
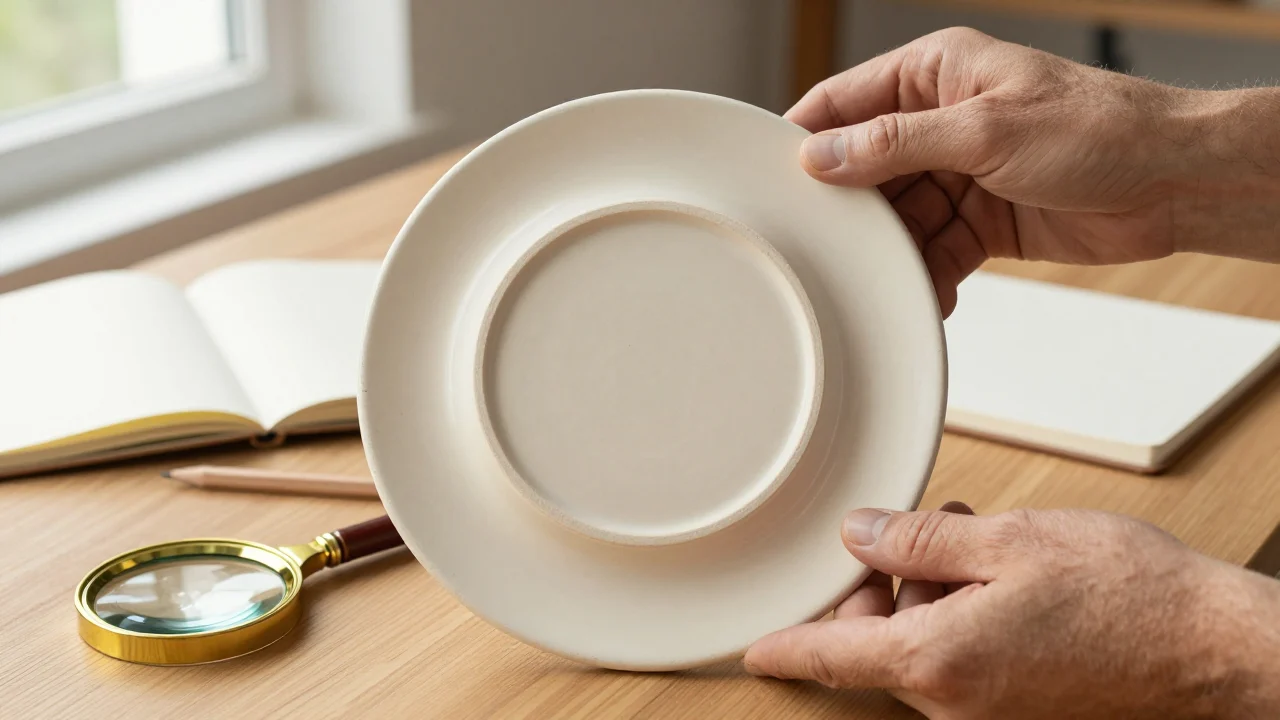
An antique is generally an object more than 100 years old; you identify one by checking materials, construction, marks and wear against documented examples.
What is classed as an antique?
An object is classed as an antique when it is more than 100 years old; that is the line written into customs and tax law and the one dealers and auction houses work to. British tax guidance states it directly: “The legal definition of an antique is an item, other than a work of art or a collectors’ item, which is over one hundred years old” (HMRC, VAT Notice 718). The United States customs regulation on antiques works to the same century: its test for an antique made with protected animal materials is that “The article is not less than 100 years of age” (19 CFR 10.53). As this guide is updated in 2026, the line falls at roughly 1926, so a piece made before the mid-1920s qualifies and a piece from the 1930s does not yet, however old it looks.
The 100-year rule describes age, not quality or price. Plenty of objects that clear it were mass-produced and survive in quantity, while some younger pieces are rarer and more sought after than genuinely antique ones. Objects that miss the line by a few decades are usually called vintage, and “retro” describes a style rather than an age; our antique vs vintage vs retro cutoffs work through the production years for each term. Once you know a piece is old, the separate question of whether it is worth anything is covered in our 15 expert tips for spotting valuable pieces.
When the production date is unknown, which is the normal situation, identification rests on physical evidence: what the object is made of, how it was put together, what marks it carries, how it has worn, and how closely it matches documented examples. The five steps below take those in order, and the museum records further down show what each kind of evidence looks like on a real object.
Step 1: Examine the materials
Start with what the object is made of, because materials rule things out faster than they rule anything in. Solid timber shows continuous grain that runs through edges and onto unfinished secondary surfaces such as drawer bottoms and backboards; veneer over a core shows a grain that stops at the edge. Hand-blown glass tends to carry a rough or ground pontil scar under the base, tiny seed bubbles and a slight asymmetry, whereas pressed glass shows mould seams and a crisp, repeated pattern. Ceramics divide into earthenware, stoneware and porcelain, each with a different weight, translucency and ring, and the metals a beginner meets most often are brass, bronze, cast iron, pewter and silver, the last of which is usually marked; our beginner’s guide to identifying antique silver covers how to tell solid silver from plate.
Some materials point to later production. Injection-moulded plastic, chipboard or MDF, foam upholstery and machine-uniform surfaces belong to the twentieth century or later, and modern screws or staples in an undisturbed joint say the same. Early plastics such as celluloid and Bakelite do turn up on genuinely old pieces, so a plastic handle or knob alone settles nothing, and old material can be reused in a new object just as new parts are fitted to old ones.
Treat the material as one witness among several. If you cannot tell whether a component is original or a later replacement, record the identification as inconclusive rather than confirmed, and move to the construction.
Step 2: Look at construction and tool marks
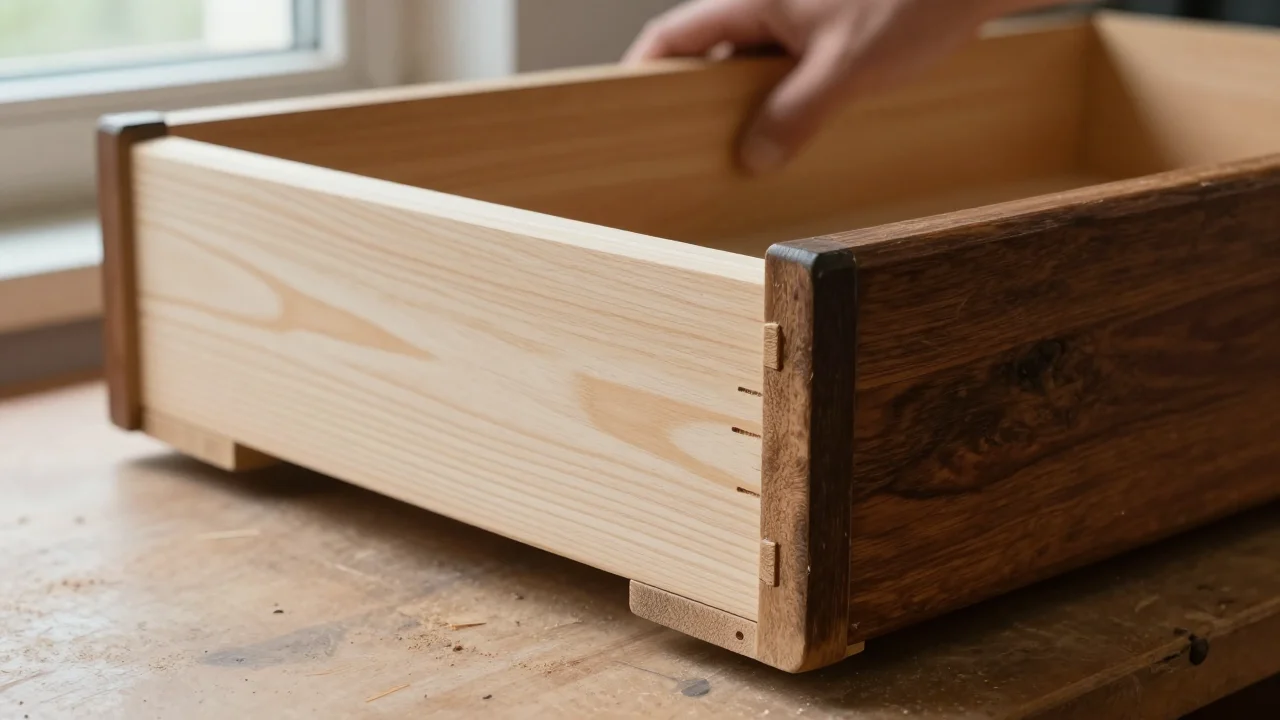
Construction shows how an object was made, and how it was made narrows when. Turn furniture over and pull the drawers out: hand-cut dovetails are slightly uneven, with a scribe line where the maker marked out the pins, while machine-cut ones are identical and evenly spaced; irregular, slightly curved saw marks on hidden surfaces come from a hand or early mill saw; seat rails and spindles shaped with a draw-knife show faceting rather than a perfectly round section; and a solid top that was once round becomes slightly oval as the wood shrinks across the grain over decades. Our guides to dating furniture by its nails, screws and hinges and to dovetail joints versus nails on 1800s dressers show these details with examples.
Fasteners give some of the firmest not-before dates a beginner can use. The cross-recess screw was devised by Henry F Phillips, whose United States patent for it was granted on 7 July 1936 (US patent 2,046,343), so a Phillips-head screw in an undisturbed joint means that joint was made or repaired after that date; slotted screws, cut nails and wooden pegs are consistent with earlier work but were also used long afterwards. Staples and wire nails in original positions point the same way as the Phillips screw. On glass, mould seams running up the body and over the rim mean the piece was pressed or mould-blown rather than free-blown; on ceramics, a printed pattern that repeats exactly is a transfer print, and a foot ring with small unglazed stilt marks was fired standing on supports. The table sets out what each clue can and cannot carry.
| Clue | What it suggests | What it does not prove |
|---|---|---|
| Uneven, scribed dovetails | Hand-cut joinery, usually before machine production | An exact date; reproduction furniture is still hand-cut |
| Phillips-head screw in an original hole | The joint was made or repaired after the 1936 patent | That the whole piece is later; screws are replaced |
| Draw-knife facets and turned members | Workshop or country production by hand and lathe | Age on its own; the same methods are used today |
| Pontil scar and seed bubbles in glass | Free-blown glass | Antiquity; studio glass is still blown by hand |
| Mould seams on glass | Pressed or mould-blown, factory production | Modern manufacture; pressed glass has a long history |
| Transfer-printed pattern on pottery | Factory decoration rather than hand painting | That the piece is common or recent; some prints are early and scarce |
| Shrinkage, oval tops, gaps at joints | Decades of seasonal movement in solid wood | Which decades; kiln-dried timber can also move |
These clues are cumulative. One of them suggests a period; several pointing the same way, with nothing contradicting them, make a case. A single modern fastener in an otherwise consistent piece is more likely a repair than proof of a fake, and the way to tell is to look at whether the hole and the surface around it were disturbed.
Step 3: Check marks, stamps and signatures
A mark is the fastest route to a maker, a country and a date, and it is also the easiest part of any object to fake. Look on the base of ceramics and glass, on the back of a spoon or fork handle, on the underside and backboards of furniture, on the sides and edges of chair seats, inside lids, on clock movements rather than only on dials, and on the reverse of paintings and frames. Photograph what you find in raking light before you try to read it.
British silver is the clearest example of a mark that can be read precisely. A hallmark, in the London Assay Office’s definition, “is a set of component marks applied to articles of the precious metals gold, silver, platinum or palladium”, and the date letter that collectors rely on is described there as “A non-compulsory mark, the date letter changes annually on January 1st” (Assay Office London, what is a hallmark). Read together, the town mark, standard mark, date letter and maker’s mark place a piece to a city, a year and a workshop; our British silver hallmark chart gives the cycles, and our note on what EPNS means on silver explains the plated marks that imitate them. Registered designs are the other precisely datable mark on British ceramics, glass and metalwork: The National Archives explains that “The fact that a design has a diamond mark at all tells you that it dates from between 1842 and 1883” (registered designs 1839–1991), and later pieces carry a registered number, “Rd No”, instead, as the celery vase in the examples below does. Both give the date the design was registered, which is a not-before date for the object, not the day it left the factory.
Most marks are less obliging. Factory backstamps changed over time and were copied, painted marks were added to unmarked pieces, and famous names were borrowed by competitors, so a mark has to be matched to a documented reference before it means anything. Our guide to antique marks and signatures and the beginner’s guide to European pottery marks cover the main categories. If a mark cannot be matched, its meaning stays uncertain, and a mark never confirms age or value by itself: it narrows the search, and the rest of the object has to agree with it.
Step 4: Read wear and patina carefully
Genuine wear sits where hands, feet, floors and cloths actually touched the object over a long time, and nowhere else. On a chair the front stretcher is worn on top where feet rested, the arms are smooth and darker where palms sat, and the back legs are scuffed low down; drawer runners are grooved along their length; a table edge is softened where sleeves crossed it; the high points of chased or engraved silver are rubbed while the recesses keep their detail; and the base of a glass or a plate carries a haze of fine scratches running in every direction from years of being set down and turned. Colour follows the same logic: wood darkens where light reached it and stays paler under a lamp base or inside a closed cupboard, and brass and copper dull where they were not handled.
Artificial ageing gets the pattern wrong. Distressing that is evenly spread, wear on surfaces that were never touched in use, dents on protected inside faces, scratches that all run the same way, bright new wood showing through a darkened surface, and a dark stain that pools in carving instead of building up gradually, all suggest a surface made to look old. Our guide to telling new wood from century-old patina shows the difference on furniture in detail.
Scratches, chips and discoloration on their own do not prove anything. Wear only supports an identification when it is consistent with how that kind of object was actually used, and a piece can be old and heavily restored, or new and convincingly distressed. When the wear looks decorative rather than functional, treat the piece as unverified and look harder at the construction and marks.
Step 5: Compare with documented examples
The most reliable check a beginner can make is to set the object beside dated examples in museum and auction records. Large museums publish their collection databases online with a photograph, a date or date range, the materials and techniques, the marks, and often the reasoning behind an attribution; the Victoria and Albert Museum records used in the next section are examples, and its database, like The Metropolitan Museum of Art’s, can be searched free by object type, material and maker. Auction archives add realised prices, which are different from asking prices, and specialist dealers’ catalogues add close photographs of construction and marks.
Search for the object type and material first, then narrow by any feature you can see, such as a pattern name, a mark or a construction detail, and read the marks and description fields rather than only looking at the photograph. Compare proportions, the placement and form of any mark, the secondary surfaces and the wear, not just the front view. Our guide to online valuation tools and collection databases lists the main free and paid archives and what each is good for, and our explanation of how appraisers determine antique value shows how professionals use the same records.
A close resemblance means your object belongs to the same family as the documented one; it does not make it the same age, because reproductions are made by copying exactly these museum pieces. The strongest result of a comparison is a date range and a maker or region to test against the material, construction, marks and wear you have already recorded.
Real examples from museum records
The examples below are documented objects in public collections, linked to their records, chosen because each shows one kind of evidence doing its work. We have not handled any of them; the observations and dates are the museums’ own, and the lesson drawn from each is ours.
A stamped Windsor armchair, 1830–1850
The Victoria and Albert Museum’s Windsor armchair by Thomas Simpson is made, in the museum’s words, of “Yew, beech, ash and elm, turned, shaped with a draw-knife, turned and carved”, and it carries the maker’s mark “T. SIMPSON BOSTON”; the record notes that Simpson “stamped his name on the side of the seat” and worked in Boston, Lincolnshire, from about 1819 to 1860. Three lessons follow for a beginner. Mixed timbers are normal in country furniture, not a sign of a marriage of parts; the mark is on the seat edge rather than underneath, which is why every surface has to be checked; and even with a named maker the museum gives a twenty-year date range, because the stamp identifies a workshop that traded for four decades, not a year. The chair is comfortably more than 100 years old and so an antique by any definition, and it is the kind of object a beginner can realistically meet.
A hallmarked silver teaspoon, London 1830–31
The V&A’s fiddle, thread and shell pattern teaspoon is “Marked on the back of the handle with London hallmark, duty sterling, date letter for 1830-31, maker’s mark of Jonathan Hayne”. Here the mark does what a mark can do at its best: city, standard, year and maker in one strike. The same record makes the opposite point about style, noting that the fiddle shape with shell and thread pattern “dates from about 1810 and became very popular. It is still produced today.” A spoon of this pattern could have been made in 1830 or last year, and only the hallmark, not the shape, tells you which; that is why reading marks comes before judging style.
A transfer-printed Jubilee plate, 1887
The V&A’s octagonal Jubilee plate by Wallis Gimson & Co. is lead-glazed earthenware, transfer-printed with Queen Victoria and Prince Albert, and its description records “Registration number 63164”; the record lists the design registered in 1886 and the plate made in 1887. It is a commemorative souvenir of a kind produced in enormous quantities, and it is now well past the 100-year line, so it is at once a genuine antique and a common object. Two things for a beginner to notice: a registered number dates the design, and the museum still dates the object itself from the event it was made for, and “antique” and “rare” are separate questions.
A pressed-glass celery vase, 1888–1900
The V&A’s Sowerby celery vase is press-moulded glass marked “Rd No 113660”, which the record ties to a registration date of 13 November 1888, together with the factory’s moulded peacock-head trademark. The museum nonetheless dates the vase to 1888–1900, because a registered number is a not-before date and the mould stayed in use. Mould seams and a moulded trademark are not flaws here; they identify the technique and the maker, and they are exactly what to look for on pressed tableware of this period.
An unmarked carved armchair, London, about 1755–1765
The V&A’s carved mahogany armchair attributed to Vile and Cobb carries no maker’s mark, and its record shows what happens next. The chairs were “formerly attributed to William Hallett, on the strength of the payments to him in the accounts of the 4th Earl of Shaftesbury”, but the museum now notes that they “are unlikely to date from before 1755 at the very earliest” and that William Vile, Hallett’s former principal journeyman, “is quite likely to have retained the custom of Lord Shaftesbury”. This is what identification without a mark honestly looks like, even for a national museum: a ten-year date range, a maker proposed from documents and style, and an attribution that was revised when the dates were checked. A beginner facing an unmarked chair should expect to land in the same place, with a period and a region rather than a certain name.
| Object and record date | Evidence that identifies it | What that evidence does not settle |
|---|---|---|
| Windsor armchair, 1830–1850 | Maker’s stamp on the seat side; draw-knife and lathe work | The year of manufacture within the maker’s working life |
| Silver teaspoon, 1830–31 | London hallmark with date letter and maker’s mark | Anything from the pattern, which is still made |
| Jubilee plate, 1887 | Transfer print, registration number, dated event | Rarity; it is antique and common at the same time |
| Celery vase, 1888–1900 | Registered number and moulded factory trademark | The exact year; registration is a not-before date |
| Carved armchair, 1755–1765 | Household accounts, style and the makers’ working dates | The maker, which remains an attribution |
Common beginner mistakes
The commonest beginner mistake is treating age and value as the same thing, when the Jubilee plate above shows they are not. The others are nearly as familiar. Relying on a single clue, usually a mark, when marks are the most copied feature of any object; accepting an asking price seen online as evidence of what a piece is worth, when only a realised sale is; missing repairs, replaced parts and “married” pieces assembled from two objects, which is why the underside and the joints matter more than the front; assuming that hand-made means old, when studio potters, glassblowers and cabinetmakers still work by hand; and cleaning, polishing or refinishing a piece before it has been identified, which removes the very wear and surface that would have helped, a point our guide to restoring versus preserving antique furniture makes at length.
The habit that avoids all of these is to write down what you can see before you decide what it means. Material, construction, marks, wear and the closest documented match, each recorded separately, will either agree or they will not, and when they do not agree the honest conclusion is “uncertain” rather than the most flattering option.
What to do with your object now
Take these three steps with the object in front of you, in order, and stop when the evidence stops.
- Record it. Photograph the whole object in daylight, then the underside or back, every mark, every joint or seam and the worn areas, and measure it. If you want a quick first suggestion of what it is and roughly when it was made, the Antique Identifier - Antiqly app, which this site publishes, is free to download with in-app purchases on iPhone and iPad and on Android, needs no sign-up, and returns candidate names and periods to check against the steps above; it does not authenticate anything.
- Match the marks and the type. Look up any mark in our marks and signatures guide, then search a museum collection database for the object type, material and any pattern or feature you found, and note the date range and maker of the closest documented match.
- Decide what the evidence supports. If the material, construction, marks and wear agree with a documented example more than 100 years old, you can reasonably call the piece an antique and describe it as that period and type; if you intend to sell or insure it, get a written appraisal, for which the American Society of Appraisers’ directory, which “has thousands of designated appraisal professionals throughout the world” (ASA, Find an Appraiser), is one place to start. If the clues disagree, record the object as unidentified with the evidence attached, which is a better position than a confident wrong answer.
Method and limits. This guide is a synthesis of the legal definitions of an antique in British tax and United States customs rules, published object records from the Victoria and Albert Museum, and standard trade practice. No object was examined, tested or appraised for this article; every observation about the example pieces is quoted from the linked museum record, and no values are given because none could be tied to a documented sale. The Antiqly app named in step 1 is published by this site.
