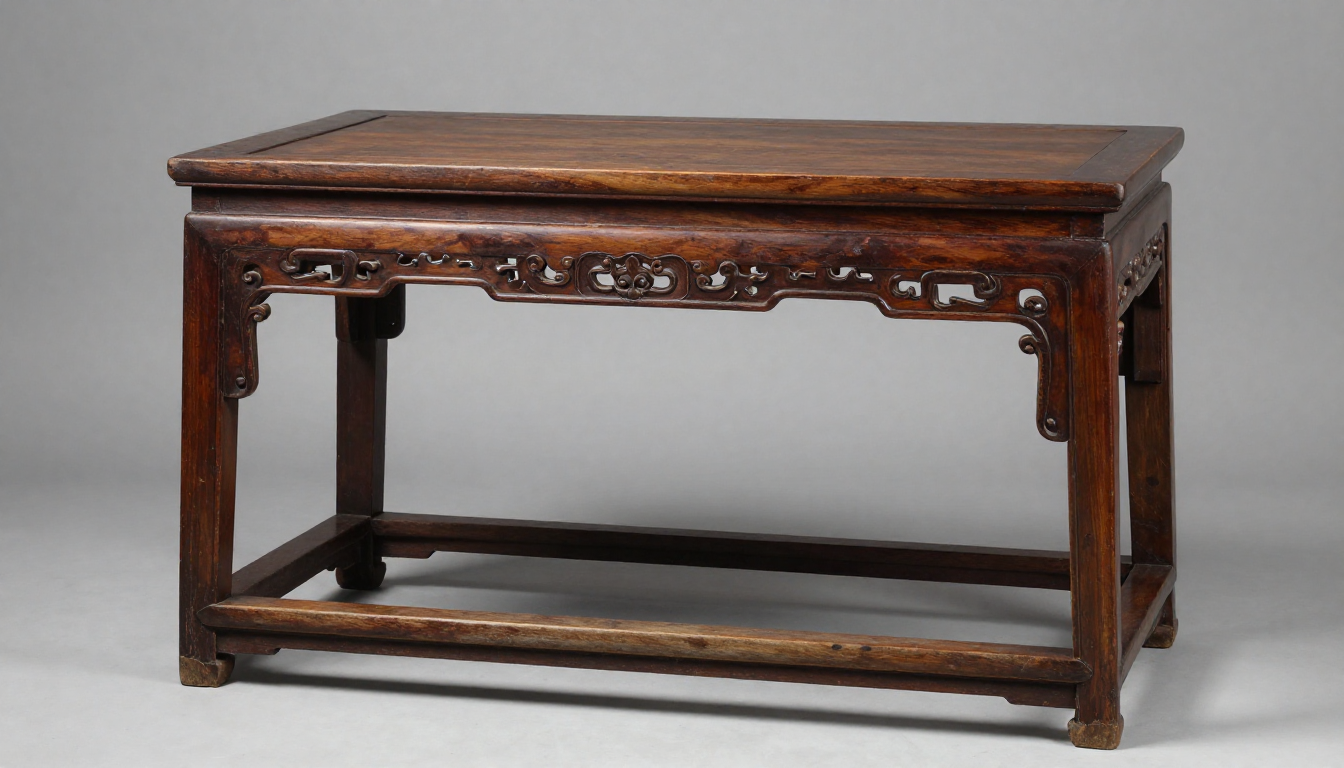
Authentic Ming Dynasty furniture (1368–1644) is characterized by its clean, unadorned lines, precision mortise-tenon joinery without nails, and the use of dense hardwoods like huanghuali and zitan. Genuine pieces exhibit natural patina, hand-carved details, and a seamless flow of wood grain that modern reproductions cannot easily replicate.
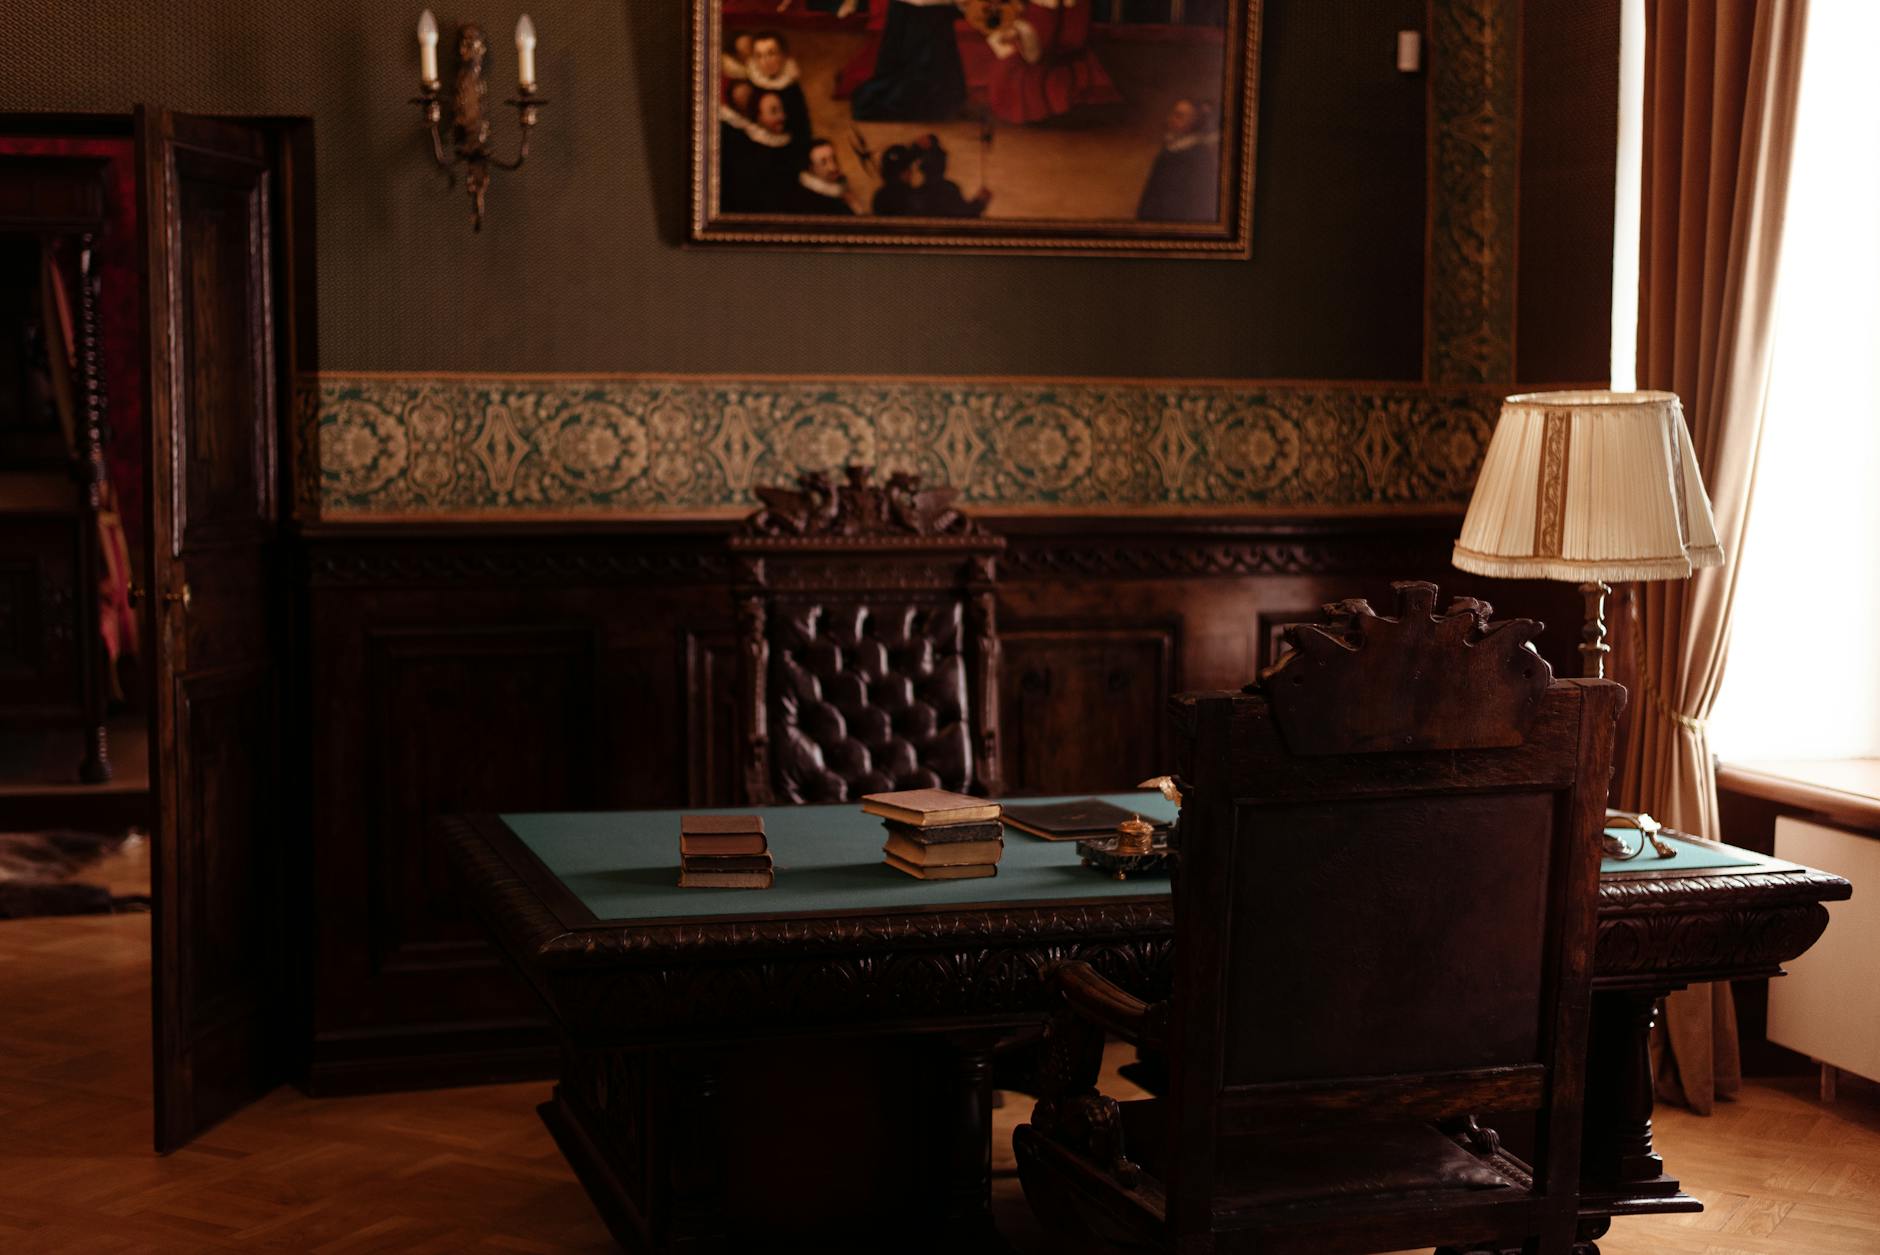
Imagine you are at a dusty estate sale in coastal Maine. Tucked in the corner of a dimly lit parlor sits a remarkably simple, elegant rosewood chair. Your heart races. Could this unassuming piece be a hidden treasure from 16th-century China, or is it a clever 19th-century reproduction?
How can I tell if my Ming Dynasty furniture is real?
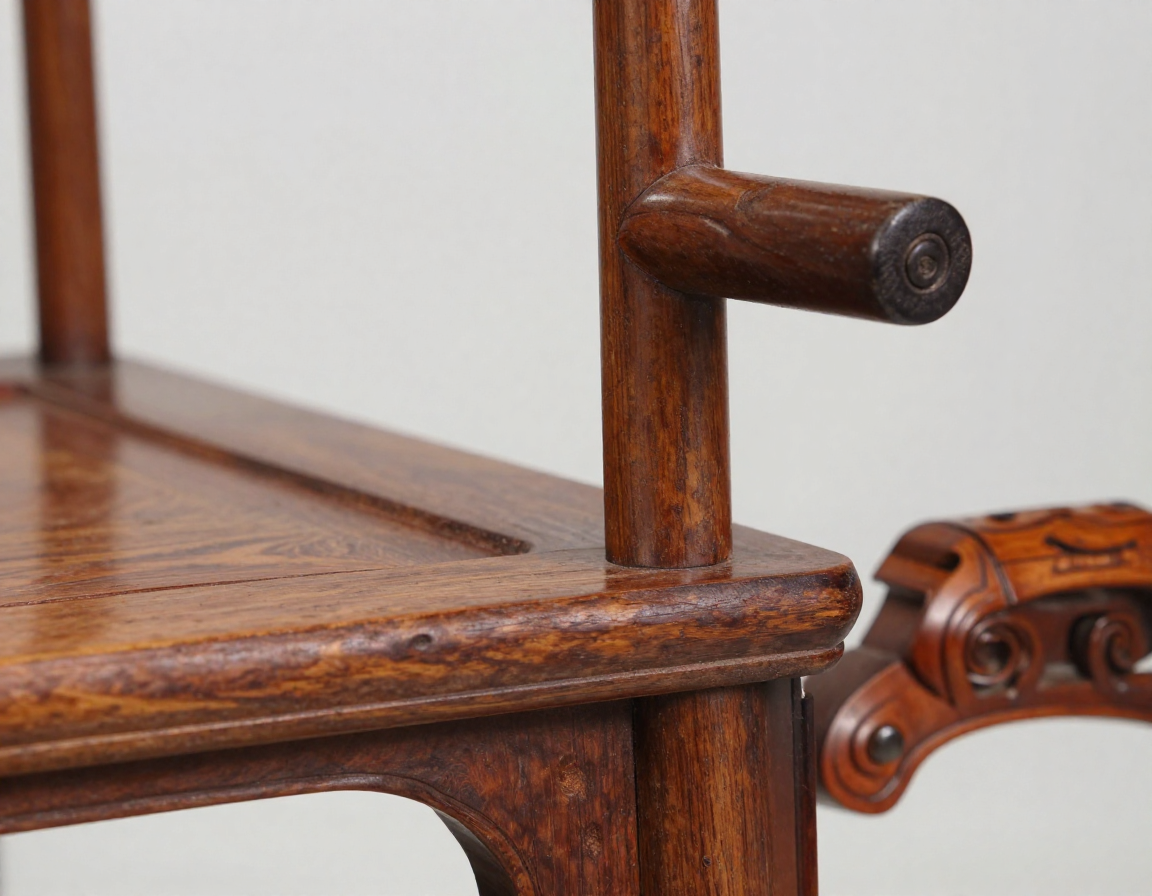
The hallmark of true Ming era craftsmanship is its structural integrity. Artisans relied on complex mortise-tenon joints, locking pieces together seamlessly. You will never find original metal brackets or nails in authentic 15th-century pieces.
Close-up macro shot of a complex, interlocking mortise-and-tenon joint on a huanghuali wood chair, showing the lack of nails and the seamless wood connection.
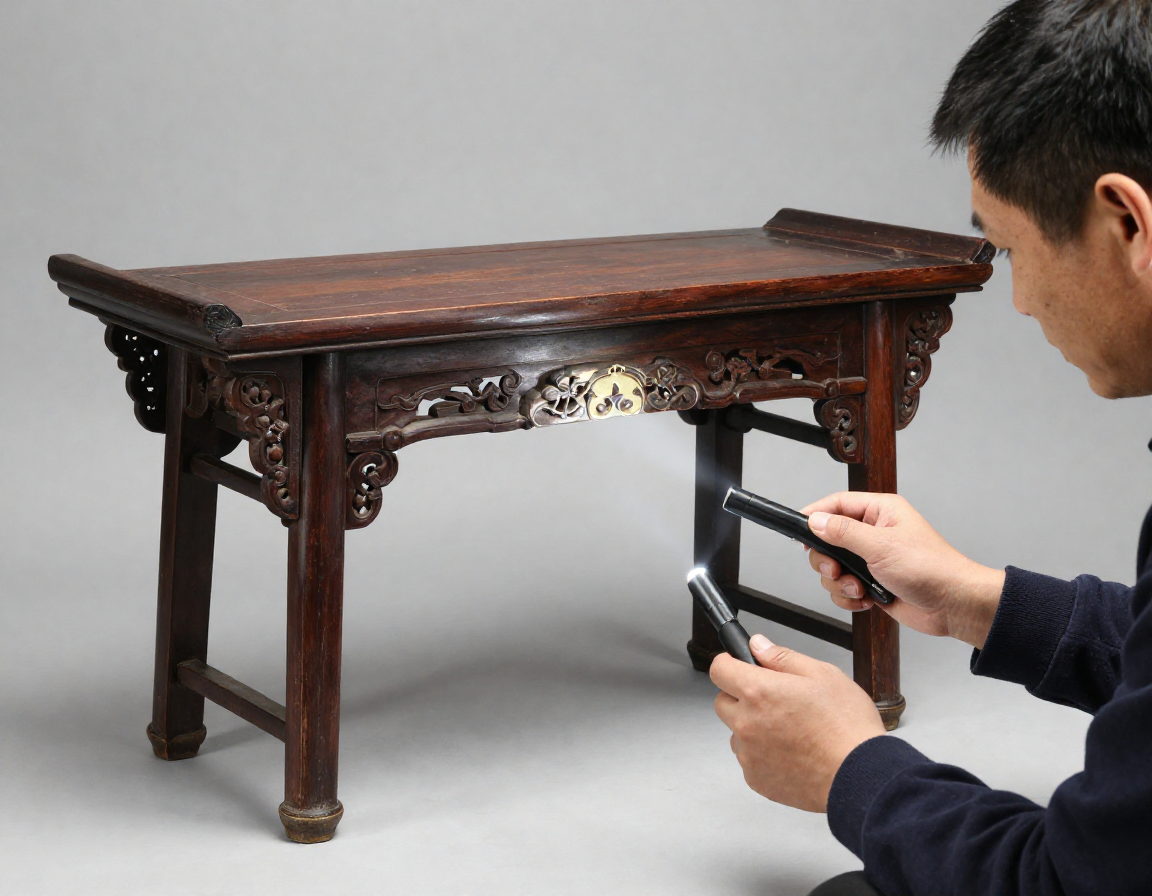
When examining a piece, always check the underside. A genuine antique will show signs of hand-tooling and natural oxidation. If the underside looks too clean or uniformly stained, it’s a major red flag for forgery detection.
Identifying these marks manually can take hours. Using the Antique Identifier app, you can simply take a photo and get an instant result.
What is the fair market value of Ming period wood types?
The value of Ming furniture is inextricably linked to the wood. Huanghuali (yellow flowering pear) and Zitan (a dense, purplish-black sandalwood) command the highest auction estimates.
Side-by-side comparison photo showing the glowing, golden-brown grain of huanghuali wood next to the dark, almost black, dense texture of zitan wood.
In the current collector market, a verified huanghuali horseshoe-back armchair can easily exceed a fair market value of $250,000. Less expensive woods, like jumu (southern elm), were used for provincial pieces but still hold significant value if the provenance is solid.
Always secure a professional appraisal or condition report before taking a piece to an auction house, as even minor restoration can heavily impact the final hammer price.
Pro Tips for Evaluating Wood:
Look for a translucent, glowing surface (patina) rather than a flat, modern finish.
Check for natural wear patterns on the footrests and armrests.
Smell the wood if possible; huanghuali* has a faint, sweet, spicy scent when gently rubbed.
Where are the secret markings located on Ming decorative arts?
Unlike European furniture, Ming pieces rarely carry a maker’s mark. Instead, the “signature” is in the proportions and the hardware.
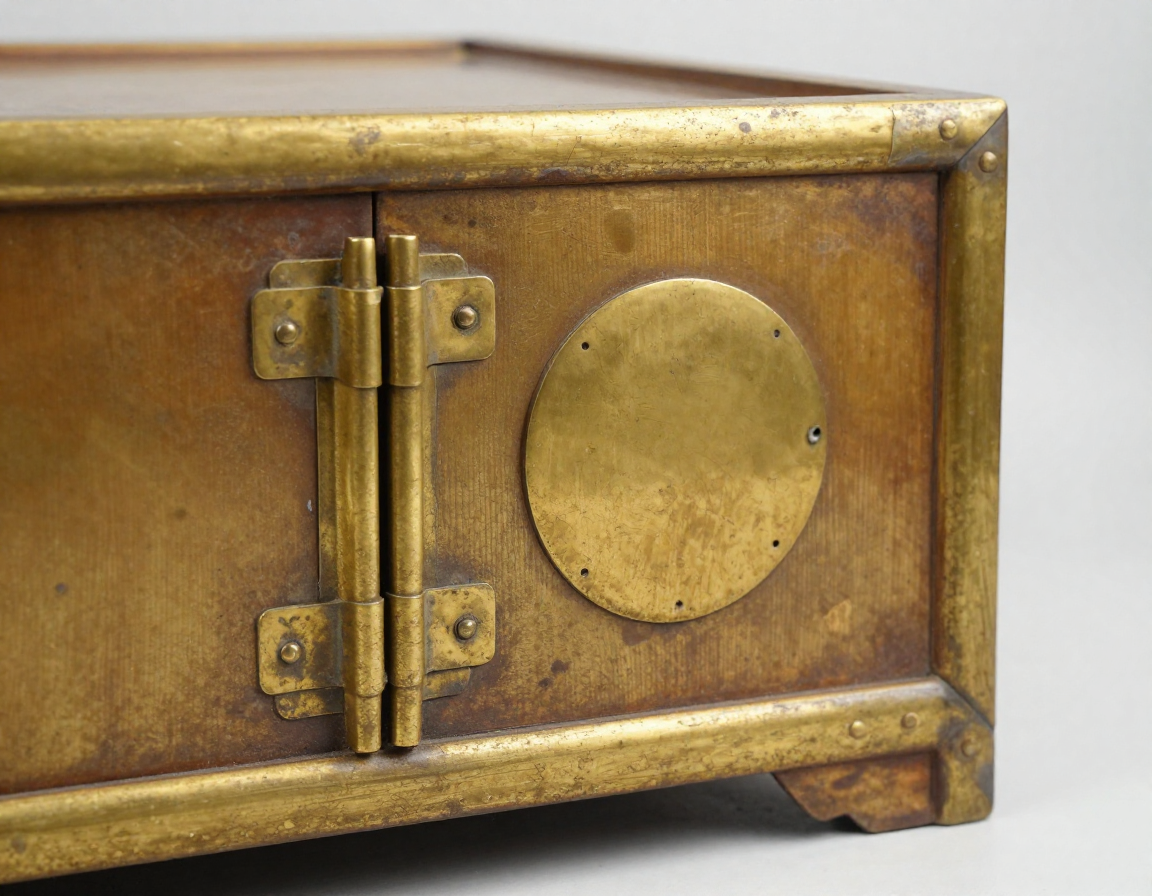
Detailed image of paktong (white brass) metal hinges and a circular lock plate on a Ming dynasty tapered cabinet, showing the natural tarnish and soft edges.
Look at the metal fittings, usually made of paktong (a white brass alloy). Authentic hardware will be flush with the wood and show centuries of gentle wear. If you are interested in how metalwork ages, this technique is similar to what we cover in our guide on The Secret Language of Furniture Hardware: Dating Knobs and Pulls.
Beware of modern veneer or inlay applied over cheaper woods to mimic zitan. True Ming furniture is crafted from solid timber. Finding thin layers of wood glued to a core is a quick way to spot a fake during authentication.
How does conservation affect the replacement value?
Over the centuries, many pieces have undergone repairs. Proper conservation stabilizes the piece without erasing its history.
An antique dealer carefully examining the underside of a Ming altar table with a UV light to check for modern glue and recent restorations.
If a piece has clumsy modern glue, replaced dovetail joints, or a heavy coat of polyurethane, its value plummets. An antique dealer will heavily discount items that have been stripped and refinished.
When establishing an accurate replacement value for insurance, appraisers look for original surface patina. The goal is correct attribution to the proper century and region, ensuring you are preserving a true piece of history rather than a heavily altered remnant.
Navigating the world of Ming Dynasty furniture requires a sharp eye for detail, an understanding of rare hardwoods, and a healthy dose of skepticism. By focusing on joinery, wood density, and natural wear, you can confidently build a collection of authentic Asian antiquities. Remember, when in doubt, leverage modern technology to assist in your identification journey.
Antique furniture maker’s marks are typically located in hidden areas such as the inside of drawers, the back panel of a case piece, or the underside of a chair seat. These marks—which can be paper labels, branded stamps, or metal tags—provide crucial attribution data, revealing the manufacturer, the city of origin, and often the production year, directly impacting fair market value.
*
Imagine you are at a crowded estate sale in Pennsylvania. You spot a dusty chest of drawers in the corner. It looks old, but is it a valuable 19th-century piece or a clever reproduction? You pull out a drawer, flip it over, and see a faint, branded stamp. That smudge of ink is the difference between a $200 thrift find and a $5,000 investment. Finding the mark is the thrill of the hunt.
Where Should I Check for Hidden Marks on Antique Furniture?
Locating a signature on a painting is easy; finding one on a highboy or credenza requires detective work. Makers didn’t want their branding to distract from the aesthetic, so they hid it.
For case goods (dressers, chests, desks), always remove the drawers completely. Look on the interior side rails and the drawer bottom (both inside and underside). Manufacturers often glued paper labels here where they wouldn’t be rubbed away.
A close-up photo showing a drawer removed from an antique dresser, flipped over to reveal a paper manufacturer’s label adhered to the unfinished wood of the underside.
For chairs and tables, get underneath them. Flip the chair over and inspect the seat frame or the central support beam. You might find a metal tag or a branded heat stamp.
Don’t ignore the hardware. Some makers, like Stickley or Knoll, occasionally stamped their names into the metal of the hinges or locks.
How Do I Decipher Different Types of Maker’s Marks?
Not all marks are created equal. The type of mark often dates the piece before you even read the text.
Paper Labels: Common in the late 19th and early 20th centuries. These are fragile. If you find one that is peeling, do not try to glue it back yourself; this is a job for conservation, not DIY repair. A pristine paper label adds significant provenance to the item.
Branded or Stamped Marks: These are burned or pressed into the wood. A branded mark usually indicates a piece from the Arts and Crafts movement (like Gustav Stickley) or mid-century modern furniture. These are permanent and highly desirable for authentication.
Macro shot of a ‘burned-in’ or heat-stamped logo on oak wood, showing the depth of the impression, characteristic of Arts and Crafts furniture.
Metal Tags: Often found on metal office furniture or industrial pieces from the 1920s-50s.
Identifying these marks manually can take hours of flipping through reference books. Using the Antique Identifier app, you can simply take a photo of the mark or the entire piece and get an instant result. It’s like having a 20-year appraisal expert in your pocket.
Does a Missing Mark Mean It’s a Fake?
This is the most common question I get at the auction house. The answer is: absolutely not.
Many authentic pieces were never marked, or their paper labels have disintegrated over the last 150 years. In these cases, we rely on attribution through construction details.
Look for hand-carved elements versus machine-cut designs. Check the joinery. Hand-cut dovetail joints on a drawer usually indicate a piece made before 1890. Irregular, large dovetails suggest an 18th-century origin.
Side-by-side comparison of hand-cut dovetail joints (irregular shapes) vs. machine-cut dovetail joints (perfectly uniform), highlighting the end grain.
If a seller claims a piece is a “signed original” but the mark looks brand new or is placed in an odd location (like right on the top surface), be wary. This is a red flag for forgery detection. Real wear patterns should be consistent across the entire piece.
How Does a Maker’s Mark Affect Value?
A legible mark is the gold standard for establishing replacement value. It moves a piece from “style of Chippendale” to “authentic Chippendale manufactured by [Specific Workshop].”
However, condition still reigns supreme. A marked piece with severe water damage or a poorly executed restoration (like stripping the original finish) will struggle to reach its full auction estimate.
Conversely, a “shop mark” from a prestigious retailer (like Marshall Field’s or Gimbel Brothers) can also add value, even if they didn’t manufacture the piece themselves, as it establishes a timeline and retail history.
This ties closely into understanding the era of production, which helps confirm if the materials used—like veneer thickness or inlay complexity—match the brand’s standards for that period.
A photo of a vintage ‘shop mark’ or retailer metal tag screwed into the inside of a cabinet door, showing patina and age.
Finding the maker’s mark is just the first step in the journey of antique identification. It validates your find and provides a starting point for determining value. Whether you are browsing a local thrift store or bidding online, knowing where to look gives you a distinct advantage over the casual buyer. Remember to check under the seat, behind the chest, and inside the drawer—treasure is often hiding in plain sight.
The key difference lies in the silhouette and timber. French Provincial furniture features graceful curves, distinct cabriole legs, and softer local woods like fruitwood or walnut, reflecting a rural adaptation of ornate Parisian court styles. In contrast, English Colonial (often called Early American) emphasizes strict utility with rigid, straight lines, sturdy mortise-tenon joinery, and practical woods like oak, maple, and pine.
Imagine you are at a dusty estate sale in rural Virginia, fighting the humidity and the early morning crowd. You spot a beautiful, worn wooden commode in the corner, covered in old quilts.
Is it a valuable piece of American Colonial history brought over by settlers, or is it a charming, high-value French Provincial piece brought back after a war?
Knowing the difference isn’t just about history—it completely changes the fair market value. In my 20 years of writing appraisals, I’ve seen collectors walk past treasures because they mistook a rough-hewn masterpiece for a reproduction.
Let’s break down exactly how to tell them apart.
What defines the French Provincial style?
French Provincial furniture (or Mobilier Rustique) was the countryside’s answer to the lavish furniture of Paris during the 18th century. It is simpler, but it retains a sense of elegance.
Look for the “S” curve. Even on simple farmhouse tables, you will often find a slight curve in the legs or the apron (the wood strip under the tabletop).
Hand-carved ornamentation is common but restrained. Instead of gold leaf, you might see simple scallop shells or wheat motifs carved directly into the solid wood.
Close-up photo of a French Provincial commode leg showing the distinct ‘S’ curve of a cabriole leg and a simple hand-carved scallop shell motif on the apron
The wood choice is a major clue. French makers used what was growing nearby.
If the piece is made of apple, cherry, or pear wood (fruitwoods) and has a warm, honey-colored patina, lean towards French Provincial. These woods polish up beautifully and have a finer grain than oak.
How can I identify genuine English Colonial furniture?
English Colonial furniture, specifically the styles seen in early America (like William and Mary or Pilgrim furniture), is built for survival and function.
The aesthetic is rectangular. If you can draw a box around the main shape of the chair or chest, it’s likely Colonial.
The legs are often turned on a lathe (rounded with rings) or strictly square. You won’t find the flowing cabriole leg here until much later periods.
Photo of an English Colonial oak blanket chest with straight sides, simple iron hinges, and flat bracket feet, demonstrating sturdy, blocky construction
Materials were strictly utilitarian. Early colonists used oak for framing because it is rot-resistant, and pine for panels because it is easy to cut.
If you see a mix of woods—like a maple base with a pine top—that is a strong indicator of American Colonial origin. This was often done to save the harder woods for the structural parts that took the most abuse.
Identifying these marks manually can take hours. Using the Antique Identifier app, you can simply take a photo and get an instant result.
What construction techniques reveal the age?
Flip the piece over or pull out a drawer. This is where the condition report gets interesting.
English Colonial joinery is legendary for its toughness. Look for large, protruding dovetail joints on drawer sides or pinned mortise-tenon joints on chair legs. These joints were meant to hold up without glue.
In French Provincial pieces, the joinery is often more refined and hidden. You might see veneer work on drawer fronts, arranged in geometric patterns (parquetry), even on rural pieces.
Side-by-side comparison photo of an open drawer: one showing large, primitive hand-cut dovetails (Colonial) and the other showing finer, hidden joinery (French)
Hardware is another dead giveaway.
French pieces often have ornate iron or brass pulls that sit on top of the wood. Colonial pieces usually use simple wooden knobs or hammered iron latches. This functional simplicity is similar to what we cover in our guide on The Secret Language of Furniture Hardware: Dating Knobs and Pulls.
How does condition affect the appraisal value?
When I determine an auction estimate or replacement value, I look for provenance and originality.
For French Provincial, a “country polish” is desirable. This is the buildup of wax and dirt over 200 years. If it has been stripped and varnished with modern polyurethane, the value drops significantly.
For English Colonial, we look for “dryness” on the underside. The raw wood shouldn’t look new.
Forgery detection is crucial here. Be wary of “antique” Colonial tables where the foot wear is perfectly even. A real 300-year-old table will have uneven wear where people actually sat.
Detailed shot of the underside of an antique table showing dark, oxidized ‘dry’ wood and uneven wear on the bottom of the feet
Beware of heavy restoration. A repaired leg on a sturdy Colonial chair is acceptable, but heavy conservation work on a French veneer piece can make it fragile and hard to sell.
Always check for inlay consistency. If a French table has elaborate inlay but the legs are crude blocks, it is likely a “marriage”—parts of two different pieces put together.
Whether you prefer the rustic romance of France or the stoic history of the Colonies, authentication is key.
Don’t let a good piece slip away because you weren’t sure about the leg style. Use your eyes, feel the weight of the wood, and when in doubt, snap a picture.
Antique furniture hardware can be dated by examining the casting style, the post mechanism, and the metal composition. William and Mary era (1690–1720) pieces utilize teardrop pulls secured by cotter pins. Chippendale hardware (1750–1790) features large, cast brass “batwing” plates with bail handles. If the back of the post is rough and hand-filed with no threading, the piece likely predates 1800.
*
Imagine you are at a dusty estate sale in rural Pennsylvania. You spot a chest of drawers in the corner, covered in decades of grime. The seller claims it’s a “nice vintage reproduction,” but something catches your eye.
You run your thumb over the back of the brass pull inside the drawer. It’s not a modern machine screw; it’s a rough, hand-flattened wire. Your pulse quickens. You know instantly that this isn’t a 1980s copy-it’s an 18th-century original that could be worth thousands.
This is the power of understanding hardware. Knobs and pulls are the “jewelry” of antique furniture, and they often tell the true story of a piece’s provenance and age.
How can I tell if the hardware is original to the piece?
The first step in any condition report is determining if the knobs or pulls belong to the piece. Hardware was often replaced over centuries due to fashion changes or breakage.
To verify originality, open the drawer and look at the back of the drawer front.
Look for extra holes: If you see plugged holes or empty holes near the current hardware, the pulls have been changed.
Check for “Ghost Marks”: Look at the wood surface behind the plate. A true original will leave a shadow or outline in the finish and oxidation that matches the current hardware shape perfectly.
Examine the Wear: The wear on the hardware should match the wear on the wood. If the drawer front is heavily worn but the brass is pristine, be suspicious.
Close-up photo of the inside of an antique drawer front showing a “ghost mark” outline where old hardware used to sit, contrasted with a new hole.
What do different hardware styles tell me about the age?
Hardware styles evolved alongside furniture design. Recognizing the silhouette is the fastest way to get an initial attribution for the era.
William and Mary (1690–1720): Look for “teardrop” or “drop” pulls. These hang vertically from a single round backplate.
Queen Anne (1720–1750): The “willow” or “batwing” shape begins to appear, but is often simpler. The bail handle (the part you grab) usually falls against the plate.
Chippendale (1750–1790): The classic, large “batwing” or “willow” mount. These are elaborate, pierced brass plates.
Hepplewhite & Sheraton (1790–1820): A shift to stamped brass rather than cast. Look for oval or octagonal plates with designs embossed into the metal (eagles, acorns, flowers).
Empire (1820–1840): Glass knobs or heavy brass lion heads with rings.
Identifying these marks manually can take hours. Using the Antique Identifier app, you can simply take a photo and get an instant result.
A split image comparing a Chippendale “batwing” brass pull against a Federal-era stamped oval brass pull to show the stylistic difference.
How do manufacturing techniques reveal the date?
The construction of the hardware is often more telling than the style itself. This is critical for authentication and forgery detection.
Pre-1800 (Hand-Cast): Early hardware was cast in sand molds. The back of the plates will often be rough or sandy. The posts were not threaded screws. Instead, a wire loop went through the wood and was bent open (clinched) or secured with a cotter pin.
1800–1850 (Early Machine): You start seeing threaded posts, but the threads are often hand-filed and irregular. The nuts are usually round or rough squares, not the perfect hex nuts we see today.
Post-1850 (Industrial): Uniform machine-cut threads and standardized screws appear. If you see a Phillips head screw, the hardware is definitively from the 20th century or later.
This evolution in manufacturing is similar to the structural changes we discuss in our guide on Identifying Duncan Phyfe Furniture: 5 Marks of Authenticity, where the transition from hand-carved to machine-assisted work helps date the piece.
Macro shot of a pre-1800 hardware post showing the rough, hand-filed threads and a non-standardized nut compared to a modern machine screw.
Does replacing the hardware affect the antique’s value?
Yes, significantly. In the collector market, original hardware is paramount.
A piece with its original brasses commands a higher fair market value than one with replacements. If you are browsing an auction house catalog, you will often see “brasses replaced” noted in the description; this is a signal that the auction estimate might be lower.
If you possess a piece with missing pulls, aim for conservation rather than modernization. Source period-correct replacements from an antique dealer rather than buying shiny reproductions from a hardware store.
Keep in mind that high-value case pieces often feature veneer or complex inlay around the hardware. Clumsy replacements can damage these delicate surfaces, further reducing the value.
Photo of a high-value mahogany chest of drawers with obvious damage to the veneer around the keyhole, illustrating the risk of replacing hardware.
What are the red flags of fake antique hardware?
When you are at an estate sale, use these quick checks to spot a reproduction:
Artificial Aging: If the brass has a dark, uniform brown coating that looks painted on, it is likely “antiqued” modern metal. Genuine patina is uneven—darker in the crevices and lighter on the high points where fingers touch.
Seam Lines: Modern cast hardware often has a visible seam line along the side of the handle where the mold halves met. Antique hand-casting was usually filed smooth.
Too Much Uniformity: On a true antique, the left handle might be slightly different from the right handle. Hand-made items have variance. Perfect uniformity is a sign of modern mass production.
Always check the construction of the furniture itself as well. If the hardware looks 18th century, but the drawer uses machine-cut dovetail joints rather than hand-cut ones, the hardware is likely a reproduction added to a later piece.
Mastering the language of hardware takes practice, but it is one of the most reliable skills for an appraiser. By looking past the style and examining the nuts, bolts, and casting marks, you can determine if a piece is a masterpiece or a clever fake. When in doubt, let technology aid your eye.
Imagine you are at a dusty estate sale in historic Richmond, Virginia. You’ve pushed past the crowds to the back room, and there it sits—a mahogany dining table with elegant, sweeping legs and brass-capped feet.
It looks old, dignified, and expensive. But is it a genuine piece from the early 19th century worth a small fortune, or a mass-produced reproduction from the 1940s?
You run your hand along the smooth wood, knowing that correctly identifying this piece could be the difference between a $100 find and a $5,000 treasure.
Full shot of a classic mahogany Duncan Phyfe dining table featuring a pedestal base and sweeping saber legs
What Defines the Duncan Phyfe Style?
Duncan Phyfe was not just a furniture style; he was a real person. A Scottish immigrant who set up shop in New York City, he became the most famous American cabinetmaker of the Federal Period (roughly 1795–1848).
His work is known for perfect proportions and high-quality materials. He didn’t invent new shapes as much as he refined European Neoclassical styles into something distinctly American.
However, be careful. The “Duncan Phyfe style” was heavily revived and mass-produced in the 1930s and 1940s. Knowing the difference relies on inspecting the construction and the wood quality.
Identifying these marks manually can take hours. Using the Antique Identifier app, you can simply take a photo and get an instant result.
How Do I Recognize the Distinctive Legs and Feet?
The most immediate giveaway of a Phyfe piece is the leg. You are looking for the saber leg (sometimes called a sweep leg).
These legs curve outward in a graceful, concave shape, mimicking the curve of a cavalry saber.
Close-up of a furniture leg showing the concave saber curve ending in a brass animal paw foot
On genuine period pieces, these legs are often reeded—meaning they have thin, convex ridges carved along the top surface.
Look at the feet. Phyfe often used brass paw feet or simple brass caps.
Pro Tip: On a true antique, the brass will have a deep, dark patina, not a shiny, bright gold finish.
Pro Tip: If the foot is carved wood painted to look* like brass, you are likely looking at a later reproduction.
Which Decorative Motifs Should I Look For?
Phyfe was restrained with his decorations, but he had favorites. He avoided the heavy, chunky carving of the later Victorian era.
Instead, look for these specific, classical motifs carved into chair backs or table aprons:
The Lyre: A harp-like instrument, extremely common on chair backs.
Cornucopias: Horns of plenty.
Wheat Sheaves: Bundles of wheat tied together.
Thunderbolts: Tied in a bow (a nod to Roman/Greek influence).
Detail shot of a wooden chair back featuring a carved Lyre harp motif in the center
If the carving looks clumsy, shallow, or machine-routed, walk away. Genuine Phyfe carving is crisp, deep, and hand-finished.
Is the Wood High-Quality Mahogany?
Duncan Phyfe was obsessed with quality. He almost exclusively used Santo Domingo mahogany (also known as Cuban mahogany).
This wood is dense, heavy, and has a deep, rich reddish-brown color that darkens with age.
In contrast, 20th-century reproductions often used stained birch or maple to mimic the look of mahogany.
Test the Weight: Lift one end of the chair or table. Genuine Cuban mahogany is surprisingly heavy.
Check the Grain: The grain should be tight and straight.
Macro shot of antique mahogany wood grain showing the deep reddish-brown patina and tight grain structure
Where Can I Find the Maker’s Mark or Label?
Here is the frustrating reality for appraisers: Duncan Phyfe rarely signed his work.
Unlike modern manufacturers, cabinetmakers of the early 1800s didn’t brand every piece. Occasionally, you might find a paper label glued to the underside of a table or the inside of a drawer, but these have often dried up and fallen off over the last 200 years.
If you do see a brand stamped “Duncan Phyfe” into the wood, proceed with caution. This often indicates a company manufacturing in the Phyfe style during the 20th century, rather than the master himself.
Authentication often comes down to: 1. Provenance: A documented history of ownership. 2. Construction: Hand-cut dovetails and hand-threaded screws. 3. Secondary Woods: The use of ash, poplar, or pine for the hidden interior parts.
Antique furniture is identified by dating four construction details simultaneously: the leg and foot style (which pins the period within 20-30 years), the primary wood species, the type of dovetails and nails, and the original hardware. A genuine Chippendale piece (1750-1790), for example, combines mahogany, hand-cut dovetails, ball-and-claw feet, and cast brass bail pulls secured with cotter pins.
AS
Arthur Sterling
Antique Identifier Editorial · April 21, 2026
Why Do You Need an Antique Furniture Identification Chart?
Identifying antique furniture involves examining multiple elements simultaneously – the legs, the wood type, the construction methods, the hardware, and decorative details. It’s easy to get overwhelmed without a systematic approach.
An identification chart helps you:
Compare features side-by-side across different periods
Spot key identifying characteristics at a glance
Avoid common misidentifications that could cost you money
Build your knowledge through repeated reference
A classic Chippendale side chair (c. 1755-1790) showing cabriole legs and ball-and-claw feet – a benchmark for furniture identification.
For even faster identification, you can use the Antique Identifier app to snap a photo and get instant results. But having a solid foundation of knowledge always helps.
What Are the Main Antique Furniture Periods and Their Key Identifiers?
Quick Reference by Period
Period
Date Range
Leg Style
Primary Wood
Key Identifier
Jacobean
1600-1690
Bulbous turned, barley twist
Oak
Heavy, dark, geometric carving
William & Mary
1690-1730
Trumpet turned, inverted cup
Walnut
Marquetry, bun feet
Queen Anne
1700-1755
Cabriole with pad foot
Walnut/Mahogany
S-curved legs, shell carving
Chippendale
1750-1790
Cabriole with ball-and-claw
Mahogany
Pierced splats, ornate carving
Hepplewhite
1780-1800
Straight, tapered
Mahogany
Shield-back chairs, inlay
Sheraton
1785-1820
Turned, reeded
Mahogany/Satinwood
Rectangular forms, delicate
Empire
1800-1840
Columns, scrolls, paw feet
Mahogany
Bold, heavy, animal motifs
Victorian
1837-1901
Various revival styles
Walnut/Rosewood
Ornate, heavily carved
Arts & Crafts
1880-1920
Square, simple
Quarter-sawn oak
Visible joinery, honest
Art Nouveau
1890-1910
Organic curved
Various
Flowing whiplash curves
Art Deco
1920-1940
Geometric, chrome
Exotic veneers
Bold shapes, glamorous
How Do I Identify Antique Furniture by Its Legs and Feet?
The legs and feet are often the quickest way to identify a furniture period. Here’s your complete reference guide:
Turned Leg Styles
Bulbous Turning (1600-1690)
Large, melon-shaped bulges
Found on Jacobean tables and court cupboards
Usually oak
Often combined with block sections
Barley Twist / Spiral Turning (1660-1700)
Continuous spiral carved into the leg
Popular in late Jacobean and Carolean periods
Can be single or double spiral
Revival versions common in Victorian era
Trumpet Turning (1690-1730)
Shaped like an upside-down trumpet
Signature of William & Mary period
Usually walnut
Often connected by flat stretchers
Inverted Cup Turning (1690-1730)
Cup shape with widest part at top
Also William & Mary period
Frequently combined with trumpet turnings
Ball or bun feet below
Bobbin Turning (1660-1700)
Series of ball shapes stacked vertically
Common on chairs and small tables
Often called “spool turning”
Victorian revival versions exist
Cabriole Leg Variations
The cabriole leg (that distinctive S-curve) appears in several periods but with different feet:
Close-up of a hand-carved ball-and-claw foot – the signature Chippendale (1750-1790) detail that separates originals from revivals.
Period
Knee Decoration
Foot Type
Additional Features
Queen Anne (early)
Plain or shell
Pad foot
Simple, elegant curves
Queen Anne (late)
Shell carving
Trifid foot
More elaborate
Chippendale
Acanthus leaves
Ball-and-claw
Carved knees
Irish Chippendale
Lion masks
Hairy paw
Very distinctive
French Provincial
Carved flowers
Scroll foot
Lighter appearance
Straight Leg Styles
Marlborough Leg (1755-1790)
Straight, square in cross-section
Sometimes with block foot
Associated with Chippendale (straight leg variant)
Often has inside chamfer or groove
Tapered Leg (1780-1820)
Straight but narrows toward foot
Square or round cross-section
Signature of Hepplewhite style
May end in spade foot
Reeded Leg (1785-1820)
Parallel grooves carved along length
Sheraton signature element
Usually round cross-section
Often tapered as well
Saber Leg (1800-1840)
Curved outward like a sword
Empire and Regency periods
Common on chairs
Usually square cross-section
Foot Identification Chart
Foot Type
Period
Description
Bun foot
1690-1730
Flattened ball shape
Ball foot
1690-1750
Round sphere
Pad foot
1700-1755
Rounded cushion on disk
Trifid foot
1730-1760
Three-toed, Philadelphia
Slipper foot
1720-1755
Elongated pad foot
Ball-and-claw
1750-1790
Claw grasping ball
Spade foot
1780-1810
Tapered rectangle
Bracket foot
1700-1830
Right angle with curve
Ogee bracket
1750-1800
S-curved bracket
French foot
1780-1820
Outward curving bracket
Paw foot
1800-1840
Animal paw (lion, eagle)
Scroll foot
1830-1860
Curved scroll shape
For the visual companion to this leg chart, the guide on how to date an antique chair by its leg style walks through each turning and cabriole shape with reference photos from authenticated period pieces.
Not sure what period it is?
Snap a photo of the legs, dovetails or hardware and let our AI identify the period in seconds — free, no sign-up.
Which Woods Were Used in Each Antique Furniture Period?
Understanding wood types helps narrow down both the period and geographic origin of a piece.
Primary Woods by Period
Period
Primary Wood
Characteristics
Jacobean
Oak
Heavy, prominent grain, dark patina
William & Mary
Walnut
Golden brown, often as veneer
Queen Anne
Walnut → Mahogany
Transition period
Chippendale
Mahogany
Reddish-brown, fine grain
Federal
Mahogany with inlays
Satinwood, holly accents
Empire
Mahogany, often figured
Flame or crotch grain
Victorian
Walnut, Rosewood
Dark, heavily figured
Arts & Crafts
Quarter-sawn Oak
Prominent ray flake
Art Deco
Exotic veneers
Macassar, zebrawood
Secondary Woods and Geographic Origin
Secondary woods (used inside drawers, for backboards, etc.) help identify where furniture was made:
Secondary Wood
Likely Origin
White pine
New England
Yellow pine
Southern United States
Tulip poplar
Mid-Atlantic (Philadelphia, NY)
Atlantic white cedar
Coastal areas
Chestnut
Continental Europe
Oak (as secondary)
England
Deal (Scots pine)
England
Beech
France, Germany
How Do I Identify Original Hardware on Antique Furniture?
Original hardware is a strong indicator of period. Here’s how to identify it:
Drawer Pull Evolution
Period
Pull Style
Material
Attachment
1690-1720
Teardrop
Cast brass
Single post through wood
1720-1780
Bail (willow)
Cast brass
Two posts, cotter pin
1780-1810
Oval plate
Stamped brass
Bolts through oval plate
1810-1840
Round rosette
Stamped/pressed
Bolt through rosette
1840-1870
Fruit/leaf carved
Wood
Integral to drawer
1870-1900
Ornate stamped
Brass/bronze
Machine screws
1900-1920
Simple/mission
Iron, copper
Exposed screws
Original 18th-century cast brass bail pull with hand-cut cotter pin – period-correct hardware is one of the strongest authenticity indicators.
Hinge Identification
Period
Hinge Type
Notes
Pre-1700
Strap hinge
Hand-forged iron
1700-1800
H-hinge, HL-hinge
Cast or wrought
1780-1850
Butt hinge
Rectangular, visible
1850+
Concealed hinge
Hidden when closed
Lock Evolution
Early locks (pre-1800) were hand-made with irregular mechanisms. Machine-made locks with uniform parts indicate 1830s or later. If a lock looks “too perfect,” it’s probably a replacement.
For a deeper reference on drawer pulls and hinges across decades, the companion guide on the secret language of furniture hardware documents the exact shapes and attachment methods by decade.
What Construction Methods Reveal the True Age of Antique Furniture?
How a piece is built reveals as much as how it looks.
Dovetail Analysis Chart
Dovetail Type
Date Range
Characteristics
Hand-cut (early)
Pre-1700
Large, irregular, few in number
Hand-cut (refined)
1700-1890
More uniform but still irregular spacing
Machine-cut
1890+
Perfectly uniform, many small pins
Router-cut
1950+
Rounded corners, extremely uniform
Hand-cut dovetails with irregular pin spacing – a classic sign of pre-1890 construction that no machine can convincingly replicate.
How to Check:
Pull drawer out completely
Look at corners where sides meet front
Count the dovetails and observe spacing
Note whether pins and tails are uniform
Nail and Screw Identification
Fastener Type
Date Range
Identification
Hand-forged nail
Pre-1800
Square shaft, irregular head
Cut nail
1790-1900
Rectangular shaft, machine-made
Wire nail
1890+
Round shaft, circular head
Hand-made screw
Pre-1850
Off-center slot, blunt tip, irregular threads
Machine screw (early)
1850-1890
Centered slot, blunt tip
Modern screw
1890+
Pointed tip, uniform threads
Saw Mark Analysis
Look at unfinished surfaces (backboards, drawer bottoms, inside of case pieces):
Assuming heavy = old – Empire furniture is heavy but only 1800s
Trusting hardware alone – Hardware is often replaced
Ignoring secondary woods – They’re as important as primary
Confusing revivals with originals – Victorian Chippendale revival is NOT 18th century
Overlooking regional variations – American Queen Anne differs from English
What’s Included in the Free Printable PDF Guide?
We’ve condensed the most essential information into a printable PDF format that you can take with you to antique shops, estate sales, and auctions.
What’s Included:
Period timeline with key characteristics
Leg and foot identification visuals
Wood identification guide
Hardware dating chart
Construction analysis checklist
Quick-reference pocket guide
This PDF pairs perfectly with the Antique Identifier app – use the chart for preliminary identification and the app for instant AI-powered confirmation and valuation.
How Can I Tell American Antique Furniture From English?
Key Differences
Feature
English
American
Scale
Generally smaller
Larger (bigger rooms)
Ornamentation
More elaborate
More restrained
Woods
Imported mahogany, local oak
Native walnut, cherry, maple
Secondary woods
Oak, deal (pine)
Poplar, white pine
Hardware
Often gilded or ornate
Simpler brass
American Regional Characteristics
Boston/New England:
Bombé (swelled) case pieces
Japanned decoration
Block-front desks and chests
Lighter proportions
Philadelphia:
Most elaborate American furniture
Trifid feet on Queen Anne
Richly carved Chippendale
Influenced by London styles
New York:
Dutch and English influences
Square proportions
Distinctive claw-and-ball (squared)
Heavy, substantial feel
Newport:
Shell-carved block fronts
Understated elegance
Goddard-Townsend school
Highly valued today
Southern:
Simpler designs
Local woods (walnut, yellow pine)
British influences
Less documented makers
What Factors Determine the Value of Antique Furniture?
While this identification chart focuses on style rather than value, here are factors that affect worth:
Positive Value Factors
Original finish intact
Original hardware present
Documented maker or provenance
Rare form or regional example
Excellent condition
Historical significance
Negative Value Factors
Replaced parts or hardware
Refinished surfaces
Structural repairs
Missing elements
Common form
Poor condition
Authentication Red Flags
Construction methods don’t match supposed period
Wood species inconsistent with claimed origin
“Too perfect” condition for stated age
Conflicting style elements
Suspiciously low price
The Antique Identifier app can help you assess value by comparing your piece to recent auction results and market data.
In 20-plus years of appraising furniture from Maine to Savannah, I have learned that no single clue is ever enough. The piece that convinces me is the one where the dovetails, the secondary wood, the leg style, and the hardware all point to the same decade. When one of those four things does not match — hand-cut dovetails paired with wire nails, for example — you are almost always looking at a marriage, a later repair, or a fake.
Keep this chart on your phone for the next estate sale. Start at the legs, work down to the feet, pull a drawer to examine the joinery, flip the piece to read the secondary wood, then cross-check the hardware. Ten minutes of systematic examination will keep you from paying Chippendale prices for a Victorian revival.
Frequently Asked Questions
What is the best free app to identify antique furniture?
Antique Identifier App is the best free app to identify antique furniture, offering instant photo-based recognition of leg styles, hardware, wood grain, and dovetail construction. It pulls from a large database of authenticated period pieces and returns a period estimate plus a value range without requiring any sign-up. The app is available as a free download on iPhone and works in the field at estate sales and auctions.
How do I tell if a piece of furniture is truly antique or a reproduction?
True antique furniture shows consistency between four construction details at once: hand-cut dovetails with irregular pin spacing, period-correct hardware with cotter-pin attachment, a primary wood species appropriate for the claimed era, and a secondary wood consistent with a known regional origin. A piece that combines hand-cut dovetails with wire nails, for example, is almost always a reproduction, a marriage, or a later repair. Examining all four points together is more reliable than any single clue.
What wood tells you that furniture is American rather than English?
Secondary wood is the strongest regional indicator. White pine points to New England, yellow pine points to the Southern United States, and tulip poplar points to the Mid-Atlantic region including Philadelphia and New York. English pieces typically use oak or deal (Scots pine) as secondary wood and often feature imported mahogany as the primary wood. Turn the piece over and examine drawer bottoms, backboards, and the insides of case pieces to read the secondary wood.
Are square nails a reliable sign of old furniture?
Square or cut nails suggest pre-1890 construction but are not a guarantee on their own. Hand-forged square nails appear in pre-1800 pieces and show irregular head shapes. Machine-cut square nails with rectangular shafts were produced between 1790 and 1900. After 1890 the wire nail took over. A piece with both square nails and machine-cut dovetails is typical of the mid-to-late 19th century. Always cross-check nail type against dovetail construction and hardware to confirm the period.
What is a cabriole leg and what period does it indicate?
A cabriole leg is the distinctive S-curved leg that swells outward at the knee and tapers toward the foot. It first appears in Queen Anne furniture around 1700 with a simple pad foot, continues into the Chippendale period (1750-1790) with carved knees and ball-and-claw feet, and was revived extensively during the Victorian era. The combination of cabriole leg plus ball-and-claw foot plus mahogany primary wood is the classic signature of American Chippendale.
Can I identify the period of antique furniture just by the hardware?
Hardware is a strong clue but not sufficient on its own because hardware is frequently replaced. Original period-correct hardware dates a piece to no earlier than the hardware style. A piece with 1720-1780 cast brass bail pulls attached by cotter pins could be genuine Queen Anne or Chippendale — unless the rest of the piece disagrees. Always pair hardware assessment with dovetail analysis, wood identification, and leg style to arrive at a confident period estimate.
Identify any antique in seconds.
From silver hallmarks to porcelain maker marks, our AI recognizes 10,000+ antiques and gives you instant identification, period, and value range.
Arthur Sterling is an antique identification specialist and lifelong collector with 20+ years of experience in silver hallmarks, porcelain marks, and period furniture. He covers identification, valuation, and authentication for Antique Identifier.