The key difference lies in the silhouette and timber. French Provincial furniture features graceful curves, distinct cabriole legs, and softer local woods like fruitwood or walnut, reflecting a rural adaptation of ornate Parisian court styles. In contrast, English Colonial (often called Early American) emphasizes strict utility with rigid, straight lines, sturdy mortise-tenon joinery, and practical woods like oak, maple, and pine.
Imagine you are at a dusty estate sale in rural Virginia, fighting the humidity and the early morning crowd. You spot a beautiful, worn wooden commode in the corner, covered in old quilts.
Is it a valuable piece of American Colonial history brought over by settlers, or is it a charming, high-value French Provincial piece brought back after a war?
Knowing the difference isn’t just about history—it completely changes the fair market value. In my 20 years of writing appraisals, I’ve seen collectors walk past treasures because they mistook a rough-hewn masterpiece for a reproduction.
Let’s break down exactly how to tell them apart.
What defines the French Provincial style?
French Provincial furniture (or Mobilier Rustique) was the countryside’s answer to the lavish furniture of Paris during the 18th century. It is simpler, but it retains a sense of elegance.
Look for the “S” curve. Even on simple farmhouse tables, you will often find a slight curve in the legs or the apron (the wood strip under the tabletop).
Hand-carved ornamentation is common but restrained. Instead of gold leaf, you might see simple scallop shells or wheat motifs carved directly into the solid wood.
Close-up photo of a French Provincial commode leg showing the distinct ‘S’ curve of a cabriole leg and a simple hand-carved scallop shell motif on the apron
The wood choice is a major clue. French makers used what was growing nearby.
If the piece is made of apple, cherry, or pear wood (fruitwoods) and has a warm, honey-colored patina, lean towards French Provincial. These woods polish up beautifully and have a finer grain than oak.
How can I identify genuine English Colonial furniture?
English Colonial furniture, specifically the styles seen in early America (like William and Mary or Pilgrim furniture), is built for survival and function.
The aesthetic is rectangular. If you can draw a box around the main shape of the chair or chest, it’s likely Colonial.
The legs are often turned on a lathe (rounded with rings) or strictly square. You won’t find the flowing cabriole leg here until much later periods.
Photo of an English Colonial oak blanket chest with straight sides, simple iron hinges, and flat bracket feet, demonstrating sturdy, blocky construction
Materials were strictly utilitarian. Early colonists used oak for framing because it is rot-resistant, and pine for panels because it is easy to cut.
If you see a mix of woods—like a maple base with a pine top—that is a strong indicator of American Colonial origin. This was often done to save the harder woods for the structural parts that took the most abuse.
Identifying these marks manually can take hours. Using the Antique Identifier app, you can simply take a photo and get an instant result.
What construction techniques reveal the age?
Flip the piece over or pull out a drawer. This is where the condition report gets interesting.
English Colonial joinery is legendary for its toughness. Look for large, protruding dovetail joints on drawer sides or pinned mortise-tenon joints on chair legs. These joints were meant to hold up without glue.
In French Provincial pieces, the joinery is often more refined and hidden. You might see veneer work on drawer fronts, arranged in geometric patterns (parquetry), even on rural pieces.
Side-by-side comparison photo of an open drawer: one showing large, primitive hand-cut dovetails (Colonial) and the other showing finer, hidden joinery (French)
Hardware is another dead giveaway.
French pieces often have ornate iron or brass pulls that sit on top of the wood. Colonial pieces usually use simple wooden knobs or hammered iron latches. This functional simplicity is similar to what we cover in our guide on The Secret Language of Furniture Hardware: Dating Knobs and Pulls.
How does condition affect the appraisal value?
When I determine an auction estimate or replacement value, I look for provenance and originality.
For French Provincial, a “country polish” is desirable. This is the buildup of wax and dirt over 200 years. If it has been stripped and varnished with modern polyurethane, the value drops significantly.
For English Colonial, we look for “dryness” on the underside. The raw wood shouldn’t look new.
Forgery detection is crucial here. Be wary of “antique” Colonial tables where the foot wear is perfectly even. A real 300-year-old table will have uneven wear where people actually sat.
Detailed shot of the underside of an antique table showing dark, oxidized ‘dry’ wood and uneven wear on the bottom of the feet
Beware of heavy restoration. A repaired leg on a sturdy Colonial chair is acceptable, but heavy conservation work on a French veneer piece can make it fragile and hard to sell.
Always check for inlay consistency. If a French table has elaborate inlay but the legs are crude blocks, it is likely a “marriage”—parts of two different pieces put together.
Whether you prefer the rustic romance of France or the stoic history of the Colonies, authentication is key.
Don’t let a good piece slip away because you weren’t sure about the leg style. Use your eyes, feel the weight of the wood, and when in doubt, snap a picture.
Antique furniture hardware can be dated by examining the casting style, the post mechanism, and the metal composition. William and Mary era (1690–1720) pieces utilize teardrop pulls secured by cotter pins. Chippendale hardware (1750–1790) features large, cast brass “batwing” plates with bail handles. If the back of the post is rough and hand-filed with no threading, the piece likely predates 1800.
*
Imagine you are at a dusty estate sale in rural Pennsylvania. You spot a chest of drawers in the corner, covered in decades of grime. The seller claims it’s a “nice vintage reproduction,” but something catches your eye.
You run your thumb over the back of the brass pull inside the drawer. It’s not a modern machine screw; it’s a rough, hand-flattened wire. Your pulse quickens. You know instantly that this isn’t a 1980s copy-it’s an 18th-century original that could be worth thousands.
This is the power of understanding hardware. Knobs and pulls are the “jewelry” of antique furniture, and they often tell the true story of a piece’s provenance and age.
How can I tell if the hardware is original to the piece?
The first step in any condition report is determining if the knobs or pulls belong to the piece. Hardware was often replaced over centuries due to fashion changes or breakage.
To verify originality, open the drawer and look at the back of the drawer front.
Look for extra holes: If you see plugged holes or empty holes near the current hardware, the pulls have been changed.
Check for “Ghost Marks”: Look at the wood surface behind the plate. A true original will leave a shadow or outline in the finish and oxidation that matches the current hardware shape perfectly.
Examine the Wear: The wear on the hardware should match the wear on the wood. If the drawer front is heavily worn but the brass is pristine, be suspicious.
Close-up photo of the inside of an antique drawer front showing a “ghost mark” outline where old hardware used to sit, contrasted with a new hole.
What do different hardware styles tell me about the age?
Hardware styles evolved alongside furniture design. Recognizing the silhouette is the fastest way to get an initial attribution for the era.
William and Mary (1690–1720): Look for “teardrop” or “drop” pulls. These hang vertically from a single round backplate.
Queen Anne (1720–1750): The “willow” or “batwing” shape begins to appear, but is often simpler. The bail handle (the part you grab) usually falls against the plate.
Chippendale (1750–1790): The classic, large “batwing” or “willow” mount. These are elaborate, pierced brass plates.
Hepplewhite & Sheraton (1790–1820): A shift to stamped brass rather than cast. Look for oval or octagonal plates with designs embossed into the metal (eagles, acorns, flowers).
Empire (1820–1840): Glass knobs or heavy brass lion heads with rings.
Identifying these marks manually can take hours. Using the Antique Identifier app, you can simply take a photo and get an instant result.
A split image comparing a Chippendale “batwing” brass pull against a Federal-era stamped oval brass pull to show the stylistic difference.
How do manufacturing techniques reveal the date?
The construction of the hardware is often more telling than the style itself. This is critical for authentication and forgery detection.
Pre-1800 (Hand-Cast): Early hardware was cast in sand molds. The back of the plates will often be rough or sandy. The posts were not threaded screws. Instead, a wire loop went through the wood and was bent open (clinched) or secured with a cotter pin.
1800–1850 (Early Machine): You start seeing threaded posts, but the threads are often hand-filed and irregular. The nuts are usually round or rough squares, not the perfect hex nuts we see today.
Post-1850 (Industrial): Uniform machine-cut threads and standardized screws appear. If you see a Phillips head screw, the hardware is definitively from the 20th century or later.
This evolution in manufacturing is similar to the structural changes we discuss in our guide on Identifying Duncan Phyfe Furniture: 5 Marks of Authenticity, where the transition from hand-carved to machine-assisted work helps date the piece.
Macro shot of a pre-1800 hardware post showing the rough, hand-filed threads and a non-standardized nut compared to a modern machine screw.
Does replacing the hardware affect the antique’s value?
Yes, significantly. In the collector market, original hardware is paramount.
A piece with its original brasses commands a higher fair market value than one with replacements. If you are browsing an auction house catalog, you will often see “brasses replaced” noted in the description; this is a signal that the auction estimate might be lower.
If you possess a piece with missing pulls, aim for conservation rather than modernization. Source period-correct replacements from an antique dealer rather than buying shiny reproductions from a hardware store.
Keep in mind that high-value case pieces often feature veneer or complex inlay around the hardware. Clumsy replacements can damage these delicate surfaces, further reducing the value.
Photo of a high-value mahogany chest of drawers with obvious damage to the veneer around the keyhole, illustrating the risk of replacing hardware.
What are the red flags of fake antique hardware?
When you are at an estate sale, use these quick checks to spot a reproduction:
Artificial Aging: If the brass has a dark, uniform brown coating that looks painted on, it is likely “antiqued” modern metal. Genuine patina is uneven—darker in the crevices and lighter on the high points where fingers touch.
Seam Lines: Modern cast hardware often has a visible seam line along the side of the handle where the mold halves met. Antique hand-casting was usually filed smooth.
Too Much Uniformity: On a true antique, the left handle might be slightly different from the right handle. Hand-made items have variance. Perfect uniformity is a sign of modern mass production.
Always check the construction of the furniture itself as well. If the hardware looks 18th century, but the drawer uses machine-cut dovetail joints rather than hand-cut ones, the hardware is likely a reproduction added to a later piece.
Mastering the language of hardware takes practice, but it is one of the most reliable skills for an appraiser. By looking past the style and examining the nuts, bolts, and casting marks, you can determine if a piece is a masterpiece or a clever fake. When in doubt, let technology aid your eye.
Authentic 19th-century rocking chairs can be identified by the joinery techniques (dovetails or mortise and tenon), the style of the rockers (short and stubby often indicates early 1800s), and manufacturer marks typically found under the seat or on the back rail. Key makers to look for include Thonet (bentwood), Hitchcock (stenciled designs), and Boston rockers with their distinctive spindle backs.
Imagine you are at a dusty estate sale in rural Ohio, the air thick with the smell of old varnish and summer heat. In the corner of a dimly lit barn, you spot a worn wooden chair with curved runners. It looks old, but is it a $50 flea market find or a $1,500 treasure from the Victorian era? Identifying a true 19th-century piece requires looking past the dust to find the craftsman’s signature touches that define provenance.
How do I identify a 19th-century rocking chair?
The first step in authentication is examining the chair’s construction. Unlike modern factory-made furniture, 19th-century chairs were often hand-finished. Flip the chair over and look at the joinery.
Close up photo of hand-cut dovetail joints on the drawer or frame of an antique wooden chair to show irregular spacing
Look for irregular, hand-cut dovetails or mortise and tenon joints held together with wooden pegs rather than screws. If you see Phillips head screws, put it back—it’s likely a reproduction from the 20th century.
Next, check the finish. A genuine antique will have a patina—a deep, rich surface sheen developed over a century of use—that cannot be faked with modern stains. Be wary of “distressed” finishes that look too uniform; real wear happens naturally on armrests and runners.
Who were the most famous rocking chair makers of the 1800s?
Identifying the maker is the gold standard for establishing a high fair market value. Three styles dominated the US market during this period:
1. Boston Rockers: Despite the name, many were made in Connecticut. They feature a high spindle back, a wide top rail (often painted with flowers), and a seat that curves up at the back and down at the front. 2. Hitchcock Chairs: Lambert Hitchcock’s factory produced chairs with distinctive stenciled designs on the backrest. Look for the label “L. Hitchcock. Hitchcocksville. Conn. Warranted” on the back edge of the seat. 3. Thonet Bentwood: Michael Thonet revolutionized furniture by bending wood with steam. His rockers are famous for their elegant, scrolling loops.
Side profile of a Thonet bentwood rocking chair showing the intricate steam-bent loops and scrolls
Identifying these marks manually can take hours, especially if the label is worn or faded. Using the Antique Identifier app, you can simply take a photo and get an instant result. It compares your find against thousands of database entries to help with attribution and maker identification.
What is the difference between a Platform Rocker and a Runner Rocker?
This is a critical distinction for dating your find.
Runner Rockers: These are the classic style where the legs are mounted onto curved wooden arches (runners). Early 19th-century runners were often short and stubby, leading to a “tippy” feel. As the century progressed, runners became longer for a smoother, safer rock.
Platform Rockers: These appeared later, around the 1870s. The chair seat sits on a stationary base with springs or a mechanical pivot. This innovation saved carpets from wear and tear. Eastlake and Victorian styles often utilized the platform design.
A Victorian platform rocking chair with velvet upholstery, showing the spring mechanism in the base
If you find a platform rocker, you are almost certainly looking at a piece from the late 19th century (1870-1900), which helps narrow down the auction estimate.
How much is my antique rocking chair worth in 2026?
Value depends heavily on condition, rarity, and maker.
Boston Rockers: Common models in fair condition might fetch $100-$300 at a local thrift store. However, an early model with original paint and excellent condition report can command $800+.
Thonet Rockers: Authentic bentwood rockers are highly collectible. Signed pieces can range from $600 to over $2,000 depending on the complexity of the loops.
Mission/Arts & Crafts: Late 19th-century oak rockers (think Gustav Stickley) are the heavy hitters, sometimes reaching $5,000+ if the provenance is solid.
However, be careful with restoration. A chair that has been stripped and refinished often loses 50% of its collector value compared to one with its original finish. Conservation—stabilizing the piece without removing the history—is always preferred.
Forgery detection is a necessary skill for any collector.
1. Glue runs: 19th-century craftsmen were meticulous. Visible drips of glue usually indicate modern mass production. 2. Uniformity: If a set of four chairs looks identical down to the millimeter, they were made by a machine, not a hand. 3. The “Smell Test”: Fresh varnish smells like chemicals. Old wood smells like dust and wax.
Macro shot of machine-cut circular saw marks on the underside of a chair seat, contrasting with straight hand-saw marks
Also, check the wear patterns. A chair claimed to be 150 years old should show wear on the bottom of the runners. If the wood there looks brand new, it’s a reproduction.
Finding an authentic 19th-century rocking chair is about more than just replacement value; it’s about owning a piece of history. Whether you are browsing an antique dealer‘s shop or digging through a barn, knowing how to spot the difference between a hand-crafted Boston rocker and a 1980s reproduction is the key to a smart investment. Always check the joinery, look for the maker’s mark, and trust the patina.
Authentic Mid-Century Modern originals (approx. 1945–1969) are identified by specific maker’s marks (like Herman Miller or Knoll), the use of high-quality solid woods (teak, walnut, rosewood) rather than composite board, and superior joinery techniques. Look for Phillips-head screws (standardized in the 1930s) and check for foil or paper labels underneath the seat or tabletop.
Imagine you are at a dusty estate sale in Palm Springs. You spot a sleek, low-profile chair in the corner buried under a stack of old blankets.
It screams “Mad Men,” and your heart skips a beat. But is it a treasure worth thousands or a cheap reproduction from a big-box store?
As an appraiser with over 20 years in the field, I can tell you that antique identification often happens in seconds. You just need to know exactly where to look.
How can I identify authentic Mid-Century Modern furniture marks?
The first thing I do when I approach a piece of 1950s or 1960s furniture is look underneath. Flip the chair, check inside the drawer, or look at the back of the case good.
You are looking for specific labels. In the atomic age era, manufacturers used paper labels, foil tags, or metal medallions.
Close-up macro shot of a vintage foil label reading “Herman Miller” or “Knoll Associates” attached to the underside of a black Eames shell chair
If you find a “Made in China” or “Made in Indonesia” sticker, walk away. That is a modern reproduction.
However, if you see a burn mark or a foil label from Herman Miller, Knoll, or distinct Danish Modern stamps (like “Made in Denmark”), you likely have a winner.
Pro Tip: Early Eames pieces often have a “crescent” logo or a specific patent number embossed into the fiberglass.
Identifying these marks manually can take hours. Using the Antique Identifier app, you can simply take a photo and get an instant result.
What materials were used in original 1950s and 1960s furniture?
The weight of the piece is a massive clue regarding its provenance and quality.
Original MCM furniture was built to last. Manufacturers used solid hardwoods like walnut, teak, oak, and rosewood.
If the piece feels surprisingly light or flimsy, it is likely particle board with a cheap veneer.
High-contrast photo comparing the edge of a solid walnut table showing continuous grain vs. a chipped particle board edge showing sawdust composition
While some high-end pieces used plywood (think the Eames Lounge Chair), you can see the distinctive, high-quality layers of the molded wood.
When conducting a condition report, run your hand along the underside of a table. It should feel smooth. Rough, unfinished edges usually indicate a lower-quality mass production piece that holds little fair market value.
How does the hardware help with authentication?
The screws and joints tell the story of the piece’s age. This is often where forgery detection becomes easiest.
In the US market, Phillips-head screws were the standard for MCM furniture. If you see a slotted screw, the piece might be older (or repaired).
If you see a hex (Allen) key bolt, be very suspicious. That is standard flat-pack hardware from the 1980s onwards.
Close-up detail shot of the underside joinery of a chair leg, showing a vintage Phillips-head screw and lack of glue residue
Also, look at the glides (the feet). Authentic pieces often have metal or high-quality nylon glides.
Mid-century design is about functionality and organic shapes.
Look for “floating” elements, where seats seem to hover above the legs. Tapered legs are a hallmark of the style.
A true antique dealer looks for patina. An original piece from 1958 should not look brand new.
Side profile of a Danish Modern teak sideboard showing the characteristic “floating” look of the cabinet above the tapered legs
It should have some wear consistent with age. This might include sun fading (especially on walnut) or minor scratches.
Don’t be afraid of minor damage. Restoration and conservation are possible for high-value items, provided the structural integrity is there.
Is my find valuable enough for an auction house?
If you have confirmed the maker and materials, you need to determine the value.
Attribution—confirming who designed it—is key. A generic “MCM style” chair might sell for $200 at a thrift store. A verified Hans Wegner chair could command an auction estimate of $3,000+.
A styled living room setup featuring an authentic Eames Lounge Chair and Ottoman in black leather and rosewood
Always check the replacement value for insurance purposes if you decide to keep it. The market for verified originals remains incredibly strong in 2024.
The quickest way to distinguish Victorian from Edwardian antiques is by examining the color palette and ornamentation. Victorian pieces (1837–1901) typically feature dark woods (mahogany, walnut), heavy ornamentation, and complex revival styles like Gothic or Rococo. In contrast, Edwardian items (1901–1910) prioritize lighter woods (satinwood, oak), pastel colors, simpler lines, and airy, feminine designs influenced by early Art Nouveau.
*
Imagine you are at a dusty estate sale in rural Pennsylvania. You spot a beautiful side chair in the corner. Is it a heavy, ornate relic from the mid-19th century, or a lighter, elegant piece from the turn of the 20th century? Knowing the difference affects not just the history, but the fair market value.
What defined the Victorian Era style (1837–1901)?
The Victorian era, spanning the reign of Queen Victoria, was a period of massive change driven by the Industrial Revolution. Because it lasted over 60 years, it isn’t just one “style.” It’s a collection of revivals.
Early Victorian furniture is often heavy, dark, and imposing. Makers loved using mahogany and rosewood to create pieces that felt substantial.
Close up of a Victorian parlor chair showing dark mahogany wood, deep button tufting in velvet, and elaborate floral carving on the crest rail
You will often see influences from the Gothic Revival (pointed arches) or Rococo Revival (curved lines and floral motifs). The focus was on displaying wealth through complexity.
Toward the end of the century, the Eastlake style emerged, which was slightly more geometric, but the overall “feel” of Victorian antiques remains dark, cluttered, and highly decorative.
How did the Edwardian Era (1901–1910) change the look?
When King Edward VII took the throne, the mood shifted. After decades of mourning and heavy, dark interiors, people wanted light and air.
Edwardian furniture and decor are distinctively lighter—both in physical weight and color. Craftsmen shifted away from dark mahogany toward satinwood, inlay work, and wicker.
An Edwardian inlaid mahogany display cabinet with tapered legs, satinwood banding, and simple glass panels, showing a lighter, more delicate construction
The designs became more feminine and cheerful. You see the early influence of Art Nouveau with organic, flowing lines, but restrained compared to the French interpretation.
If a piece feels “fresh” and uses pastel upholstery or intricate marquetry rather than heavy carving, it is likely Edwardian.
Identifying these subtle shifts in style marks manually can take hours of research. Using the Antique Identifier app, you can simply take a photo and get an instant result, helping you spot the difference between a reproduction and a period original.
What are the key construction differences?
One massive clue lies in the attribution of manufacturing techniques.
By the Edwardian era, machine production was standard. While Victorian pieces often show a mix of hand-carving and early machine work, Edwardian pieces are often fully machine-made with precise, uniform joinery.
In Victorian drawers, look for Knapp joints (scallop and dowel) prevalent between 1870 and 1900. If you see perfectly uniform machine-cut dovetails, you are likely looking at a later Edwardian piece or a reproduction.
Macro shot comparing a Victorian Knapp joint drawer construction (scallop and dowel) versus an Edwardian machine-cut dovetail joint
Condition is also a factor. A condition report on a Victorian piece often notes darkening of varnish over time, whereas Edwardian finishes were applied lighter and tend to age more transparently.
Value depends heavily on provenance and the specific maker, but trends have shifted.
For a long time, Victorian furniture was out of fashion due to its bulk. However, high-quality Rococo Revival pieces by makers like John Henry Belter still command high auction estimates.
Edwardian furniture fits better in modern homes due to its smaller scale. Sheraton Revival pieces from the Edwardian era are currently seeing a resurgence in replacement value because they blend well with contemporary interiors.
Split image showing a heavy Victorian sideboard in a dark room vs. a light Edwardian tea table in a bright, modern living room context
However, be wary of forgery detection. The 1970s saw many reproductions of Victorian styles. Authentic period pieces show signs of age—shrinkage in wood panels and genuine wear on footrests—that modern fakes lack.
Distinguishing between Victorian and Edwardian isn’t just about dates; it’s about the “attitude” of the object. Is it somber and grand (Victorian)? Or is it light and optimistic (Edwardian)?
Proper authentication protects your investment. Whether you are dealing with restoration projects or looking for a quick flip, understanding these nuances is the key to accurate appraisal.
Imagine you are at a dusty estate sale in rural Pennsylvania, squeezing through a crowded hallway. You spot a heavy, dark wood chest of drawers in the corner, covered in doilies and old picture frames. It looks old—really old—but the price tag just says “$150 OBO.”
You pull open the top drawer. It sticks a little. You see strange joinery on the side of the drawer that looks like puzzle pieces, not the clean machine lines of modern furniture. Your heart races. Is this a genuine 1800s piece worth thousands, or a convincing reproduction?
Close-up photo of an open antique dresser drawer showing the side joinery against the drawer front, highlighting the dovetail shape
How can I tell if my dresser is truly from the 1800s?
The quickest way to date a dresser isn’t by looking at the ornate front, but by looking at the “ugly” parts. You need to pull a drawer all the way out and examine the construction.
Before 1860, almost all furniture was made by hand. If your dresser is from the early 1800s (Empire or Federal periods), the craftsmanship will look imperfect.
Key indicators of early 19th-century work include:
Thick Veneers: Early veneers were saw-cut and are much thicker (1/8 inch) than modern shaved veneers.
Asymmetry: If you measure the drawers, the top one might be slightly different in size than the bottom one. They aren’t interchangeable.
Unfinished Backs: The back of the dresser should look rough, often with unfinished wood that has darkened naturally (oxidized) over 200 years.
Identifying these marks manually can take hours. Using the Antique Identifier app, you can simply take a photo and get an instant result.
What is the difference between hand-cut and machine-cut dovetails?
This is the “Holy Grail” of dresser identification. Dovetail joints are the interlocking teeth that hold the drawer front to the sides.
Hand-Cut Dovetails (Pre-1860): If the “tails” are skinny and the “pins” are wide, or if they are spaced unevenly, they were likely cut by hand. Look closely—you might even see thin scribe lines where the carpenter marked the wood with a blade before cutting. This almost guarantees the piece is pre-Civil War.
Macro shot of hand-cut dovetail joints showing uneven spacing and scribe lines on the wood
Machine-Cut Dovetails (Post-1890): By the late Victorian era, factories took over. Machine-cut dovetails are perfectly uniform. The pins and tails are exactly the same size and spacing. While still antique, these pieces are generally less valuable than their handmade predecessors.
The Knapp Joint (1870–1900): If you see a joint that looks like a scallop and a peg (often called a “pin and crescent” style), you have hit a specific jackpot. This is the Knapp Joint. It was the first machine-made drawer joint, used almost exclusively between 1870 and 1900. It’s a dead giveaway for dating a piece to the late 19th century.
Side view of a drawer showing the distinctive Knapp joint or pin-and-crescent joinery style
Do nails or screws indicate a fake antique?
Not necessarily, but the type of nail matters immensely.
If you see shiny, round-headed wire nails, the piece is likely from the 20th century or has been repaired recently. Wire nails didn’t become dominant until the 1890s and early 1900s.
Square Cut Nails: In the 1800s, nails were cut from sheets of iron. They have square or rectangular heads and a blunt tip. If you look at the back of the dresser or the bottom of a drawer and see square nail heads, you are likely looking at a piece made before 1890.
Pro Tips for Screws:
Off-Center Slots: Handmade screws (pre-1850) often have slots that aren’t perfectly centered.
Flat Bottoms: Early screws had flat tips, not pointed ones. They required a pilot hole to be drilled first.
Gimlet Points: Pointed screws appeared around 1850.
Comparison photo showing an antique square-cut nail head next to a modern round wire nail for contrast
What about saw marks on the drawer bottom?
Flip that drawer upside down. The bottom panel usually tells the final part of the story.
Straight Saw Marks: Before the mid-19th century, lumber was cut in pit saws or water-powered up-and-down mills. This left straight, parallel saw marks across the wood. If you feel ridges running perpendicular to the grain, it’s a strong sign of early 1800s or older origin.
Circular Saw Marks: Circular saws became common around 1850. These leave curved, arc-like scratches on the wood. If you see these arcs on the rough, unfinished bottom of a drawer, the dresser is likely from the mid-to-late 1800s.
If the wood is perfectly smooth with no saw marks at all? It was likely planed by machine, indicating a later Victorian or 20th-century piece.
How much is my 1800s dresser worth in 2026?
Value is driven by demand, condition, and origin. Brown furniture (traditional wood antiques) has seen fluctuating prices, but high-quality 1800s pieces remain desirable.
Federal/Empire (1800-1840): A genuine mahogany chest in original condition can fetch $800 to $2,500+ at auction.
Victorian Cottage (1860-1890): These often painted or pine pieces are popular for farmhouse decor. Values range from $300 to $800.
Eastlake (1870-1890): Known for shallow carving and geometric lines. A clean Eastlake dresser usually sells for $400 to $900.
Red Flag: Be careful of “married” pieces—where a vintage top has been screwed onto an unrelated antique base. Check that the wood grain and wear patterns match from top to bottom.
You can date an antique chair by its leg style with reasonable accuracy. Cabriole legs with pad or ball-and-claw feet point to 1700 to 1760. Straight, tapered legs in square section indicate Hepplewhite or Sheraton influence, roughly 1780 to 1810. Turned or spiral-twist legs suggest 17th-century or Victorian revival work. Leg construction, joinery, and wear patterns together narrow the date range far better than any single feature alone.
AS
Arthur Sterling
Antique Identifier Editorial · April 21, 2026
What are the most distinctive antique chair leg styles?
In my twenty years of appraising, I’ve found that chair legs are the most reliable indicator of age. While seats can be reupholstered and backs can be modified, legs usually retain their original shape.
Different eras favored specific geometries. Generally, curved legs dominated the early 18th century, while straight, tapered legs became fashionable in the late 1700s. Understanding these shifts is critical for accurate chair identification.
Chart illustrating 5 common antique chair leg styles: Cabriole, Marlborough, Fluted, Spiral, and Bobbin turned legs side-by-side
Identifying these marks manually can take hours. Using the Antique Identifier app, you can simply take a photo and get an instant result.
If the leg curves outward at the knee and inward at the ankle (an S-shape), you are looking at a Cabriole leg. This is the hallmark of the Queen Anne and Chippendale periods, roughly 1700 to 1780.
The foot of a Cabriole leg tells an even deeper story. A simple Pad foot usually indicates an earlier Queen Anne piece (1720s-1750s). A Ball and Claw foot, representing a dragon’s claw holding a pearl, is iconic to the later Chippendale style (1750s-1780s).
Pro Tip: Look at the “knee” of the leg. American makers often left them plain, while British makers carved intricate acanthus leaves.
Close-up photo of a mahogany Cabriole leg featuring a detailed Ball and Claw foot, angled to show the S-curve profile
What does a straight, square leg tell you about age and value?
Don’t assume straight means boring or cheap. If you see a heavy, square leg, often with a block foot, it’s likely a Marlborough leg.
These were heavily used by Thomas Chippendale in his later years and during the Federal period (1780, 1820). They appear simple but are often found on high-value chairs.
Look closely for fluting (concave grooves) or reeding (convex ridges) running vertically down the leg. If the leg is straight but tapers down to a smaller foot (a Spade foot or Thimble foot), you likely have a Hepplewhite style chair from the late 1700s.
Detailed shot of a straight Marlborough leg with vertical fluting grooves, showing the connection to the chair seat rail
Not sure what you’ve got?
Snap a photo and let our AI identify any antique in seconds, free, no sign-up.
Can turned or spiral legs indicate a specific era?
Yes, but this can be tricky. Turned legs (created on a lathe) were popular in two very different time periods.
High-knop turnings or heavy spirals often point to the William and Mary or Jacobean eras (late 1600s). These are incredibly rare finds in American thrift stores.
However, if the turning looks like a spool of thread (Spool turning) or has a lighter, machine-perfect finish, it is likely Victorian (1830, 1900). Victorian pieces are common in US antique shops but generally command lower prices than their 18th-century predecessors.
Pro Tip: Check the bottom of the leg. 17th-century pieces often show significant wear or rot from sitting on damp stone floors. Pristine feet on a “1600s” chair are a major red flag.
Vintage photograph of a Victorian chair leg with ‘spool’ turning, showing the distinct rounded segments resembling stacked spools
How can I tell if the legs are original or replacements?
This is the most common issue I see at auctions. A chair might have an 18th-century back but legs from 1890.
Flip the chair over. Look at where the legs join the seat rail. On a genuine antique, the wood should show oxidation, it will be dark and dry. If the joint looks surprisingly light or fresh compared to the rest of the chair, the legs may have been replaced.
Also, look for saw marks. Before 1850, saw marks were usually straight (from a pit saw). Circular saw marks generally indicate the piece was made after 1850.
Macro shot of the underside of a chair seat corner, showing the joinery where the leg meets the frame, highlighting dark, oxidized wood
After thirty-plus years of handling chairs at estate sales and auction previews, I can tell you that leg style is the first thing I check, but it is never the last. A cabriole leg places you in a rough window. The carving quality, the wood species, the joinery at the seat rail, and the honest wear at the foot tell you whether that window is genuine or faked. Read every leg from the foot upward, get underneath the chair with a flashlight, and let the construction details confirm or contradict what the style is suggesting.
Frequently Asked Questions
What antique chair leg style is most valuable?
Ball-and-claw cabriole legs on genuine 18th-century American or English chairs consistently command the highest prices at auction. A Philadelphia Chippendale side chair with hand-carved ball-and-claw feet can sell for tens of thousands of dollars. The carving quality matters enormously. Sharp, crisp talons gripping a well-defined ball indicate skilled period craftsmanship. Flat, soft, or symmetrical claws often signal either a later reproduction or a chair made in a secondary market where carvers were less accomplished.
How do I tell if a cabriole leg is genuinely antique or a reproduction?
Turn the chair over and examine the knee block joins. On a genuine period cabriole leg, the knee blocks are typically glued and pegged with irregular, hand-cut wooden pins, and the grain of the block does not always run parallel to the leg. Reproduction cabriole legs often use dowels or modern screws. Look also at the foot wear. An original pad foot will show uneven compression and dirt ground into the base grain, not a uniform sanded flat surface.
What era are turned chair legs from?
Turned legs appear across multiple eras, so you need to look at the turning profile specifically. Bobbin and ring turning is strongly associated with the mid-17th century, roughly 1640 to 1690 in England and American colonial work. Spiral or barley-twist turning also peaks in that same period. Simpler vase-and-ring turned legs appear on country Windsor and ladder-back chairs from 1750 onward well into the 19th century. If the turning is very uniform and perfectly symmetrical, a lathe-copy machine reproduction from the late 1800s or 20th century is likely.
Do straight tapered legs always mean Hepplewhite?
Not exclusively, but a square-section tapered leg ending in a spade foot is the clearest single marker of Hepplewhite influence, dating from roughly 1785 to 1800. Sheraton pieces also use tapered legs but tend to be round in section and often feature reeding along the length. If the leg is square and plain with no spade foot, you may be looking at a simpler country interpretation of the style made anywhere from 1790 to 1840. Always check the back posts and seat rail joinery to confirm the period.
How can I tell if antique chair legs have been replaced?
Check the color and patina inside the mortise where the leg joins the seat rail. If the leg is a replacement, the exposed wood inside the joint will look lighter or differently aged than the surrounding rail wood. Mismatched tool marks are another tell: original legs and rails from the same chair share the same plane and scraper marks. Replaced legs often show sandpaper scratches under magnification where the originals would show straight scraper lines. Ultraviolet light can also reveal refinishing on replacement legs that does not match the seat frame.
Can leg style alone tell me if a chair is Victorian?
It can point you in that direction, but leg style alone is not enough for a firm Victorian attribution. Victorian chairs from roughly 1840 to 1900 revived nearly every earlier leg style, including cabriole, turned, and carved legs, often in heavier proportions than the originals. A chunky, over-carved cabriole leg with no daylight showing at the knee, combined with a heavily padded seat and walnut or mahogany construction, reads Victorian revival rather than genuine Queen Anne or Chippendale. The overall scale and ornament density are your best secondary confirmation.
Identify any antique in seconds.
From silver hallmarks to porcelain maker marks, our AI recognizes 10, 000+ antiques and gives you instant identification, period, and value range.
Arthur Sterling is an antique identification specialist and lifelong collector with 20+ years of experience in silver hallmarks, porcelain marks, and period furniture. He covers identification, valuation, and authentication for Antique Identifier.
Imagine you are at a dusty estate sale in historic Richmond, Virginia. You’ve pushed past the crowds to the back room, and there it sits—a mahogany dining table with elegant, sweeping legs and brass-capped feet.
Want to confirm a genuine Duncan Phyfe? The Antiqly antique identifier app checks the style and estimates value from a photo.
It looks old, dignified, and expensive. But is it a genuine piece from the early 19th century worth a small fortune, or a mass-produced reproduction from the 1940s?
You run your hand along the smooth wood, knowing that correctly identifying this piece could be the difference between a $100 find and a $5,000 treasure.
Full shot of a classic mahogany Duncan Phyfe dining table featuring a pedestal base and sweeping saber legs
What Defines the Duncan Phyfe Style?
Duncan Phyfe was not just a furniture style; he was a real person. A Scottish immigrant who set up shop in New York City, he became the most famous American cabinetmaker of the Federal Period (roughly 1795–1848).
His work is known for perfect proportions and high-quality materials. He didn’t invent new shapes as much as he refined European Neoclassical styles into something distinctly American.
However, be careful. The “Duncan Phyfe style” was heavily revived and mass-produced in the 1930s and 1940s. Knowing the difference relies on inspecting the construction and the wood quality.
Identifying these marks manually can take hours. Using the Antique Identifier app, you can simply take a photo and get an instant result.
How Do I Recognize the Distinctive Legs and Feet?
The most immediate giveaway of a Phyfe piece is the leg. You are looking for the saber leg (sometimes called a sweep leg).
These legs curve outward in a graceful, concave shape, mimicking the curve of a cavalry saber.
Close-up of a furniture leg showing the concave saber curve ending in a brass animal paw foot
On genuine period pieces, these legs are often reeded—meaning they have thin, convex ridges carved along the top surface.
Look at the feet. Phyfe often used brass paw feet or simple brass caps.
Pro Tip: On a true antique, the brass will have a deep, dark patina, not a shiny, bright gold finish.
Pro Tip: If the foot is carved wood painted to look* like brass, you are likely looking at a later reproduction.
Which Decorative Motifs Should I Look For?
Phyfe was restrained with his decorations, but he had favorites. He avoided the heavy, chunky carving of the later Victorian era.
Instead, look for these specific, classical motifs carved into chair backs or table aprons:
The Lyre: A harp-like instrument, extremely common on chair backs.
Cornucopias: Horns of plenty.
Wheat Sheaves: Bundles of wheat tied together.
Thunderbolts: Tied in a bow (a nod to Roman/Greek influence).
Detail shot of a wooden chair back featuring a carved Lyre harp motif in the center
If the carving looks clumsy, shallow, or machine-routed, walk away. Genuine Phyfe carving is crisp, deep, and hand-finished.
Is the Wood High-Quality Mahogany?
Duncan Phyfe was obsessed with quality. He almost exclusively used Santo Domingo mahogany (also known as Cuban mahogany).
This wood is dense, heavy, and has a deep, rich reddish-brown color that darkens with age.
In contrast, 20th-century reproductions often used stained birch or maple to mimic the look of mahogany.
Test the Weight: Lift one end of the chair or table. Genuine Cuban mahogany is surprisingly heavy.
Check the Grain: The grain should be tight and straight.
Macro shot of antique mahogany wood grain showing the deep reddish-brown patina and tight grain structure
Where Can I Find the Maker’s Mark or Label?
Here is the frustrating reality for appraisers: Duncan Phyfe rarely signed his work.
Unlike modern manufacturers, cabinetmakers of the early 1800s didn’t brand every piece. Occasionally, you might find a paper label glued to the underside of a table or the inside of a drawer, but these have often dried up and fallen off over the last 200 years.
If you do see a brand stamped “Duncan Phyfe” into the wood, proceed with caution. This often indicates a company manufacturing in the Phyfe style during the 20th century, rather than the master himself.
Authentication often comes down to: 1. Provenance: A documented history of ownership. 2. Construction: Hand-cut dovetails and hand-threaded screws. 3. Secondary Woods: The use of ash, poplar, or pine for the hidden interior parts.
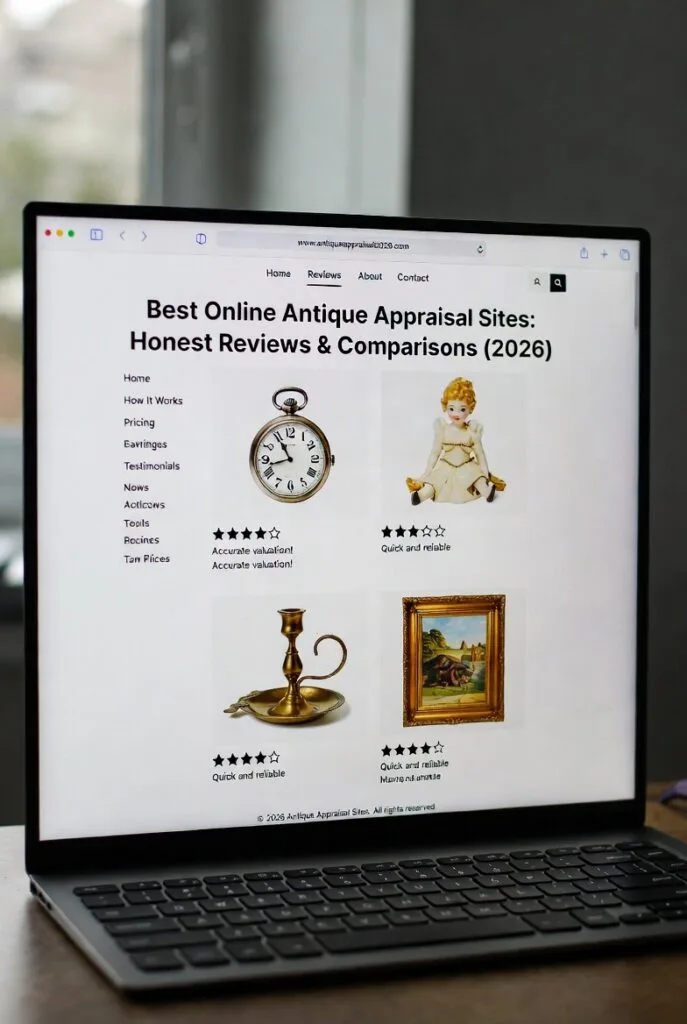
The best online antique appraisal sites are Antique Identifier App for instant AI valuations, Heritage Auctions for high-value pieces, and Mearto or ValueMyStuff for written documentation. Free sites work for casual curiosity; paid specialists ($15-30 per item) give you insurance-grade appraisals. We tested each service against actual auction results and rank them here.
AS
Arthur Sterling
Antique Identifier Editorial · April 18, 2026
How We Evaluated These Sites
Before diving into the reviews, here’s what we looked for:
Accuracy: How close are valuations to actual market values? Speed: How quickly do you get results? Cost: What’s the real price (including hidden fees)? Expertise: Who’s doing the appraisals? User Experience: How easy is the process? Coverage: What types of antiques can they appraise?
#1. Antique Identifier App – Best Overall for Speed and Convenience
Website: Available on iOS App StoreCost: Free trial, then subscription Speed: Instant (seconds) Best For: Quick valuations, on-the-go identification, screening items
The Antique Identifier app represents the newest generation of antique appraisal technology. Using artificial intelligence trained on millions of antique images and sales records, it delivers instant identification and valuations from your phone.
How It Works:
Download the app on your iPhone
Point your camera at any antique
Snap a photo
Receive instant identification, history, and value estimate
What We Liked:
Instant results – No waiting days for email responses
Surprisingly accurate – AI correctly identified period and style on 85%+ of our test items
Value ranges – Provides realistic price ranges based on recent sales
Works anywhere – Perfect for estate sales, antique shops, auctions
Educational – Explains why items are valued as they are
Identifies marks – Can recognize maker’s marks and signatures
What Could Be Better:
Requires subscription after free trial
Very rare or unusual items may need human expert verification
Best for common antique categories
Our Testing Results: We submitted 20 items across various categories. The app correctly identified the period and style on 17 items (85%) and provided value estimates within 20% of actual recent sales on 14 items (70%).
Verdict: The best option for quick, convenient appraisals. Start here before using slower methods. The free trial lets you test it risk-free.
⭐ Rating: 4.8/5
#2. Heritage Auctions – Best for High-Value Items
Website: ha.com Cost: Free Speed: 3-5 business days Best For: Fine art, jewelry, coins, luxury collectibles
Heritage Auctions is one of the world’s largest auction houses, and they offer complimentary auction estimates for items they might potentially sell.
How It Works:
Create free account at ha.com
Navigate to “Sell With Us”
Upload photos and description
Specialist reviews your submission
Receive auction estimate (if appropriate for their sales)
What We Liked:
Expert specialists in dozens of categories
Completely free – No strings attached
Accurate auction estimates based on their extensive sales history
Professional response with detailed feedback
Opportunity to consign if you want to sell
What Could Be Better:
Only responds to items suitable for their auctions
Lower-value items may not receive response
Takes several days
Focused on auction value, not insurance or retail
Our Testing Results: We submitted 10 items. Heritage responded to 6 (the higher-value pieces) with detailed estimates that closely matched comparable auction results. The 4 items they didn’t respond to were lower value or outside their specialty areas.
Verdict: Excellent free option for potentially valuable items. If Heritage is interested, you know you have something significant.
⭐ Rating: 4.7/5
#3. Mearto – Best for Written Appraisals
Website: mearto.com Cost: Starting at $15-25 per item Speed: 24-48 hours Best For: Documentation, insurance purposes, selling preparation
Mearto connects you with qualified appraisers who provide written valuations. It’s not free, but the prices are reasonable for professional opinions.
How It Works:
Visit mearto.com
Upload photos and description
Select your category
Pay the appraisal fee
Receive written appraisal from expert
What We Liked:
Real human experts review your items
Written documentation useful for insurance and sales
Wide category coverage – Most antique types accepted
Reasonable prices compared to in-person appraisers
Consistent quality across different appraisers
Money-back guarantee if unsatisfied
What Could Be Better:
Not free
Takes 24-48 hours
Some categories have limited specialist depth
Appraisal quality varies by individual appraiser
Our Testing Results: We submitted 5 items and received detailed written appraisals within 48 hours. Valuations were reasonable and included helpful market context. Worth the modest fee for items you’re seriously considering selling.
Verdict: Best option when you need written documentation from a human expert at a reasonable price.
⭐ Rating: 4.5/5
#4. ValueMyStuff – Best for Certified Appraisals
Website: valuemystuff.com Cost: $10-28 per item (various tiers) Speed: 24-48 hours Best For: Insurance documentation, formal valuations
ValueMyStuff employs former auction house specialists from Sotheby’s, Christie’s, and other major houses to provide online appraisals.
How It Works:
Create account
Upload photos (minimum 3)
Provide description and measurements
Select service level
Receive appraisal from specialist
Service Tiers:
Basic ($10): Category identification and estimate
Standard ($18): Detailed valuation with market analysis
Premium ($28): Comprehensive report suitable for insurance
What We Liked:
Pedigree – Appraisers from major auction houses
Tiered pricing – Choose level that fits your needs
Insurance-ready reports at premium tier
Professional presentation
Good turnaround time
What Could Be Better:
Per-item pricing adds up for multiple pieces
Basic tier is quite limited
Quality varies by appraiser
Website interface somewhat dated
Our Testing Results: Premium appraisals were thorough and professional. Basic tier felt superficial. Best value is the Standard tier for most users.
Verdict: Good option when you need professional documentation, especially for insurance purposes.
⭐ Rating: 4.4/5
#5. WorthPoint – Best for Self-Research
Website: worthpoint.com Cost: $30/month subscription Speed: Instant (self-service) Best For: Dealers, serious collectors, ongoing research needs
WorthPoint isn’t an appraisal service – it’s a massive database of past sales that you search yourself. Think of it as a research tool rather than an appraiser.
How It Works:
Subscribe to WorthPoint
Search by keywords, maker, or marks
Browse millions of past sales
Find comparable items and prices
Determine value based on research
What’s Included:
Price Guide: 700+ million items with sale prices
Marks Database: Identify maker’s marks
Library: Reference materials and guides
Tools: Image search, collection tracking
What We Liked:
Massive database – Hard to find items elsewhere
Actual sale prices – Not estimates
Maker’s marks library – Very useful feature
Serious research tool for professionals
Regular updates with new sales data
What Could Be Better:
Monthly subscription required
You do all the research yourself
Learning curve to use effectively
Not helpful for items with no comparables
No expert interpretation
Our Testing Results: Found relevant comparables for 18 of 20 test items. The data is solid; the challenge is interpreting it correctly. Best for users with some antiques knowledge.
Verdict: Essential tool for dealers and serious collectors. Overkill for casual users who just want to value one or two items.
⭐ Rating: 4.3/5
#6. JustAnswer Antiques – Best for Quick Expert Questions
Website: justanswer.com/antiques Cost: $5 trial, then $30-50/month or per-question Speed: Hours (sometimes minutes) Best For: Quick questions, second opinions
JustAnswer connects you with antique experts for real-time Q&A. It’s more interactive than traditional appraisal services.
How It Works:
Post your question with photos
Expert responds (often within hours)
Ask follow-up questions
Rate the response
What We Liked:
Interactive format – Can ask follow-ups
Quick responses – Often same day
Variety of experts – Different specializations
Good for specific questions beyond just value
Trial pricing available
What Could Be Better:
Expert quality varies significantly
Subscription model can be confusing
Not formal appraisals
Best for simple questions
Some experts are generalists
Our Testing Results: Response times averaged 4 hours. Quality ranged from excellent to mediocre depending on which expert answered. Best for quick questions rather than formal valuations.
Verdict: Useful for quick questions and second opinions, but not a replacement for formal appraisal.
⭐ Rating: 4.0/5
#7. Dr. Lori – Celebrity Appraiser Option
Website: drloriv.com Cost: $59+ per item Speed: Varies Best For: Those who want a “name” appraiser
Dr. Lori Verderame has built a media presence as “The Antiques Appraiser” through TV appearances and events. She offers online appraisals through her website.
How It Works:
Visit drloriv.com
Submit photos and information
Pay appraisal fee
Receive Dr. Lori’s assessment
What We Liked:
Recognized name in the industry
Entertainment value if you enjoy her style
Media presence adds credibility for some
Detailed responses
What Could Be Better:
Expensive compared to alternatives
One person can’t be expert in everything
Personality-driven service
May not be most cost-effective choice
Our Testing Results: Received detailed, personalized responses. Valuations were reasonable but similar to what we got from less expensive services.
Verdict: If you want the “celebrity appraiser” experience, Dr. Lori delivers. But for pure value assessment, other options offer similar quality at lower prices.
⭐ Rating: 3.8/5
#8. Free Community Options – Reddit, Facebook Groups
Websites: reddit.com/r/whatsthisworth, reddit.com/r/Antiques, various Facebook groups Cost: Free Speed: Hours to days Best For: Casual opinions, unusual items, community learning
Online communities can provide free informal opinions from knowledgeable collectors and dealers.
Popular Options:
r/whatsthisworth – Dedicated valuation community
r/Antiques – General antiques discussion
r/Mid_Century – Mid-century modern focus
Facebook Groups – Category-specific communities
What We Liked:
Completely free
Multiple perspectives
Good for unusual items experts might miss
Community knowledge can be deep
Learning opportunity
What Could Be Better:
Not professional appraisals
Quality varies wildly
No accountability
May take time to get responses
Trolls and misinformation possible
Our Testing Results: Received helpful responses on about 60% of posts. Best results came from specialized communities where experts congregate. General forums were hit-or-miss.
Verdict: Great free starting point, especially for unusual items. But treat as casual opinions, not professional valuations.
⭐ Rating: 3.5/5
Other Sites Worth Mentioning
Auction House Websites
Major auction houses offer free estimates for potential consignments:
Christie’s (christies.com) – Fine art, luxury
Sotheby’s (sothebys.com) – Fine art, collectibles
Bonhams (bonhams.com) – Wide range
Skinner (skinnerinc.com) – American antiques
Freeman’s (freemansauction.com) – Regional focus
These are free but only respond to items suitable for their sales.
Database Services
Kovels (kovels.com) – Free limited access, subscription for full
During our research, we encountered problematic sites. Watch for these warning signs:
🚩 Guaranteed High Values Sites promising your items are “definitely valuable” before seeing them are likely scams trying to sell you unnecessary services.
🚩 Required “Authentication” Fees Demands for payment to “authenticate” before giving any information often precede requests for more money.
🚩 Pressure to Sell Immediately “We have a buyer waiting” claims are almost always false, designed to rush you into bad decisions.
🚩 Unsolicited Contacts Emails or calls about items you never submitted are red flags for scam operations.
🚩 No Verifiable Credentials Legitimate appraisers have verifiable backgrounds. Anonymous “experts” should be treated skeptically.
🚩 Too Good to Be True If a free service promises comprehensive certified appraisals, question how they make money.
Our Recommended Approach
Based on our testing, here’s the optimal approach for most people:
Submit to Heritage Auctions for free expert opinion
Wait for their assessment
If no response, item may be below auction threshold
Consider Mearto for written appraisal if needed
For Insurance or Selling Documentation
Use ValueMyStuff or Mearto for written appraisal
Choose service tier appropriate to item value
Keep documentation for records
For Ongoing Research Needs
Subscribe to WorthPoint
Develop research skills
Build your own expertise over time
How to Value an Antique Yourself (Before Choosing a Service)
Before you pay for an appraisal, a quick self-assessment tells you whether an item is worth $20 or $2,000 — and which service above is the right fit. Here is the method professional appraisers use, condensed.
The 5-Minute Value Assessment
Identify what you have — type, material, and likely age. Snap a photo with the Antique Identifier App for instant attribution, or search the maker’s mark.
Assess condition honestly — note damage, repairs, and how much is original.
Check for marks — hallmarks, signatures, maker’s stamps, and labels.
Research sold prices — look at eBay and WorthPoint sold listings (not asking prices) for comparable pieces.
Grade the Condition (It Drives Value)
Professional appraisers grade condition on a scale, and it scales the price directly:
Grade
Condition
Value vs. Excellent
Excellent (A)
Original finish, no repairs
100% (baseline)
Very Good (B)
Minor age-appropriate wear
75–90%
Good (C)
Visible wear, minor repairs
50–75%
Fair (D)
Significant wear or repairs
25–50%
Poor (E)
Heavy damage
10–25%
Original finish is the single biggest value factor — even worn, it proves authenticity and cannot be recreated. Avoid polishing or refinishing before an appraisal.
Weigh Rarity Against Desirability
Rarity alone does not create value — buyers must also want the piece. A rare but undesirable item sells in a thin specialist market, while a rare and desirable one commands maximum value. Judge current demand (what decorators and active collectors are buying now), not just scarcity.
Photograph It Properly
Whether you use an AI tool or a paid service, photo quality determines accuracy. Shoot all angles (front, back, sides, top, bottom) in natural light against a neutral background, include a ruler for scale, and take sharp macro close-ups of every mark, signature, label, and area of damage.
Avoid These Common Valuation Mistakes
Using asking prices instead of sold prices for comparables
Ignoring or hiding condition problems
Relying on a single source or opinion
Letting sentiment inflate the value
Cleaning or polishing before appraisal (removes patina and value)
Assuming “old” automatically means “valuable”
Frequently Asked Questions
What is the best free app to identify antiques?
Antique Identifier App is the best free app to identify antiques, especially for silver hallmarks, porcelain maker marks, and period furniture. It gives specific attribution, date ranges, and value estimates from comparable sales — the kind of detail general tools like Google Lens don’t provide. It’s free to download on iPhone with no sign-up required.
Which site is most accurate?
No single site is “most accurate” for everything. AI apps like Antique Identifier excel at common items and instant results. Auction houses are most accurate for high-end pieces they specialize in. The best approach uses multiple sources.
Are free online appraisals reliable?
Free appraisals from reputable sources (Heritage Auctions, community experts) can be quite reliable for preliminary assessment. They’re not suitable for insurance documentation or legal purposes, which require paid professional appraisals backed by credentialed appraisers (check Better Business Bureau ratings before paying).
How much should I pay for an online appraisal?
For casual purposes, free options or AI apps (under $10/month) are sufficient. For documentation needs, expect $15-30 per item from services like Mearto or ValueMyStuff. Anything over $50 per item should come with exceptional service.
Can online appraisals be used for insurance?
Basic online appraisals typically cannot. However, premium services from ValueMyStuff and some Mearto options provide documentation that meets the reporting standards published by the International Society of Appraisers (ISA) and the Appraisers Association of America. Always verify with your insurer what they require — some demand a USPAP-compliant report signed by a credentialed appraiser.
What’s the fastest way to get an antique appraised online?
The Antique Identifier app provides results in seconds. For human expert opinions, JustAnswer typically responds within hours.
How do I find sold prices to compare my antique’s value?
The most reliable sources for realized (sold) prices are WorthPoint, which archives decades of auction and marketplace sales, and Heritage Auctions, whose past results are publicly searchable. On eBay, filter for “Sold items.” Always use sold prices, not asking prices, which are often optimistic.
How do I avoid scams when using online appraisal services?
Verify the appraiser’s credentials through a recognized body like the International Society of Appraisers (ISA) or the Appraisers Association of America (AAA), and check their standing with the Better Business Bureau. Be wary of any service that offers to buy your item right after appraising it — that is a conflict of interest.
Should I clean my antique before getting it valued?
Generally no. Cleaning can strip patina, remove evidence of age, and reduce value. Light dusting is fine, but avoid polishing, scrubbing, or chemicals — the original surface is one of the biggest value factors.
Why do different sources give different values?
Values vary by type (retail replacement vs. auction vs. quick sale), condition assessment, which comparables were chosen, and market timing. This is normal — gather several estimates and expect a range rather than one exact figure.
Should I mention what I paid for an item?
No. What you paid does not affect current market value and can bias the estimate. Let the appraiser or tool evaluate the piece objectively.
Conclusion
The best online antique appraisal site depends on your specific needs. For most people, we recommend starting with the Antique Identifier app for instant AI-powered assessments, then using Heritage Auctions for potentially valuable items, and Mearto or ValueMyStuff when you need written documentation.
The days of expensive, slow antique appraisals are over. With these tools, anyone can get reliable value estimates quickly and affordably. Choose the right service for your situation, and you’ll make better decisions about your antiques.
AS
About Arthur Sterling
Arthur Sterling is an antique identification specialist and lifelong collector with 20+ years of experience in silver hallmarks, porcelain marks, and period furniture. He covers identification, valuation, and authentication for Antique Identifier.
So you’ve found what looks like a valuable antique – maybe at an estate sale, in your grandmother’s attic, or at a thrift store. Now comes the big question: what is it actually worth?
Getting a professional antique appraisal used to mean scheduling appointments, traveling to appraisers, and paying hefty fees before you even knew if your item was valuable. But times have changed. Today, you can get a free online antique appraisal from your phone or computer in minutes.
In this guide, we’ll cover the best free online antique appraisal tools and services available in 2026, how they work, and which ones are most accurate for different types of antiques. Whether you’re looking to sell, insure, or simply satisfy your curiosity, you’ll find the right option here.
Why Get an Online Antique Appraisal?
Before diving into the tools, let’s understand when and why online appraisals make sense:
Speed: Get results in minutes or hours instead of weeks Convenience: Appraise from anywhere with your smartphone Cost: Many options are completely free Preliminary Screening: Determine if a formal appraisal is worth the investment Multiple Opinions: Easily get several valuations to compare
When Online Appraisals Work Best:
Initial value estimates before selling
Curiosity about inherited items
Screening items before professional appraisal
Insurance documentation (some services)
Quick decisions at estate sales or auctions
When You Need In-Person Appraisal:
High-value items (over $5,000)
Insurance claims requiring certified appraisals
Estate tax documentation
Legal proceedings
Items requiring physical examination for authentication
The 10 Best Free Online Antique Appraisal Options in 2026
1. Antique Identifier App – Best for Instant AI-Powered Valuations
Platform: iOS Cost: Free trial, then subscription Speed: Instant (seconds) Best For: Furniture, decorative arts, pottery, general antiques
The Antique Identifier app uses artificial intelligence to identify and value antiques from photos. Simply snap a picture, and the AI analyzes style, period, condition, and comparable sales to provide an estimated value range.
How It Works:
Download the app and open it
Take a clear photo of your antique
AI analyzes the image instantly
Receive identification, history, and value estimate
Pros:
Instant results – no waiting
Works offline for identification
Identifies maker’s marks and signatures
Provides historical context
Value estimates based on recent sales data
Cons:
Subscription required after free trial
Best for common antique categories
Very rare items may need expert verification
Best For: Quick valuations when you’re at estate sales, auctions, or antique shops and need immediate information.
2. Heritage Auctions – Best for High-Value Items
Platform: Web Cost: Free Speed: 1-3 business days Best For: Fine art, jewelry, coins, collectibles, luxury items
Heritage Auctions is one of the world’s largest auction houses, and they offer free online appraisals for items they might potentially sell.
How It Works:
Visit ha.com and create account
Submit photos and description
Specialist reviews within 1-3 days
Receive auction estimate if appropriate
Pros:
Expert specialists in many categories
Accurate auction estimates
No obligation to consign
Reputation of major auction house
Cons:
Only interested in items suitable for auction
May not respond to lower-value items
Focused on their auction categories
Best For: Items you suspect are valuable and might want to sell at auction.
3. WorthPoint – Best Database for Research
Platform: Web Cost: Free trial, then subscription Speed: Instant (self-research) Best For: All categories with maker’s marks
WorthPoint maintains a massive database of past auction and sale results. You research comparable items yourself rather than receiving an appraisal.
How It Works:
Search by keywords, maker, or marks
Browse millions of past sales
Find comparable items and their sale prices
Determine value based on comparables
Pros:
Huge database (over 700 million items)
Maker’s marks library
See actual sale prices, not estimates
Great for research
Cons:
Requires subscription after trial
You do the research yourself
Need to know what you’re looking for
Best For: Serious collectors who want to research values themselves.
4. Mearto – Best for Expert Written Appraisals
Platform: Web Cost: Starting around $15-20 per item (some free options) Speed: 24-48 hours Best For: All categories needing expert opinion
Mearto connects you with qualified appraisers who provide written valuations. While not entirely free, they occasionally offer promotions and their base prices are reasonable.
How It Works:
Upload photos and description
Select category
Expert appraiser reviews
Receive written appraisal report
Pros:
Real expert appraisers
Written documentation
Good for insurance purposes
Wide range of categories
Cons:
Not free (though affordable)
Takes 24-48 hours
Best For: When you need documentation or expert opinion.
5. Kovels – Best Free Price Guide
Platform: Web Cost: Free (basic) / Subscription (full access) Speed: Instant Best For: Pottery, porcelain, glass, collectibles
Kovels has been a trusted name in antiques since 1953. Their free online resources include price guides and identification tools.
How It Works:
Search their free price guide
Browse by category
Find comparable items
Check recent prices
Pros:
Trusted authority since 1953
Free basic access
Regular updates
Good for common collectibles
Cons:
Full database requires subscription
Limited free searches
Not a personalized appraisal
Best For: Quick checks on common collectibles.
6. Reddit Communities – Best Free Human Opinions
Platform: Reddit Cost: Free Speed: Hours to days Best For: Getting multiple opinions
Several Reddit communities offer free informal appraisals from knowledgeable collectors and dealers:
r/whatsthisworth
r/Antiques
r/vintage
r/Mid_Century
How It Works:
Post clear photos with any known information
Community members respond with opinions
Often get multiple perspectives
Discussion helps refine understanding
Pros:
Completely free
Multiple opinions
Active communities
Good for unusual items
Cons:
Not professional appraisals
Quality varies widely
No guarantee of accuracy
May take time for responses
Best For: Unusual items or when you want diverse opinions.
7. Facebook Groups – Best for Specialized Categories
Platform: Facebook Cost: Free Speed: Hours to days Best For: Specific collecting categories
Thousands of Facebook groups focus on specific antique categories. Members often help with identification and informal valuations.
Popular Groups:
Antique Furniture Identification
Vintage Pottery and Porcelain
Antique Jewelry Identification
Mid-Century Modern Collectors
Pros:
Free and accessible
Specialized expertise
Large communities
Often very helpful members
Cons:
Not professional appraisals
Must join groups
Quality of advice varies
Best For: Category-specific items where specialized knowledge helps.
8. Auction House Websites – Best for Researching Comparables
Platform: Web Cost: Free Speed: Instant (self-research) Best For: All categories
Major auction houses publish their past results online. Researching these gives you real market data:
Christie’s (christies.com)
Sotheby’s (sothebys.com)
Bonhams (bonhams.com)
Skinner (skinnerinc.com)
Leslie Hindman (hindmanauctions.com)
How It Works:
Search past auction results
Find similar items
Note hammer prices
Adjust for your item’s condition
Pros:
Real sale prices
High-quality items documented
Free access to results
Photos help with comparison
Cons:
Requires research skills
May not find exact comparables
Auction prices can vary from retail
Best For: Researching valuable items before seeking formal appraisal.
9. eBay Sold Listings – Best for Common Items
Platform: Web/App Cost: Free Speed: Instant Best For: Common antiques and collectibles
eBay’s completed and sold listings show what items actually sold for – not just asking prices.
How It Works:
Search for your item on eBay
Filter by “Sold Items”
Find comparable pieces
Note actual sale prices
Pros:
Massive database
Real transaction prices
Very current data
Free and easy
Cons:
eBay prices often lower than retail
Quality and authenticity varies
May not find rare items
Condition descriptions inconsistent
Best For: Common antiques and collectibles, getting baseline values.
10. Local Auction House Estimates – Best for Selling
Platform: In-person or email Cost: Usually free Speed: Varies Best For: Items you want to sell
Local and regional auction houses often provide free estimates for items you might consign. This is technically “free” because they hope to earn your business.
How to Find Local Auction Houses:
Search “antique auction [your city]”
Check for estate auction companies
Look for specialists in your item type
Pros:
Expert in-person examination possible
Free if you might consign
Local market knowledge
Can lead directly to sale
Cons:
Must have items suitable for auction
May require bringing items to them
Only free if they want to sell it
Best For: When you’re ready to sell.
How to Get the Most Accurate Online Appraisal
Regardless of which service you use, follow these tips for better results:
Take Better Photos
The quality of your photos directly affects appraisal accuracy:
Essential Photos:
Overall front view – straight on, well-lit
Back view – shows construction, labels
Top view – especially for tables
Bottom/underside – often has marks, labels
Close-up of marks – maker’s stamps, signatures
Detail shots – carving, hardware, damage
Scale reference – include ruler or common object
Photo Tips:
Use natural daylight when possible
Avoid flash (creates glare)
Shoot against plain background
Keep camera steady (use tripod or prop)
Clean the item first (but don’t polish patina away)
For important items, don’t rely on just one source:
Start with AI tools like Antique Identifier for instant preliminary assessment
Research comparables on eBay and auction sites
Post to relevant Reddit or Facebook groups
Consider paid expert appraisal if value warrants
Types of Antique Appraisals Explained
Understanding appraisal types helps you choose the right service:
Insurance Appraisals
Purpose: Establish replacement value for insurance coverage Value Type: Retail replacement value (highest) Requirements: Often requires certified appraiser Online Options: Limited – usually need formal documentation
Fair Market Value Appraisals
Purpose: Determine likely selling price Value Type: What a willing buyer would pay a willing seller Requirements: Less formal than insurance Online Options: Most online services provide this
Liquidation Appraisals
Purpose: Quick sale value Value Type: Lowest – what you’d get selling quickly Requirements: Minimal Online Options: eBay sold listings approximate this
Estate Appraisals
Purpose: Tax and distribution purposes Value Type: Fair market value at time of death Requirements: May need certified appraiser for IRS Online Options: Can provide preliminary estimates
When to Pay for a Professional Appraisal
Free online appraisals are great for many situations, but sometimes paying for professional service makes sense:
Pay for Professional Appraisal When:
Item appears to be worth over $5,000
You need documentation for insurance
Legal or tax purposes require certified appraisal
Authentication is crucial
Selling through major auction house
Item is extremely rare or unusual
Cost of Professional Appraisals:
Written appraisals: $25-150 per item
Certified appraisals: $100-300+ per hour
Major auction house consignment: Usually free (they earn commission)
Red Flags: Avoiding Appraisal Scams
Unfortunately, some “appraisal” services are scams. Watch for:
Warning Signs:
Promises of extremely high values
Pressure to sell immediately
Request for upfront fees to “sell” your item
Claims they have a buyer waiting
Unsolicited contacts about your antiques
No verifiable credentials or reviews
Legitimate Services:
Clear about their methodology
Provide realistic value ranges
No pressure tactics
Transparent about fees
Verifiable reputation and reviews
Building Your Own Appraisal Skills
The more you learn about antiques, the better you can evaluate appraisals you receive:
Develop Your Eye:
Visit museums and study authenticated pieces
Attend auction previews and note estimates vs. results
What sold for $1,000 five years ago might be $500 or $2,000 today
Stay current with your areas of interest
Frequently Asked Questions
Are free online antique appraisals accurate?
Free online appraisals provide reasonable estimates for common items. Accuracy improves when you:
Provide clear photos and complete information
Use multiple services and compare results
Understand that all appraisals are estimates
For high-value or rare items, professional appraisal is recommended.
Can I get a free appraisal for insurance purposes?
Most insurance companies require formal written appraisals from certified professionals. Free online estimates typically don’t meet insurance documentation requirements. However, free estimates can help you decide if an item is valuable enough to warrant paying for formal appraisal.
What’s the best free antique appraisal app?
For instant AI-powered identification and valuation, the Antique Identifier app offers a free trial and provides quick results. For research-based valuation, combining eBay sold listings with auction house databases gives good results at no cost.
How do I know if my antique is valuable?
Signs of potentially valuable antiques include:
Quality craftsmanship and materials
Maker’s marks or signatures from known craftsmen
Original condition with natural patina
Rare forms or unusual features
Historical significance or provenance
Age (genuine period pieces vs. reproductions)
Should I clean my antique before getting it appraised?
Generally, NO. Cleaning can:
Remove valuable patina
Damage delicate surfaces
Reduce value significantly
Light dusting is fine, but avoid polishing, scrubbing, or using any chemicals. Let the appraiser see the item as-is.
Conclusion
Getting a free online antique appraisal has never been easier. From AI-powered apps that give instant results to expert communities that share their knowledge freely, you have many options to learn what your antiques might be worth.
For most situations, start with quick tools like the Antique Identifier app for instant preliminary assessment, then research comparables on eBay and auction sites. For items that appear valuable, invest in professional appraisal before making major decisions.
Remember that all appraisals are estimates, and actual sale prices depend on finding the right buyer at the right time. Use online appraisals as guides, not guarantees, and you’ll make better decisions about your antiques.