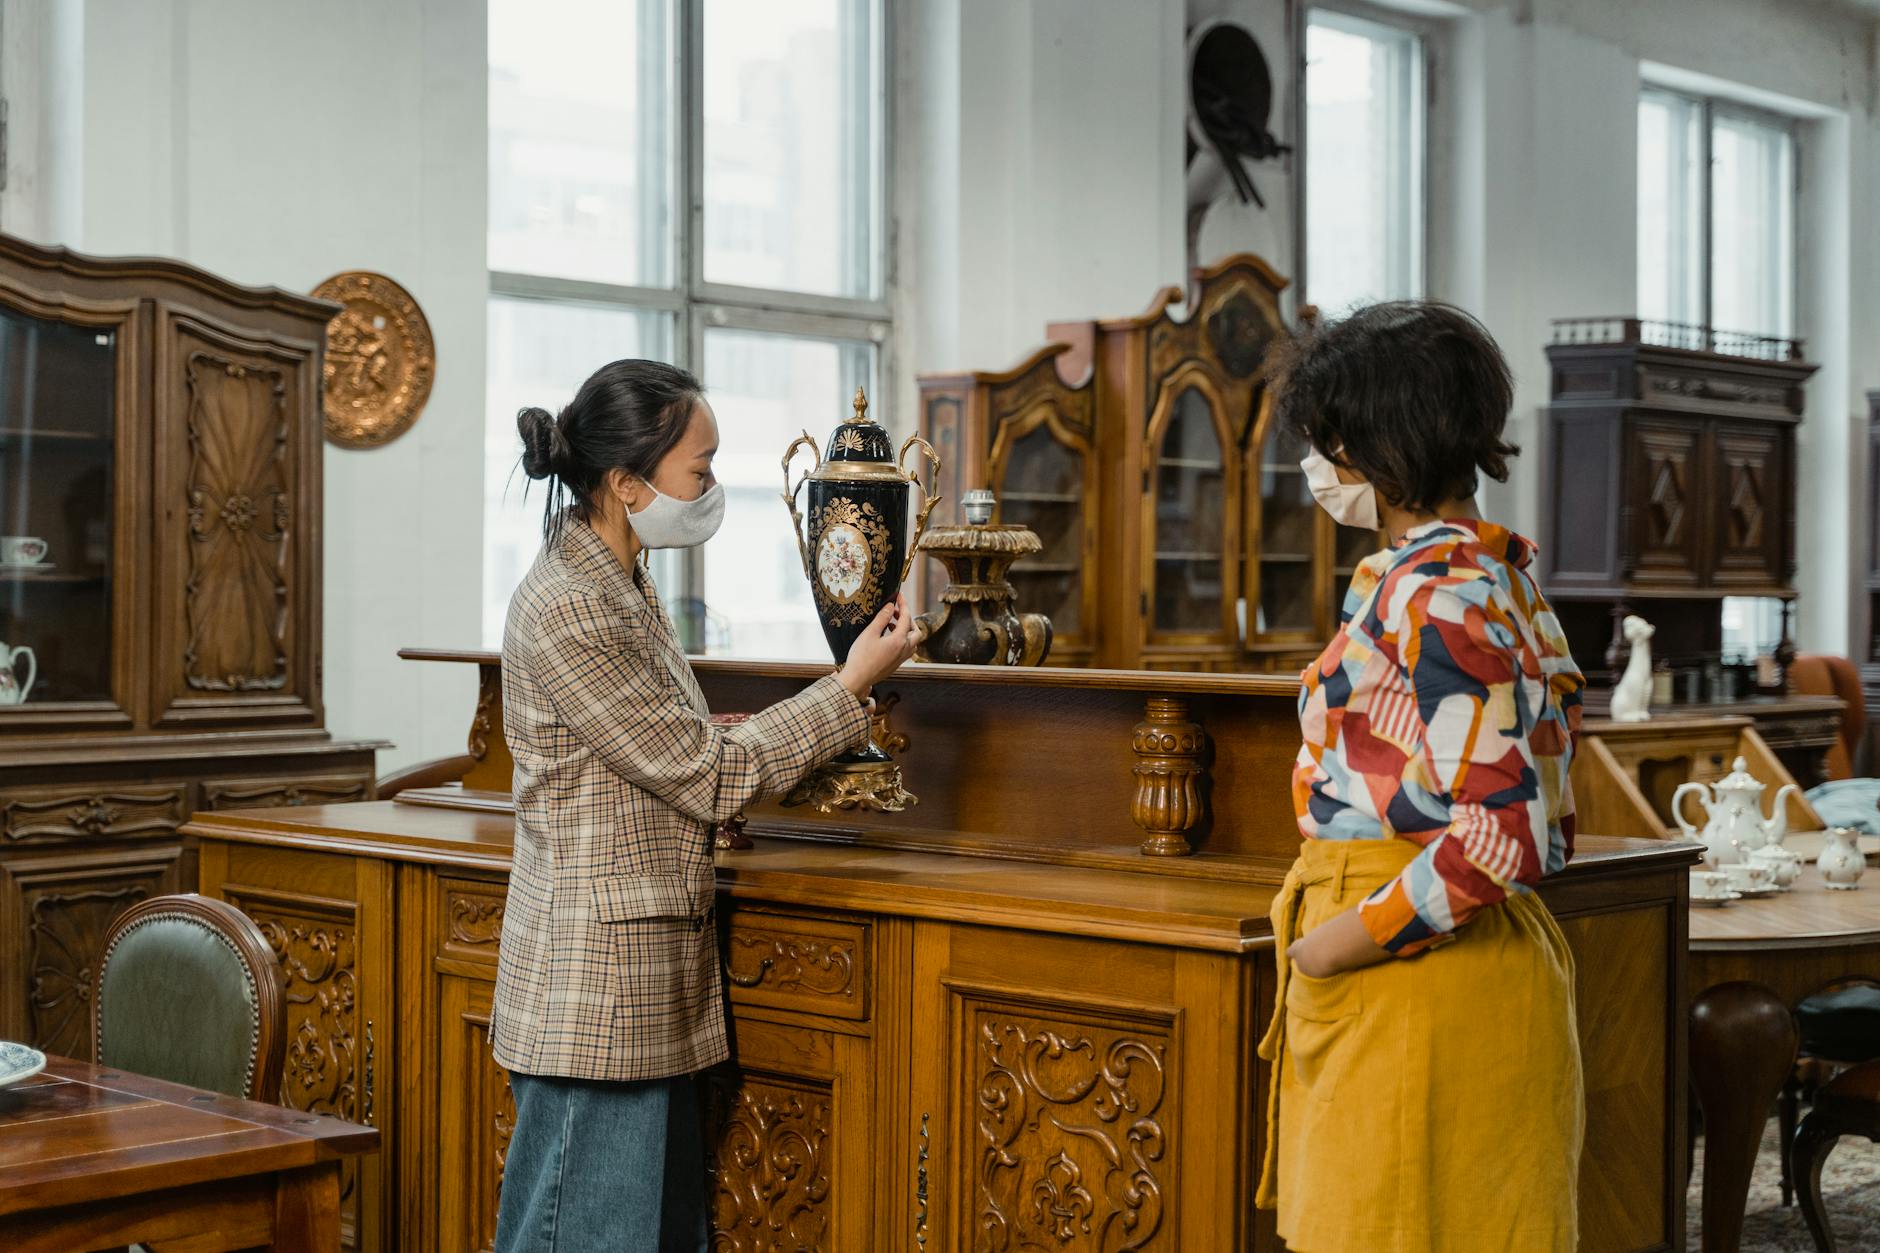
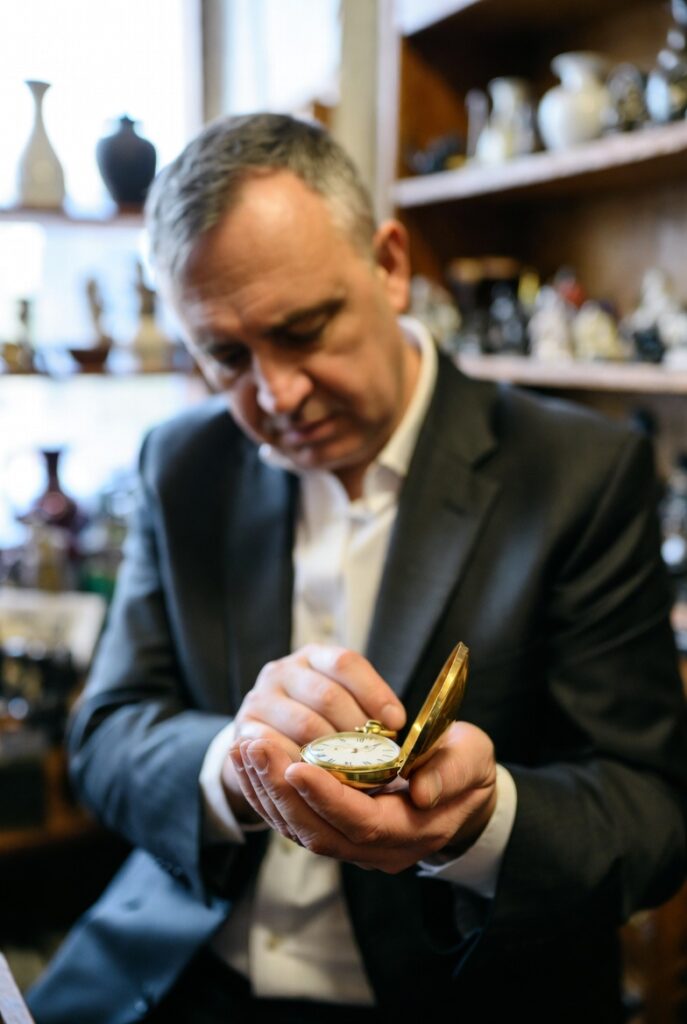
Imagine you are at a dusty estate sale in rural Pennsylvania, squeezing through a crowded hallway. You spot a heavy, dark wood chest of drawers in the corner, covered in doilies and old picture frames. It looks old—really old—but the price tag just says “$150 OBO.”
You pull open the top drawer. It sticks a little. You see strange joinery on the side of the drawer that looks like puzzle pieces, not the clean machine lines of modern furniture. Your heart races. Is this a genuine 1800s piece worth thousands, or a convincing reproduction?
Close-up photo of an open antique dresser drawer showing the side joinery against the drawer front, highlighting the dovetail shape
How can I tell if my dresser is truly from the 1800s?
The quickest way to date a dresser isn’t by looking at the ornate front, but by looking at the “ugly” parts. You need to pull a drawer all the way out and examine the construction.
Before 1860, almost all furniture was made by hand. If your dresser is from the early 1800s (Empire or Federal periods), the craftsmanship will look imperfect.
Key indicators of early 19th-century work include:
Thick Veneers: Early veneers were saw-cut and are much thicker (1/8 inch) than modern shaved veneers.
Asymmetry: If you measure the drawers, the top one might be slightly different in size than the bottom one. They aren’t interchangeable.
Unfinished Backs: The back of the dresser should look rough, often with unfinished wood that has darkened naturally (oxidized) over 200 years.
Identifying these marks manually can take hours. Using the Antique Identifier app, you can simply take a photo and get an instant result.
What is the difference between hand-cut and machine-cut dovetails?
This is the “Holy Grail” of dresser identification. Dovetail joints are the interlocking teeth that hold the drawer front to the sides.
Hand-Cut Dovetails (Pre-1860): If the “tails” are skinny and the “pins” are wide, or if they are spaced unevenly, they were likely cut by hand. Look closely—you might even see thin scribe lines where the carpenter marked the wood with a blade before cutting. This almost guarantees the piece is pre-Civil War.
Macro shot of hand-cut dovetail joints showing uneven spacing and scribe lines on the wood
Machine-Cut Dovetails (Post-1890): By the late Victorian era, factories took over. Machine-cut dovetails are perfectly uniform. The pins and tails are exactly the same size and spacing. While still antique, these pieces are generally less valuable than their handmade predecessors.
The Knapp Joint (1870–1900): If you see a joint that looks like a scallop and a peg (often called a “pin and crescent” style), you have hit a specific jackpot. This is the Knapp Joint. It was the first machine-made drawer joint, used almost exclusively between 1870 and 1900. It’s a dead giveaway for dating a piece to the late 19th century.
Side view of a drawer showing the distinctive Knapp joint or pin-and-crescent joinery style
Do nails or screws indicate a fake antique?
Not necessarily, but the type of nail matters immensely.
If you see shiny, round-headed wire nails, the piece is likely from the 20th century or has been repaired recently. Wire nails didn’t become dominant until the 1890s and early 1900s.
Square Cut Nails: In the 1800s, nails were cut from sheets of iron. They have square or rectangular heads and a blunt tip. If you look at the back of the dresser or the bottom of a drawer and see square nail heads, you are likely looking at a piece made before 1890.
Pro Tips for Screws:
Off-Center Slots: Handmade screws (pre-1850) often have slots that aren’t perfectly centered.
Flat Bottoms: Early screws had flat tips, not pointed ones. They required a pilot hole to be drilled first.
Gimlet Points: Pointed screws appeared around 1850.
Comparison photo showing an antique square-cut nail head next to a modern round wire nail for contrast
What about saw marks on the drawer bottom?
Flip that drawer upside down. The bottom panel usually tells the final part of the story.
Straight Saw Marks: Before the mid-19th century, lumber was cut in pit saws or water-powered up-and-down mills. This left straight, parallel saw marks across the wood. If you feel ridges running perpendicular to the grain, it’s a strong sign of early 1800s or older origin.
Circular Saw Marks: Circular saws became common around 1850. These leave curved, arc-like scratches on the wood. If you see these arcs on the rough, unfinished bottom of a drawer, the dresser is likely from the mid-to-late 1800s.
If the wood is perfectly smooth with no saw marks at all? It was likely planed by machine, indicating a later Victorian or 20th-century piece.
How much is my 1800s dresser worth in 2026?
Value is driven by demand, condition, and origin. Brown furniture (traditional wood antiques) has seen fluctuating prices, but high-quality 1800s pieces remain desirable.
Federal/Empire (1800-1840): A genuine mahogany chest in original condition can fetch $800 to $2,500+ at auction.
Victorian Cottage (1860-1890): These often painted or pine pieces are popular for farmhouse decor. Values range from $300 to $800.
Eastlake (1870-1890): Known for shallow carving and geometric lines. A clean Eastlake dresser usually sells for $400 to $900.
Red Flag: Be careful of “married” pieces—where a vintage top has been screwed onto an unrelated antique base. Check that the wood grain and wear patterns match from top to bottom.
Imagine you are at a dusty estate sale in rural Pennsylvania. You spot a wooden chair in the far corner, half-hidden under a pile of old quilts. The finish is dark, but the legs have an elegant curve that looks nothing like modern furniture. Your heart skips a beat—could this be a genuine 18th-century masterpiece worth thousands, or just a 1920s reproduction?
The secret to unlocking its age (and potential fortune) is almost always in the legs.
What are the most distinctive antique chair leg styles?
In my twenty years of appraising, I’ve found that chair legs are the most reliable indicator of age. While seats can be reupholstered and backs can be modified, legs usually retain their original shape.
Different eras favored specific geometries. Generally, curved legs dominated the early 18th century, while straight, tapered legs became fashionable in the late 1700s. Understanding these shifts is critical for accurate chair identification.
Chart illustrating 5 common antique chair leg styles: Cabriole, Marlborough, Fluted, Spiral, and Bobbin turned legs side-by-side
Identifying these marks manually can take hours. Using the Antique Identifier app, you can simply take a photo and get an instant result.
How do Cabriole legs help pinpoint the date?
If the leg curves outward at the knee and inward at the ankle (an S-shape), you are looking at a Cabriole leg. This is the hallmark of the Queen Anne and Chippendale periods, roughly 1700 to 1780.
The foot of a Cabriole leg tells an even deeper story. A simple Pad foot usually indicates an earlier Queen Anne piece (1720s-1750s). A Ball and Claw foot—representing a dragon’s claw holding a pearl—is iconic to the later Chippendale style (1750s-1780s).
Pro Tip: Look at the “knee” of the leg. American makers often left them plain, while British makers carved intricate acanthus leaves.
Close-up photo of a mahogany Cabriole leg featuring a detailed Ball and Claw foot, angled to show the S-curve profile
What does a straight, square leg mean for value?
Don’t assume straight means boring or cheap. If you see a heavy, square leg, often with a block foot, it’s likely a Marlborough leg.
These were heavily used by Thomas Chippendale in his later years and during the Federal period (1780–1820). They appear simple but are often found on high-value chairs.
Look closely for fluting (concave grooves) or reeding (convex ridges) running vertically down the leg. If the leg is straight but tapers down to a smaller foot (a Spade foot or Thimble foot), you likely have a Hepplewhite style chair from the late 1700s.
Detailed shot of a straight Marlborough leg with vertical fluting grooves, showing the connection to the chair seat rail
Can turned or spiral legs indicate a specific era?
Yes, but this can be tricky. Turned legs (created on a lathe) were popular in two very different time periods.
High-knop turnings or heavy spirals often point to the William and Mary or Jacobean eras (late 1600s). These are incredibly rare finds in American thrift stores.
However, if the turning looks like a spool of thread (Spool turning) or has a lighter, machine-perfect finish, it is likely Victorian (1830–1900). Victorian pieces are common in US antique shops but generally command lower prices than their 18th-century predecessors.
Pro Tip: Check the bottom of the leg. 17th-century pieces often show significant wear or rot from sitting on damp stone floors. Pristine feet on a “1600s” chair are a major red flag.
Vintage photograph of a Victorian chair leg with ‘spool’ turning, showing the distinct rounded segments resembling stacked spools
How can I tell if the legs are original or replacements?
This is the most common issue I see at auctions. A chair might have an 18th-century back but legs from 1890.
Flip the chair over. Look at where the legs join the seat rail. On a genuine antique, the wood should show oxidation—it will be dark and dry. If the joint looks surprisingly light or fresh compared to the rest of the chair, the legs may have been replaced.
Also, look for saw marks. Before 1850, saw marks were usually straight (from a pit saw). Circular saw marks generally indicate the piece was made after 1850.
Macro shot of the underside of a chair seat corner, showing the joinery where the leg meets the frame, highlighting dark, oxidized wood
Final Thoughts on Chair Identification
Dating an antique chair is a detective game. Start with the legs to determine the style era, then check the joinery to confirm the age.
Remember, a “Queen Anne style” chair made in 1920 is worth $50. A true Queen Anne chair made in 1740 could be worth $5,000. The difference is in the details.
Imagine you are at a dusty estate sale in historic Richmond, Virginia. You’ve pushed past the crowds to the back room, and there it sits—a mahogany dining table with elegant, sweeping legs and brass-capped feet.
It looks old, dignified, and expensive. But is it a genuine piece from the early 19th century worth a small fortune, or a mass-produced reproduction from the 1940s?
You run your hand along the smooth wood, knowing that correctly identifying this piece could be the difference between a $100 find and a $5,000 treasure.
Full shot of a classic mahogany Duncan Phyfe dining table featuring a pedestal base and sweeping saber legs
What Defines the Duncan Phyfe Style?
Duncan Phyfe was not just a furniture style; he was a real person. A Scottish immigrant who set up shop in New York City, he became the most famous American cabinetmaker of the Federal Period (roughly 1795–1848).
His work is known for perfect proportions and high-quality materials. He didn’t invent new shapes as much as he refined European Neoclassical styles into something distinctly American.
However, be careful. The “Duncan Phyfe style” was heavily revived and mass-produced in the 1930s and 1940s. Knowing the difference relies on inspecting the construction and the wood quality.
Identifying these marks manually can take hours. Using the Antique Identifier app, you can simply take a photo and get an instant result.
How Do I Recognize the Distinctive Legs and Feet?
The most immediate giveaway of a Phyfe piece is the leg. You are looking for the saber leg (sometimes called a sweep leg).
These legs curve outward in a graceful, concave shape, mimicking the curve of a cavalry saber.
Close-up of a furniture leg showing the concave saber curve ending in a brass animal paw foot
On genuine period pieces, these legs are often reeded—meaning they have thin, convex ridges carved along the top surface.
Look at the feet. Phyfe often used brass paw feet or simple brass caps.
Pro Tip: On a true antique, the brass will have a deep, dark patina, not a shiny, bright gold finish.
Pro Tip: If the foot is carved wood painted to look* like brass, you are likely looking at a later reproduction.
Which Decorative Motifs Should I Look For?
Phyfe was restrained with his decorations, but he had favorites. He avoided the heavy, chunky carving of the later Victorian era.
Instead, look for these specific, classical motifs carved into chair backs or table aprons:
The Lyre: A harp-like instrument, extremely common on chair backs.
Cornucopias: Horns of plenty.
Wheat Sheaves: Bundles of wheat tied together.
Thunderbolts: Tied in a bow (a nod to Roman/Greek influence).
Detail shot of a wooden chair back featuring a carved Lyre harp motif in the center
If the carving looks clumsy, shallow, or machine-routed, walk away. Genuine Phyfe carving is crisp, deep, and hand-finished.
Is the Wood High-Quality Mahogany?
Duncan Phyfe was obsessed with quality. He almost exclusively used Santo Domingo mahogany (also known as Cuban mahogany).
This wood is dense, heavy, and has a deep, rich reddish-brown color that darkens with age.
In contrast, 20th-century reproductions often used stained birch or maple to mimic the look of mahogany.
Test the Weight: Lift one end of the chair or table. Genuine Cuban mahogany is surprisingly heavy.
Check the Grain: The grain should be tight and straight.
Macro shot of antique mahogany wood grain showing the deep reddish-brown patina and tight grain structure
Where Can I Find the Maker’s Mark or Label?
Here is the frustrating reality for appraisers: Duncan Phyfe rarely signed his work.
Unlike modern manufacturers, cabinetmakers of the early 1800s didn’t brand every piece. Occasionally, you might find a paper label glued to the underside of a table or the inside of a drawer, but these have often dried up and fallen off over the last 200 years.
If you do see a brand stamped “Duncan Phyfe” into the wood, proceed with caution. This often indicates a company manufacturing in the Phyfe style during the 20th century, rather than the master himself.
Authentication often comes down to: 1. Provenance: A documented history of ownership. 2. Construction: Hand-cut dovetails and hand-threaded screws. 3. Secondary Woods: The use of ash, poplar, or pine for the hidden interior parts.
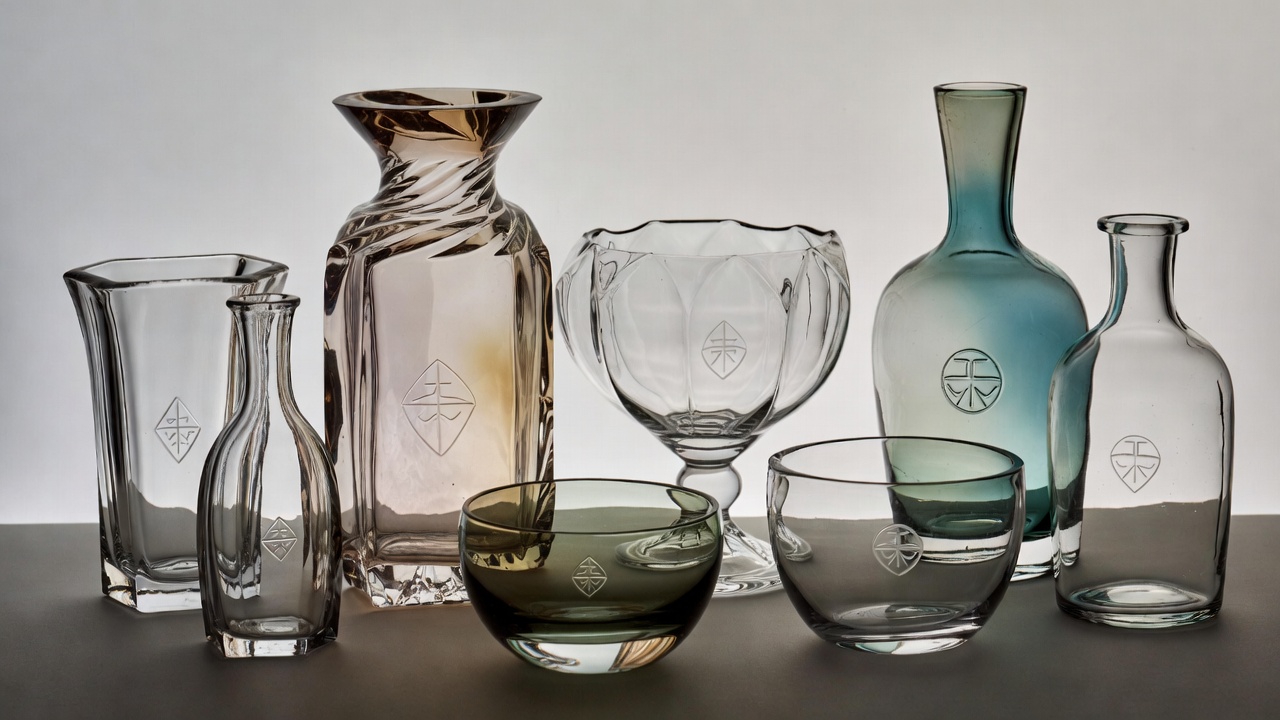
That beautiful glass vase sitting on your shelf could be a valuable piece of art glass worth thousands – or a modern reproduction worth very little. The difference often comes down to understanding the marks, signatures, and identifying features that distinguish genuine antique glass.
Unlike pottery or silver, glass marks can be subtle, hidden, or even absent entirely. Many valuable pieces were never marked at all. This makes antique glass identification both challenging and rewarding – once you know what to look for, you’ll spot treasures others miss.
This comprehensive guide will teach you how to identify marks on antique glass from the world’s most prestigious makers, from Lalique to Tiffany, Steuben to Baccarat.
Why Glass Marks Are Different
Glass marks present unique challenges:
Not Always Present: Many fine glass pieces were never marked, especially before the 20th century.
Hard to See: Glass marks can be nearly invisible – acid-etched, lightly engraved, or molded into the glass.
Easily Faked: Signatures can be added to unmarked pieces fraudulently.
Wear and Damage: Marks on glass can be scratched, worn, or ground off.
Paper Labels: Many pieces had only paper labels, now long lost.
Despite these challenges, understanding glass marks is essential for authentication and valuation.
Types of Glass Marks
Glass marks fall into several categories:
Molded Marks
Raised or recessed letters/symbols in the glass
Created when glass was formed in mold
Cannot be added later (good authentication)
Often on base or hidden areas
Acid-Etched Marks
Frosted/matte appearance
Applied with acid-resistant stencil
Common on French art glass
Can be felt as slightly textured
Engraved Marks
Cut into glass surface with wheel or point
Artist signatures often engraved
Can be examined under magnification
Harder to fake convincingly
Painted/Enameled Marks
Applied as decoration
Can wear off over time
Period-appropriate style important
Some factories used specific colors
Paper Labels
Often lost over time
Very valuable when present
Style indicates period
Reproductions exist
Pontil Marks
Not a “mark” but an identifying feature
Rough or polished area where glass was attached to pontil rod
Style indicates age and quality
Ground and polished = higher quality
French Art Glass Marks
French art glass represents some of the most valuable and collectible pieces.
Lalique
René Lalique (1860-1945) created some of the most recognizable art glass.
Daum Frères (Daum Nancy) produced exceptional art glass.
Marks:
“DAUM NANCY” with cross of Lorraine (✚)
“Daum Nancy France”
Often acid-etched or engraved
Cross of Lorraine is key identifier
Periods:
Art Nouveau (1890s-1914): highest values
Art Deco (1920s-1930s): very collectible
Post-WWII: modern production
Authentication:
Cross of Lorraine should be present
Quality of decoration
Period-appropriate techniques
Signature style matches period
Other French Makers
Baccarat:
Circular acid stamp
“BACCARAT” text
Paper labels (often lost)
Modern: acid-etched “BACCARAT FRANCE”
Saint-Louis:
“ST. LOUIS” or “St Louis”
Paper labels
Acid stamps on modern pieces
Schneider/Le Verre Français:
“SCHNEIDER”
“LE VERRE FRANÇAIS” or “CHARDER”
Often engraved
Art Deco period most valuable
American Art Glass Marks
Tiffany
Louis Comfort Tiffany (1848-1933) created America’s most famous art glass.
Mark Types:
Favrile Glass:
“L.C.T.” (Louis Comfort Tiffany)
“L.C. Tiffany”
“L.C. Tiffany Favrile”
“Tiffany Favrile”
Often engraved on base
Tiffany Studios (Lamps & Decorative):
“TIFFANY STUDIOS NEW YORK”
Model numbers
“Tiffany Glass & Decorating Company” (early)
Mark Locations:
Base of vases
Edge of lamp shades
On metal fittings
Numbering System: Numbers on Tiffany glass indicate:
Production sequence
Sometimes prefixed with letters
Can help authenticate and date
Authentication:
Quality of iridescence
Weight and feel of glass
Correct numbering format
Period-appropriate techniques
Provenance when possible
Red Flags:
Modern copies exist
Signatures can be added
Check quality, not just mark
“Too good” condition suspicious
Steuben
Steuben Glass Works (1903-2011) produced fine American glass.
Mark Evolution:
Period
Marks
Early (1903-1932)
Fleur-de-lis, “STEUBEN” acid stamp
Carder Period
“AURENE” for aurene glass
Later (1933-2011)
“STEUBEN” script or block
Modern
Engraved “STEUBEN”
Frederick Carder Era (1903-1933):
Most collectible period
“AURENE” marks on aurene glass
Fleur-de-lis symbol
Various color names marked
Later Steuben:
Clear crystal focus
Engraved signatures
Designer signatures sometimes
High quality, lower values than Carder
Quezal
Quezal Art Glass (1901-1924) made Tiffany-style glass.
Marks:
“QUEZAL” engraved
Sometimes on base
Quality iridescent glass
Often confused with Tiffany
Durand
Durand Art Glass (1924-1931) produced brief but quality production.
Marks:
“DURAND” engraved across pontil
Sometimes with “V” (Victor Durand)
Limited production period
Highly collectible
Other American Makers
Fenton:
“FENTON” in oval (after 1970)
Earlier pieces often unmarked
Paper labels
Logo evolved over time
Imperial:
“IG” or “IMPERIAL”
Various marks by period
Cross marks
Cambridge:
“C” in triangle
“NEAR CUT”
Paper labels
Heisey:
“H” in diamond
Distinctive and consistent
Highly collectible
Fostoria:
Often unmarked
Paper labels
“Fostoria” acid stamp (some periods)
European Glass Marks
Bohemian/Czech Glass
Historic glassmaking region with many factories.
Common Marks:
Often unmarked historically
“BOHEMIA” (20th century)
“CZECHOSLOVAKIA” (1918-1992)
“CZECH REPUBLIC” (1993+)
Individual factory marks vary
Moser:
“MOSER” engraved
“MOSER KARLSBAD”
High quality, collectible
Distinctive cutting and engraving
Loetz (Lötz):
Often unmarked
“LOETZ AUSTRIA” (some pieces)
Paper labels
Quality iridescent glass (Tiffany-like)
Attribution often by style
Venetian/Murano Glass
Italian island famous for centuries of glassmaking.
Marks:
Many pieces unmarked
“MURANO” text
“MADE IN ITALY”
Factory-specific labels
Artist signatures (modern)
Major Makers:
Venini (V with VENINI or label)
Barovier & Toso
Seguso
Archimede Seguso (signature)
Authentication Challenges:
Many unmarked pieces
Labels often lost
Modern reproductions common
Style identification important
Scandinavian Glass
Orrefors (Sweden):
“ORREFORS” engraved
Designer signatures
Model numbers
“Of” monogram (some periods)
Kosta Boda (Sweden):
“KOSTA” or “KOSTA BODA”
Artist signatures
“KB” marks
Iittala (Finland):
“IITTALA” text
Designer names
“i” logo (modern)
Holmegaard (Denmark):
“HOLMEGAARD”
Designer signatures
Labels
British Glass
Webb:
“WEBB” or “THOMAS WEBB”
“WEBB CORBETT”
Acid stamp or engraved
Famous for cameo glass
Stevens & Williams:
“S&W” marks
“BRIERLEY”
Paper labels
Whitefriars:
Often unmarked
Paper labels
Distinctive styles identify
Edinburgh/Scottish:
“EDINBURGH CRYSTAL”
Various maker marks
Pressed and Pattern Glass Marks
American Pressed Glass
Identifying Features:
Mold seams visible
Pattern names in marks
Maker marks on base
Major Makers:
Boston & Sandwich: Rarely marked, identify by pattern
Gillinder: “GILLINDER” sometimes
U.S. Glass: “US” marks
Indiana Glass: Various marks
Depression Glass
Mass-produced 1920s-1940s colored glass.
Marks:
Often unmarked
Pattern identification crucial
Some maker marks exist:
Federal Glass: “F” in shield
Anchor Hocking: Anchor symbol
Hazel-Atlas: “H” over “A”
Jeannette: “J” in triangle
Carnival Glass
Iridescent pressed glass (1908-1930s primarily).
Identification:
Molded patterns key
Maker identification by pattern
Northwood: “N” in circle (most valuable)
Fenton: Often unmarked early
Imperial: Iron cross, “IG”
Millersburg: No mark, identify by pattern
How to Examine Glass Marks
Equipment
Basic:
Good light source
Magnifying glass
Black light (UV) – reveals repairs, some signatures
Advanced:
Jeweler’s loupe (10x)
LED flashlight
UV flashlight
Camera with macro
Examination Process
Step 1: Overall Assessment
Quality of glass
Weight and feel
Style and period
Condition
Step 2: Locate Marks
Turn piece over, examine base
Check inside rim
Look at pontil area
Examine decorative elements
Check for paper label residue
Step 3: Identify Mark Type
Molded, etched, or engraved?
How was it applied?
Period-appropriate technique?
Step 4: Document
Photograph marks clearly
Note location and style
Record any numbers
Step 5: Research Use the Antique Identifier app for instant identification, or consult reference books and online databases.
Authentication Red Flags
Watch for these warning signs:
Signature Issues
Too Crisp: Old signatures show wear; brand-new looking marks on “antique” glass are suspicious.
Wrong Style: Signature style should match the period claimed.
Wrong Location: Marks in unusual places warrant scrutiny.
Added Later: Signatures can be engraved onto unmarked pieces – compare to known authentic examples.
Quality Mismatches
Mark vs. Quality: A Tiffany signature on mediocre quality glass is suspicious.
Style vs. Mark: A modern style piece with antique marks doesn’t compute.
Condition vs. Age: Perfect condition on supposedly century-old glass raises questions.
Common Fakes
Tiffany: Most commonly faked American art glass Lalique: “R. Lalique” marks added to post-1945 pieces Gallé: Signatures added to unmarked cameo glass Carnival glass: Fake Northwood “N” marks
Many valuable glass pieces are unmarked. Identify by style, quality, technique, and comparison to marked examples. The Antique Identifier app can help identify pieces by their overall appearance, not just marks.
Can glass marks be faked?
Yes, especially on valuable makers like Tiffany and Lalique. Signatures can be engraved onto unmarked pieces. Always evaluate quality, style, and technique alongside marks.
Why do some Lalique pieces say “R. Lalique” and others just “Lalique”?
“R. LALIQUE” indicates pieces made during René Lalique’s lifetime (died 1945). After his death, the “R” was dropped. Pre-1945 pieces are generally more valuable.
Is unsigned glass worthless?
Absolutely not. Many valuable antique pieces were never signed. Quality, rarity, and condition matter more than marks. Some unsigned pieces are museum quality.
What does a star after Gallé’s signature mean?
A star (★) after the Gallé signature indicates the piece was made after Émile Gallé’s death in 1904 but before the factory closed in 1914. Still valuable, but slightly less than lifetime pieces.
Conclusion
Antique glass marks require more detective work than pottery or silver marks, but understanding them opens doors to identifying valuable pieces that others overlook. From Lalique’s elegant etchings to Tiffany’s engraved signatures, each mark tells a story of origin, age, and authenticity.
Remember that many fine glass pieces are unmarked – style, quality, and technique matter as much as marks. Use tools like the Antique Identifier app to help identify both marked and unmarked pieces, and always evaluate the whole picture.
That tiny stamp on your silver candlestick holds centuries of information – if you know how to read it. Silver hallmarks are one of the oldest and most reliable marking systems in the antique world, dating back over 700 years in Britain alone.
Understanding silver hallmarks transforms you from a casual observer to an informed collector. These small marks tell you exactly when a piece was made, where it was assayed, who made it, and whether it’s genuine sterling or merely silverplate. This comprehensive guide will teach you to decode silver hallmarks like a professional.
Why Silver Hallmarks Matter
Silver hallmarks are uniquely valuable because:
Legal Requirement: Unlike pottery marks, silver hallmarks were legally mandated in many countries. This means genuine antique silver SHOULD be marked.
Precise Dating: The hallmark system allows dating to the exact year in many cases.
Authentication: Proper hallmarks help distinguish sterling from plate, genuine from fake.
Origin Identification: Marks reveal country, city, and often the specific silversmith.
Value Impact: Properly hallmarked silver from notable makers commands significant premiums.
Understanding Silver Purity
Before examining hallmarks, understand what they’re certifying:
Silver Standards
Standard
Purity
Common Names
Britannia
95.8%
.958, Britannia silver
Sterling
92.5%
.925, Sterling silver
European
80-90%
.800, .830, .835, .900
Coin
90%
.900, Coin silver
German
80%
.800, German silver (note: “German silver” can also mean nickel silver with NO silver)
Important: “German silver,” “nickel silver,” and “alpaca” contain NO actual silver – they’re copper-nickel alloys.
British Silver Hallmarks
Britain has the oldest and most comprehensive hallmarking system, dating from 1300.
The Five Standard Marks
A complete British hallmark contains up to five marks:
1. Maker’s Mark (Sponsor’s Mark)
Initials of the silversmith or company
In a shaped shield (varies by period)
Registered with the assay office
Helps identify valuable makers
2. Standard Mark (Purity Mark)
Indicates silver content
Lion passant (walking lion) = Sterling (.925)
Lion’s head erased = Britannia (.958)
Required since 1544
3. Assay Office Mark (Town Mark)
Shows where silver was tested
Each city has unique symbol
Critical for identification
Symbol
City
Leopard’s head
London
Anchor
Birmingham
Crown
Sheffield
Castle
Edinburgh
Harp crowned
Dublin
Rose
York (historical)
Three wheat sheaves
Chester (historical)
4. Date Letter
Single letter indicates year
Cycles through alphabet
Shield shape changes each cycle
Font style changes each cycle
Requires reference chart to decode
5. Duty Mark (1784-1890)
Sovereign’s head in profile
Indicates duty/tax paid
Removed in 1890
Helps narrow dating
Reading British Date Letters
The date letter system is precise but complex:
How It Works:
Each assay office uses letters A-Z (usually excluding J)
Letter style and shield shape change each cycle
20-25 year cycles
Different offices started cycles at different times
Example – London:
Gothic lowercase in plain shield = 1756-1775
Roman capitals in shield = 1776-1795
And so on through multiple cycles
Pro Tip: The Antique Identifier app can decode British date letters instantly from a photo – no reference charts needed.
British Hallmarks by Period
Medieval (1300-1544)
Leopard’s head only (London)
Date letters from 1478
Maker’s marks from 1363
Tudor-Stuart (1544-1696)
Lion passant added 1544
Consistent marking system established
Britannia Period (1697-1720)
Higher standard required
Lion’s head erased mark
Figure of Britannia
Different maker’s mark style (first two letters of surname)
Georgian (1720-1837)
Return to sterling standard option
Duty mark added 1784
Sovereign’s head indicates period
Victorian (1837-1901)
Queen Victoria’s head as duty mark
Duty mark removed 1890
Consistent marking
Modern (1901-Present)
Various monarchs’ heads (when used)
Date letter system continues
Additional marks for imported silver
Scottish Silver Hallmarks
Scottish silver has its own system:
Edinburgh:
Castle mark (three-towered)
Thistle mark (standard)
Date letters (different cycle than London)
Maker’s marks
Glasgow:
Tree, fish, bell mark
Lion rampant
Date letters 1819-1964
Closed 1964
Irish Silver Hallmarks
Dublin:
Crowned harp (town mark)
Hibernia figure (duty mark, 1730+)
Date letters
Maker’s marks
Cork, Limerick, etc.:
Various local marks
Less systematic
Often valuable for rarity
American Silver Marks
American silver marking is less standardized than British but still informative.
Colonial Period (1650-1776)
Characteristics:
No legal marking requirement
Silversmiths used personal marks
Often just initials
Quality varied
Notable Colonial Makers:
Paul Revere (Boston)
Myer Myers (New York)
Philip Syng Jr. (Philadelphia)
Colonial American silver by known makers commands very high prices.
Federal Period (1776-1840)
Common Marks:
Maker’s name or initials
“COIN” (made from melted coins, .900 silver)
City names sometimes
Eagle marks (patriotic)
Victorian Era (1840-1900)
“Sterling” Marking:
“STERLING” or “925” became common
Required after 1868 for items marked as silver
Major company marks established
Major American Silver Companies:
Company
Typical Marks
Tiffany & Co.
“TIFFANY & CO.”, various date codes
Gorham
Lion, anchor, “G”, “STERLING”
Reed & Barton
Eagle, “R&B”
Wallace
Stag head, “WALLACE”
International
Various subsidiary marks
Kirk
“S. KIRK”, “KIRK STIEFF”
Towle
“T” in shield, “TOWLE”
American Coin Silver
Before sterling standard adoption:
“COIN” Mark:
Made from melted silver coins
.900 silver (90% pure)
Common pre-1868
Still valuable, slightly less than sterling
“PURE COIN” or “D” (Dollar):
Same meaning as “COIN”
Regional variations
“STANDARD”:
Usually .900 silver
Used by some makers
Continental European Silver Marks
French Silver Marks
French silver uses a complex system of guarantee marks:
Major Marks:
1. Maker’s Mark (Poinçon de Maître)
Initials with symbol
In lozenge (diamond) shape
Registered with guild
2. Charge Mark (Poinçon de Charge)
Indicates tax paid when work began
Various symbols by period and region
3. Discharge Mark (Poinçon de Décharge)
Tax paid when completed
Small marks, often worn
4. Standard Mark (Titre)
Minerva head = .950 (1st standard)
Various marks for lower standards
Revolutionary Period (1789-1797):
Old system disrupted
Various transitional marks
Modern French Marks (1838+):
Minerva head in octagonal frame = .950
Numbers indicate department
Owl mark = imported silver
German Silver Marks
Pre-Unification (Before 1871):
City marks varied widely
Guild marks
Quality marks
After 1871:
Crescent and crown = .800+
“800” “835” “925” numbers common
Maker’s marks in various shapes
Common Standards:
800 (80% – most common German standard)
835 (83.5%)
925 (sterling, less common)
Dutch Silver Marks
Historical System:
City marks (keys for The Hague, etc.)
Date letters
Maker’s marks
Lion marks for standard
Modern System:
Minerva head type marks
Numeric standards
Russian Silver Marks
Imperial Period (to 1917):
Kokoshnik (woman’s headdress) mark
City marks (St. Petersburg, Moscow)
Assay master’s initials
Zolotnik standards (84, 88, 91 = different purities)
84 Zolotnik = 875/1000 (87.5% silver) – most common Russian standard
Soviet/Modern:
Different marking system
Star with hammer and sickle (Soviet)
Various modern Russian marks
Scandinavian Silver Marks
Swedish:
Three crowns (national symbol)
City marks
Date letters
“S” marks for different standards
Norwegian:
830S common standard
City marks
Maker’s marks
Danish:
Three towers (Copenhagen)
Various provincial marks
“830S” “925S” standards
Georg Jensen marks highly collectible
Silverplate Marks
Don’t confuse silverplate with sterling. Silverplate is a thin layer of silver over base metal.
Common Silverplate Marks
Mark
Meaning
EPNS
Electroplated Nickel Silver
EPBM
Electroplated Britannia Metal
EP
Electroplated
A1, AA, AAA
Quality grades (more A’s = thicker plate)
Quadruple Plate
Heavy plating
Silver Plated
Self-explanatory
Sheffield Plate
Fused plate technique (pre-1840)
Silver on Copper
Description of construction
Sheffield Plate vs. Electroplate
Sheffield Plate (1743-c.1840):
Silver fused to copper by heat
Edges show copper “bleeding”
Earlier, collectible technique
Higher value than electroplate
Electroplate (1840+):
Silver deposited by electricity
More uniform coating
Lower value
Still being produced
Value Comparison
Type
Relative Value
Sterling silver
100% (baseline)
Sheffield plate
10-30% of sterling
Quality electroplate
5-15% of sterling
Common electroplate
1-5% of sterling
Warning: Some sellers deliberately obscure the “EP” in EPNS or describe silverplate as simply “silver.” Always check marks carefully.
How to Examine Silver Hallmarks
Equipment Needed
Basic:
Good lighting
Magnifying glass (10x loupe ideal)
Clean, soft cloth
Advanced:
Jeweler’s loupe (10x-20x)
Portable microscope
Good camera with macro capability
Examination Process
Step 1: Clean the Area
Gently clean around marks
Don’t polish aggressively (can wear marks)
Good lighting essential
Step 2: Locate All Marks Common locations:
Bottom/base
Inside rim
On handles
Near hinges
On removable parts
Scattered across piece (British often grouped)
Step 3: Document Each Mark
Photograph clearly
Note position
Sketch if necessary
Record any text
Step 4: Identify Mark Types
Which is maker’s mark?
Which is standard mark?
Is there a date letter?
Any town/assay mark?
Step 5: Research and Decode Use the Antique Identifier app for instant identification, or consult reference books and online databases.
Common Silver Hallmark Questions
Is It Sterling or Plate?
Signs of Sterling:
“STERLING” or “925” mark
Lion passant (British)
Consistent hallmark set
Heavy weight for size
Tarnish pattern
Signs of Plate:
“EP,” “EPNS,” “EPBM” marks
“A1,” “AA” quality marks
“Silver Plated” text
Copper showing at wear points
Lighter weight
Why Are Marks Worn or Partial?
Causes:
Years of polishing
Heavy use
Deliberate removal (rarely)
Poor original striking
Location on high-wear area
Interpretation:
Partial marks still provide clues
Consistent wear suggests genuineness
Very clear marks on “old” piece = suspicious
What If There Are No Marks?
Possible Explanations:
Very early piece (pre-marking laws)
Provincial/rural maker
Marks worn away completely
Deliberate removal (tax evasion, historically)
Not actually silver
Modern reproduction
Testing Options:
Acid test (professional)
XRF analysis
Specific gravity test
Magnet test (silver not magnetic)
Can Hallmarks Be Faked?
Yes, but:
Quality fakes are difficult
Usually detectable under magnification
Style must match period
Multiple marks harder to fake
Inconsistencies reveal fakes
Red Flags:
Marks too crisp for claimed age
Wrong style marks for period
Marks don’t align/match
Single mark when multiples expected
“Duty dodger” conversions (marks added from scraps)
Start with the Antique Identifier app for instant AI-powered identification. Then cross-reference with hallmark guides. For valuable pieces, consult auction house specialists.
What does 925 mean on silver?
925 indicates sterling silver – 92.5% pure silver. This is the standard for quality silver in most countries.
How can I tell if silver is real or plated?
Look for marks: “STERLING” or “925” indicates solid silver. “EPNS,” “EP,” or “A1” indicates silverplate. Weight is also a clue – sterling is heavier than plate for similar items.
Are unmarked pieces silver?
Possibly. Very old pieces, provincial pieces, or heavily worn pieces may lack visible marks. Professional testing (acid test, XRF) can determine silver content.
Why do British pieces have so many marks?
British law required multiple marks: maker’s mark, standard mark (purity), assay office mark (location), and date letter (year). Duty marks were also required 1784-1890.
Conclusion
Silver hallmarks are your key to unlocking the history, origin, and value of antique silver. The British system offers precise dating to the exact year; American marks identify makers and eras; Continental marks reveal origin and quality.
While mastering all hallmark systems takes time, understanding the basics transforms your ability to evaluate silver. Start with the fundamentals – sterling vs. plate, major assay marks, the concept of date letters – and build from there.
Use technology like the Antique Identifier app to accelerate your learning, and remember that hallmarks are evidence to be evaluated alongside style, weight, construction, and condition.
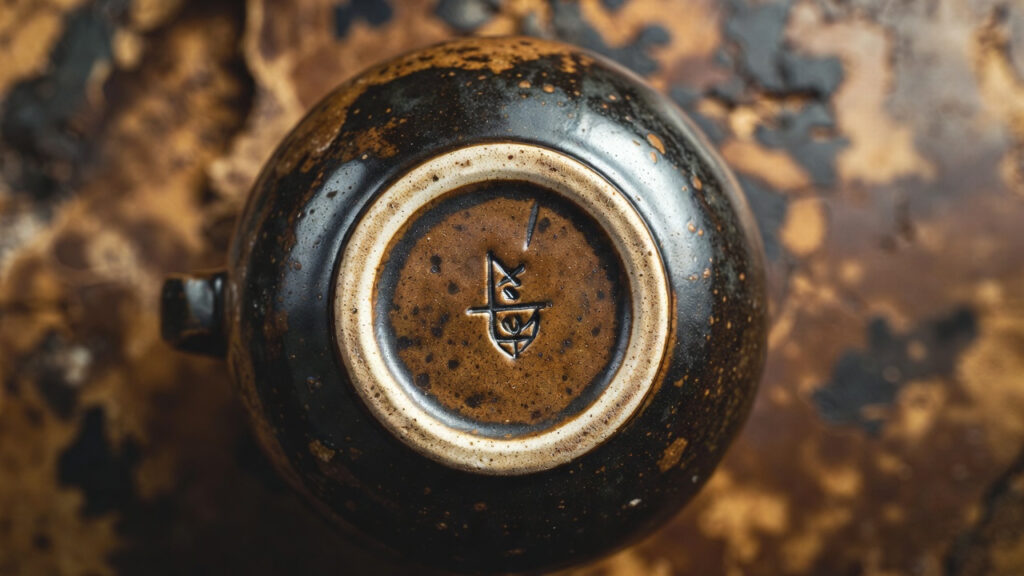
You’ve turned over a piece of pottery and found a mysterious mark on the bottom. It could be a factory stamp, a pattern number, an artist’s signature, or something else entirely. Understanding what that mark means could be the difference between a $50 flea market find and a $5,000 treasure.
Antique pottery marks identification is one of the most valuable skills any collector can develop. These small stamps, symbols, and signatures reveal the maker, origin, date, and often the specific artist who decorated a piece. This comprehensive guide will teach you how to identify and decode pottery marks from major factories around the world.
Why Pottery Marks Matter
Antique Identifier
Before diving into identification, understand why marks are so important:
Value Impact: A piece of unmarked blue and white pottery might sell for $100. The same piece with a genuine Meissen crossed swords mark could be worth $10,000 or more.
Authentication: Marks help distinguish genuine antiques from reproductions and fakes.
Dating: Many factories used systematic marking that allows precise dating.
Attribution: Marks can identify not just the factory but the specific decorator or artist.
Provenance: Some marks indicate royal commissions or special orders.
Where to Find Pottery Marks
Before you can identify a mark, you need to find it:
Primary Locations:
Base/bottom (most common – 90% of marks)
Inside foot rim
Recessed areas on bottom
Secondary Locations:
Inside lids
Back of figurines
Under handles
Inside hollow pieces
Hidden decorative areas
Mark Types You’ll Encounter:
Impressed: Stamped into wet clay before firing
Incised: Scratched into clay
Underglaze: Painted/printed under glaze (permanent)
Overglaze: Applied over glaze (can wear off)
Transfer printed: Mechanically applied designs
Paper labels: Often lost but valuable when present
Pro Tip: The Antique Identifier app can photograph and identify pottery marks instantly. Simply snap a photo of the mark and get identification within seconds.
English Pottery Marks
England produced some of the world’s finest ceramics. Here are the major factories and their marks:
Wedgwood (1759-Present)
One of the most collected English pottery makers.
Key Marks:
“WEDGWOOD” impressed (note: NOT “Wedgewood” with extra ‘e’)
“WEDGWOOD & BENTLEY” (1769-1780, very early, valuable)
“WEDGWOOD ETRURIA” (some periods)
“WEDGWOOD ENGLAND” (1891+)
“WEDGWOOD MADE IN ENGLAND” (1908+)
Date Coding System (1860-1930): Three-letter codes indicate month, potter, and year:
First letter = month (J=January, F=February, etc.)
Second letter = potter’s mark
Third letter = year (cycles through alphabet)
Warning Signs of Fakes:
“Wedgewood” spelling (extra ‘e’)
Poor quality impressed marks
Incorrect date letter combinations
Modern “microwave safe” text
Royal Doulton (1815-Present)
Evolution of Marks:
“Doulton Lambeth” (1858-1956)
“Doulton Burslem” (1882+)
“Royal Doulton” (1901+, after royal warrant)
The Lion and Crown Mark:
Lion standing on crown = standard mark
Added “ENGLAND” (1891+)
Added “MADE IN ENGLAND” (1930s+)
Special Marks:
“Flambe” for flambe glazes
“Sung” for sung ware
Artist monograms (valuable addition)
Series ware backstamps
Date Coding: Numbers near the mark often indicate year of production.
Minton (1793-Present)
Mark Evolution:
Early pieces often unmarked or “M” only
“MINTON” impressed (various periods)
“MINTONS” with ‘s’ (1873+)
Globe mark (1863-1872)
Crown and globe (1873+)
Year Cyphers (1842-1942): Minton used unique symbols for each year – requires reference chart to decode.
Decorator Marks: Many pieces have additional artist cyphers indicating the painter.
Spode/Copeland (1770-Present)
Mark Progression:
“SPODE” impressed or printed (1770-1833)
“COPELAND & GARRETT” (1833-1847)
“COPELAND” alone (1847-1867)
“W.T. COPELAND” (1867-1890s)
“SPODE” revived (1970+)
Pattern Numbers: Spode used extensive pattern numbering – these help identify and date pieces.
Royal Worcester (1751-Present)
Key Marks:
Various early marks (1751-1783)
Crescent mark (early period)
Crown and circle (standard mark)
“ROYAL WORCESTER ENGLAND”
Date Dots System: Dots arranged around the mark indicate year – complex but precise dating possible.
Color of Mark:
Puce/purple = earlier pieces
Green = later 19th century
Black = 20th century
Other Important English Factories
Royal Crown Derby:
Crown over “D” cipher
“ROYAL CROWN DERBY”
Date codes on base
Coalport:
Various marks including “CBD”
“COALPORT ENGLAND”
“AD 1750” often added (founding date, not piece date)
Mason’s Ironstone:
“MASON’S PATENT IRONSTONE CHINA”
Crown marks
Various printed marks
Continental European Pottery Marks
Meissen (Germany, 1710-Present)
The most famous porcelain mark in the world – and the most faked.
The Crossed Swords:
Two crossed swords in underglaze blue
Style evolved over 300+ years
Position, angle, and details indicate period
Period Identification:
Period
Sword Characteristics
1720-1730
Simple, almost straight
1730-1763
Curved guards, dot between
1763-1774
Dot between hilts
1774-1814
Star between hilts (Marcolini)
1814-1833
Plain swords again
1833-1924
Curved, with “pommels”
1924+
More stylized
Additional Marks:
Model numbers (incised)
Decorator numbers
Quality marks (scratches through swords = second quality)
Fake Detection:
Swords too perfect or too crude
Wrong blue color
Marks don’t match piece style
Swords applied overglaze (should be underglaze)
Sèvres (France, 1756-Present)
Royal Period Marks (1756-1793):
Interlaced L’s (Louis XV/XVI cipher)
Date letter in center
Decorator marks around
Date Letters: A=1753, B=1754… through alphabet, then doubled (AA=1778, etc.)
Later Marks:
Various Republic marks (1793-1804)
Imperial marks (Napoleon period)
“S” in various forms
“SÈVRES” text marks (19th-20th century)
Authentication Challenge: Sèvres is heavily faked. The mark alone is never sufficient – examine paste, decoration quality, and style.
Royal Copenhagen (Denmark, 1775-Present)
The Three Wavy Lines:
Represent Denmark’s three waterways
Blue underglaze
Very consistent across periods
Additional Marks:
Crown (some periods)
“DENMARK” (for export)
“ROYAL COPENHAGEN”
Pattern numbers
Artist initials
Dating: Numeric codes indicate year – factory provides reference guides.
Other European Factories
KPM Berlin (Germany):
Blue scepter mark
“KPM” with orb
Various eagle marks
Herend (Hungary):
Hungarian coat of arms
“HEREND” text
Pattern names
Rosenthal (Germany):
Crown mark
“ROSENTHAL” text
Various subsidiary marks
Limoges (France): Note: “Limoges” is a region, not a single factory.
Many factories used “LIMOGES”
Look for specific factory marks
“T&V” = Tressemann & Vogt
“GDA” = Gerard, Dufraisseix, and Abbot
“ELITE” “CORONET” etc.
American Pottery Marks
Rookwood (Cincinnati, 1880-1967)
The RP Monogram:
Reversed “R” and “P” combined
Flames added below indicate year
1 flame = 1886, 2 flames = 1887… up to 14 flames = 1900
After 1900: Roman numerals added below flames indicate years after 1900. Example: Flames + XIV = 1914
Additional Marks:
Shape numbers (incised)
Size letters
Clay type marks
Artist cyphers (very collectible)
Notable Artists: Pieces signed by famous Rookwood artists command significant premiums.
Roseville (Ohio, 1890-1954)
Mark Evolution:
“RPCo” (Roseville Pottery Company, early)
“Rozane” (art pottery line)
“Roseville” in script (most common)
“Rv” impressed
“ROSEVILLE U.S.A.” (later)
Pattern Identification: Shape numbers help identify patterns – many reference guides available.
Paper Labels: Original paper labels significantly increase value but are often missing.
Weller (Ohio, 1872-1948)
Various Marks:
“WELLER” in block letters
“Weller” in script
“WELLER POTTERY”
Line-specific marks (Louwelsa, Dickensware, etc.)
Artist Signatures: Hand-decorated pieces often have artist signatures – these add value.
Hull (Ohio, 1905-1986)
Mark Styles:
“HULL” impressed
“Hull Art” (art pottery lines)
“Hull USA”
Pattern numbers and letters
Dating Tip: Pre-1950 pieces often more valuable than later production.
McCoy (Ohio, 1848-1990)
Common Marks:
“McCOY” impressed
“McCOY USA”
“NM” (Nelson McCoy)
“BRUSH McCOY” (earlier related company)
Caution: Many reproductions exist. Look for quality of molding and glaze.
Red Wing (Minnesota, 1878-1967)
Mark Types:
“RED WING” text
Wing logo
“RED WING USA”
Various stoneware marks
Stoneware vs. Art Pottery: Different lines had different marking systems.
Asian Pottery Marks
Chinese Porcelain Marks
Reign Marks: Six-character marks reading (top to bottom, right to left):
Dynasty name (e.g., “Da Qing” = Great Qing)
Emperor’s reign name
“Nian Zhi” = “made in the reign of”
Major Reign Marks:
Emperor
Reign
Dates
Kangxi
康熙
1662-1722
Yongzheng
雍正
1723-1735
Qianlong
乾隆
1736-1795
Jiaqing
嘉慶
1796-1820
Daoguang
道光
1821-1850
Guangxu
光緒
1875-1908
Important Warning: Chinese reign marks are often “apocryphal” – later pieces marked with earlier reign marks as homage. A Kangxi mark does NOT guarantee Kangxi period manufacture. Always evaluate the piece itself.
Other Chinese Marks:
Hall marks (private commissions)
Potter’s marks
Auspicious symbols
Export marks
Japanese Pottery Marks
Country of Origin:
“Nippon” = 1891-1921 (for US export)
“Japan” = 1921+ (for US export)
“Made in Japan” = post-1921
Major Japanese Marks:
Satsuma:
Circle with cross
“Satsuma” in various scripts
Artist signatures
Imari:
Various factory marks
Often unmarked
Style identification important
Noritake:
“M” in wreath (Morimura)
“Noritake” text
Various backstamps by period
Kutani:
“Kutani” in characters
Various artist marks
Quality varies widely
How to Research Unknown Pottery Marks
When you encounter an unfamiliar mark, follow this process:
Start with the Antique Identifier app for instant AI-powered identification. Then cross-reference with mark encyclopedias and online databases. For valuable pieces, consult specialists.
Can pottery marks be faked?
Yes, commonly. Valuable factories like Meissen, Sèvres, and Wedgwood are frequently faked. Always evaluate the piece itself – quality, style, materials – not just the mark.
What if my pottery has no marks?
Many genuine antique pieces are unmarked. Early pieces, seconds, and some factories didn’t always mark. Use style, technique, and materials for identification. Unmarked pieces can still be valuable.
Are pieces marked “Made in China” antiques?
Items marked “Made in China” are typically post-1949 and usually modern. However, the absence of this mark doesn’t guarantee age – many reproductions deliberately avoid such markings.
Why do some pieces have multiple marks?
Multiple marks might indicate:
Factory mark + decorator mark
Retailer mark added
Date code + factory mark
Quality grade + identification
Multiple firing marks
Each provides different information.
Conclusion
Antique pottery marks identification opens a window into the history, origin, and value of ceramic pieces. While mastering all marks takes years, understanding the basics transforms your ability to evaluate pottery.
Start with factories relevant to your interests, use technology like the Antique Identifier app to accelerate learning, and remember that marks are one piece of evidence among many. The best identifications combine mark knowledge with understanding of styles, techniques, and historical context.
That mysterious stamp on the bottom of your antique could be the key to unlocking its history, origin, and value. Antique marks and symbols are like fingerprints – they tell you who made an item, where it came from, and often when it was produced.
But decoding these marks can feel like learning a foreign language. Strange symbols, faded stamps, and cryptic initials leave many collectors scratching their heads. This comprehensive guide will teach you how to identify and interpret the most common antique marks and symbols, transforming confusing scratches into valuable information.
Why Antique Marks Matter
Understanding marks can dramatically impact your antique experience:
Authentication: Marks help verify an item is genuine, not a reproduction Dating: Many marking systems indicate specific production dates Origin: Marks reveal country, region, and often specific factory Maker Attribution: Identify the craftsman or company behind the piece Value Impact: Correct attribution can multiply value by 10x or more
A piece of porcelain marked “Meissen” with authentic crossed swords is worth exponentially more than an unmarked piece of similar quality. Marks matter.
Where to Find Marks
Before identifying marks, you need to find them. Here’s where to look:
Ceramics and Pottery
Bottom/base (most common)
Inside foot rim
Inside lid
Back of figurines
Hidden surfaces
Furniture
Inside or underneath drawers
Back of case pieces
Under tabletops
On bed rails
Inside cabinet doors
Around locks and hinges
Silver and Metalware
Bottom or base
Inside rim
On handles
Near hinges
On removable parts
Glass
Base/bottom (pontil area)
Inside foot
On applied elements
Molded into glass
Jewelry
Inside rings (shank)
On clasps
Back of pendants
On pin stems
Jump ring attachments
Pro Tip: Use the Antique Identifier app to photograph marks and get instant identification. The AI can recognize thousands of maker’s marks from your photos.
Types of Antique Marks
Marks fall into several categories, each providing different information:
1. Maker’s Marks
Identify who made the item:
Factory Marks: Symbols or names identifying the manufacturer
Wedgwood (impressed “WEDGWOOD”)
Meissen (crossed swords)
Royal Copenhagen (three wavy lines)
Craftsman Marks: Individual maker signatures
Silversmith initials
Furniture maker stamps
Artist signatures on pottery
Designer Marks: Creator of the design (may differ from manufacturer)
2. Date Marks
Indicate when an item was made:
Date Letters: Letters cycling through alphabets by year
English silver hallmarks
Some pottery marks
Date Codes: Numbers or symbols indicating year
Patent dates
Registration marks
Reign Marks: Chinese porcelain emperor marks
3. Origin Marks
Show where an item was made:
Country Marks: Required by import laws
“Made in England”
“France”
“Nippon” (Japan)
City/Region Marks: Specific location
Assay office marks on silver
Regional pottery marks
4. Quality Marks
Indicate material or quality standards:
Precious Metal Marks:
Sterling (925)
Gold karats (14K, 18K)
Platinum (PT, PLAT)
Porcelain Quality:
First quality vs. seconds
Decorator marks
5. Registration/Patent Marks
Legal protection markings:
British Registration Diamond: 1842-1883 Registration Numbers: 1884 onwards Patent Numbers: With searchable dates
Ceramic and Pottery Marks Guide
Ceramics have the most elaborate marking systems. Here’s how to decode them:
English Pottery Marks
Wedgwood
“WEDGWOOD” impressed (not “Wedgewood” – that’s a fake)
Three-letter date codes from 1860
Various impressed and printed marks
Royal Doulton
Lion over crown mark
Date codes in marks
“ROYAL DOULTON” text
Various specialty marks
Minton
Globe mark
Year cyphers (symbols for dates)
“MINTON” or “MINTONS”
Spode/Copeland
“SPODE” impressed or printed
“COPELAND” after 1847
Various printed marks
Royal Worcester
Crown with circle
Date dots system
“ROYAL WORCESTER ENGLAND”
Continental European Marks
Meissen (Germany)
Crossed swords (most famous mark in porcelain)
Position and style of swords indicate date
Many variations over 300+ years
Heavily copied – beware fakes
Sèvres (France)
Interlaced L’s (royal period)
Various republic marks
Date letters in center
Decorator marks
Royal Copenhagen (Denmark)
Three wavy blue lines
Crown above (some periods)
“DENMARK” added for export
KPM Berlin (Germany)
Blue scepter mark
“KPM” with orb
Various forms over time
Limoges (France)
Various factory marks
“LIMOGES FRANCE” common
Many factories used this designation
American Pottery Marks
Rookwood
RP monogram with flames
Number of flames indicates year (1886-1900)
Shape numbers and artist cyphers
Roseville
“Roseville” in various scripts
“Rv” mark
Paper labels (often lost)
Weller
“WELLER” in various styles
Incised, impressed, or stamped
Line names sometimes marked
Hull
“HULL” or “Hull Art”
“USA” often included
Pattern numbers
Asian Ceramics Marks
Chinese Reign Marks Six-character marks reading:
Dynasty name
Emperor’s reign
“Made during the reign of”
Common formats:
Kaishu (regular script)
Zhuanshu (seal script)
In squares or vertical columns
Major Reign Marks:
Kangxi (1662-1722)
Yongzheng (1723-1735)
Qianlong (1736-1795)
Republic period marks
Japanese Marks
“Nippon” (1891-1921)
“Made in Japan” (1921+)
“Japan” alone
Specific factory marks
Artist signatures
Important Note: Many Chinese marks are apocryphal (later pieces marked with earlier reign marks as homage). The mark alone doesn’t guarantee age.
Silver Marks and Hallmarks
Silver marks are among the most systematic and useful for dating.
British Silver Hallmarks
British silver has a regulated hallmark system since 1300. A full hallmark includes:
1. Maker’s Mark
Initials of silversmith
In shaped punch (shield, oval, etc.)
Registered with assay office
2. Standard Mark
Lion passant (walking lion) = sterling (.925)
Lion’s head erased = Britannia standard (.958)
Indicates silver purity
3. Assay Office Mark
Leopard’s head = London
Anchor = Birmingham
Crown = Sheffield
Castle = Edinburgh
Harp = Dublin
4. Date Letter
Letter of alphabet indicates year
Style and shield shape change by cycle
Requires reference chart to decode
5. Duty Mark (1784-1890)
Sovereign’s head profile
Indicates tax paid
American Silver Marks
American silver marking is less standardized:
“Sterling” or “925”
Indicates .925 pure silver
Required after 1868
“Coin”
Made from melted coins (.900 silver)
Common pre-1868
Maker’s Marks
Company names or initials
Major makers: Gorham, Tiffany, Reed & Barton, Wallace, International
Pattern Names
Often stamped on flatware
Help identify and value pieces
European Silver Marks
French Silver
Complex system of guarantee marks
Minerva head = .950 standard
Various maker and tax marks
German Silver
“800” or “835” common (lower than sterling)
“925” for sterling
City and maker marks vary
Dutch Silver
Lion marks
Date letter systems
City marks
Silverplate Marks
Don’t confuse plate with sterling:
Common Silverplate Marks:
EPNS (Electroplated Nickel Silver)
A1 or AA (quality grades)
“Silver Plated” or “Quadruple Plate”
“Sheffield Plate” (historical technique)
“German Silver” (actually no silver – nickel alloy)
Silverplate is worth fraction of sterling. Always check carefully.
Furniture Marks
Furniture marks are less common but highly valuable when found:
Types of Furniture Marks
Stamps (Impressed)
Maker’s name pressed into wood
Common on French furniture (estampille)
Found underneath, inside, or on back
Brands (Burned)
Hot iron marks
Common on American pieces
Often found underneath
Labels (Paper)
Manufacturer labels
Retailer labels
Often partial or missing
Stencils (Painted)
Painted marks
Common on American pieces
May be faded
Chalk/Pencil Marks
Worker’s marks
Shop numbers
May indicate authentic period construction
Important Furniture Makers to Know
American:
Duncan Phyfe (New York)
Goddard-Townsend (Newport)
Philadelphia school makers
Gustav Stickley (Arts & Crafts)
Herter Brothers (Victorian)
British:
Thomas Chippendale
George Hepplewhite
Thomas Sheraton
Gillows of Lancaster
French:
JME (Jurande des Menuisiers-Ébénistes) stamp
Individual ébéniste stamps
Royal inventory marks
French Furniture Marks
From 1743-1791, Paris guild furniture required:
Estampille (Maker’s Stamp)
Ébéniste’s name
Usually found on frame under marble top
Or inside case pieces
JME Stamp
Jurande des Menuisiers-Ébénistes
Guild approval mark
Confirms pre-Revolution origin
Glass Marks
Glass marks can be subtle but revealing:
Types of Glass Marks
Molded Marks
Raised letters in glass
Company names
Patent numbers
Acid-Etched Marks
Frosted appearance
Common on art glass
Lalique, Gallé, Daum
Engraved Marks
Cut into glass surface
Signatures
Decoration marks
Paper Labels
Often lost
Very desirable when present
Major identification help
Important Glass Marks
Lalique
“R. LALIQUE” (pre-1945)
“LALIQUE” (post-1945)
“LALIQUE FRANCE”
Acid-etched or engraved
Steuben
Fleur-de-lis mark
“STEUBEN” acid stamp
Limited editions numbered
Tiffany
“L.C.T.” (Louis Comfort Tiffany)
“Tiffany Studios”
Various forms and periods
Baccarat
Circular stamp
“BACCARAT” or “BACCARAT FRANCE”
Paper labels
Waterford
Acid-etched seahorse
“WATERFORD”
Older pieces may be unmarked
Country of Origin Marks
Import laws created useful dating markers:
United States Requirements
McKinley Tariff Act (1891)
Required “country of origin” marking
Items marked “Germany,” “France,” “England,” etc.
Indicates 1891 or later
“Made in” Requirement (1914)
“Made in [Country]” required
More specific than just country name
Indicates 1914 or later
“Japan” vs. “Nippon”
“Nippon” = 1891-1921
“Japan” or “Made in Japan” = 1921+
Useful dating marker
“Occupied Japan” (1945-1952)
Very specific date range
Collectible category
Valuable identification mark
British Requirements
Items for export to US follow American rules. For British domestic market:
“England” vs. “Made in England”
“England” alone = 1891-1914 for US export
“Made in England” = 1914+ for US export
Domestic pieces may not be marked
German Marks
“Germany” = 1891-1914 or post-1949 “Made in Germany” = 1914+ or post-1949 “West Germany” = 1949-1990 (very specific) “East Germany/DDR” = 1949-1990
Start with AI tools like the Antique Identifier app for instant identification. Then cross-reference with mark dictionaries and online databases. For valuable items, consult specialists.
Can marks be faked?
Yes. Valuable maker’s marks are frequently forged. Always evaluate marks alongside other evidence: appropriate style, construction methods, materials, and wear patterns. If only the mark suggests high value but other factors don’t match, be suspicious.
What if my antique has no marks?
Many genuine antiques are unmarked. This doesn’t mean they’re not valuable or authentic. Use style, construction, materials, and provenance to identify and value unmarked pieces.
Are items marked “Made in China” antiques?
Items marked “Made in China” (or PRC) are typically post-1949 and usually modern. However, pieces marked with reign marks or exported before modern marking laws may be genuinely antique. Context matters.
Why do some marks look worn or partial?
Age, use, cleaning, and handling wear marks over time. Partial marks still provide information. Very crisp, clear marks on supposedly old pieces might actually indicate reproductions.
Conclusion
Antique marks and symbols are powerful tools for identification, dating, and valuation. While mastering all marking systems takes years, understanding the basics transforms your ability to evaluate antiques.
Start with the categories most relevant to your interests, use technology like the Antique Identifier app to accelerate your learning, and always remember that marks are one piece of evidence among many. The best identifications combine mark knowledge with understanding of styles, construction, and materials.
You’ve got an antique item sitting in front of you. Maybe you found it at a garage sale, inherited it from a relative, or discovered it hiding in your own basement. The question burning in your mind: what is this thing actually worth?
Antique item value identification doesn’t have to be complicated or expensive. With the right approach, you can get a reliable estimate of your item’s value in minutes rather than days. This guide will show you quick, practical methods to identify what your antiques are worth – whether you’re at home, at an estate sale, or browsing an antique shop.
The 5-Minute Value Assessment
When you need a quick answer, follow this rapid assessment process:
Step 1: Identify What You Have (1 minute)
Before you can value something, you need to know what it is. Ask yourself:
What type of item is it? (furniture, pottery, silver, etc.)
What era does it appear to be from? (Victorian, Art Deco, Mid-Century)
What country or region? (American, English, French, Asian)
Who made it? (look for marks, signatures, labels)
Quick Identification Tip: Use the Antique Identifier app to snap a photo and get instant identification. The AI recognizes styles, periods, and often specific makers within seconds.
Step 2: Assess Condition (1 minute)
Condition dramatically affects value. Do a quick visual check:
Excellent: No damage, original finish, all parts present Good: Minor wear, small repairs acceptable, mostly original Fair: Noticeable wear or damage, may need restoration Poor: Significant damage, missing parts, needs major work
A piece in excellent condition might be worth 3-4x more than the same item in fair condition.
Step 3: Check for Marks (1 minute)
Look for identifying marks that can reveal maker and origin:
Where to Look:
Bottom or underside
Inside drawers
Back of piece
On hardware or fittings
Around hinges and locks
What to Look For:
Maker’s stamps or signatures
Country of origin marks
Patent numbers or dates
Retailer labels
Impressed or painted marks
Photograph any marks you find – they’re crucial for accurate valuation.
Step 4: Quick Value Research (2 minutes)
Now get a ballpark value:
Fastest Method: Use Antique Identifier app for instant AI-powered valuation based on your photo.
Alternative Method:
Open eBay on your phone
Search for your item type
Filter by “Sold Items”
Find similar pieces
Note the actual sale prices
You now have a preliminary value range in under 5 minutes.
Understanding Value Types
Before diving deeper, understand that “value” means different things:
Value Type
What It Means
When Used
Retail Value
Price at antique shop
Insurance, replacement
Auction Value
What it sells for at auction
Selling at auction
Fair Market Value
Price between willing parties
Estates, donations
Quick Sale Value
Fast cash price
Need to sell immediately
Typical Relationships:
Retail = highest (100%)
Auction = 60-80% of retail
Fair Market = 50-70% of retail
Quick Sale = 25-40% of retail
When someone asks “what’s it worth?” – clarify which type of value they mean.
Detailed Value Identification by Category
Different antique categories require different approaches. Here’s how to value the most common types:
Furniture Value Identification
Key Value Factors:
Period authenticity – Is it genuinely from the claimed era?
Original condition – Original finish worth 2-3x refinished
Quality of craftsmanship – Fine details vs. mass production
Wood type – Mahogany, walnut more valuable than pine
Maker attribution – Known makers command premiums
Regional origin – Philadelphia, Newport pieces more valuable
Form rarity – Unusual forms worth more than common
Signs of potentially valuable antiques include: quality craftsmanship, known maker marks, original condition, unusual form, documented history, and current market demand. Use the methods in this guide to assess these factors.
What’s the fastest way to identify antique value?
The Antique Identifier app provides instant AI-powered identification and valuation from a photo. For free alternatives, eBay sold listings give quick market data.
Should I clean my antique before getting it valued?
Generally no. Cleaning can damage patina, remove evidence of age, and reduce value. Light dusting is fine, but avoid polishing, scrubbing, or using chemicals.
Why do different sources give different values?
Values vary based on: value type (retail vs. auction), condition assessment differences, comparable selection, and market timing. This is normal – use multiple sources and expect a range.
When should I get a professional appraisal?
Get professional appraisal when: item appears worth $5,000+, you need insurance documentation, legal/tax purposes require it, authentication is uncertain, or you’re considering major auction sale.
Conclusion
Antique item value identification is a skill anyone can develop. Start with quick methods – AI apps and eBay sold searches – to get ballpark values fast. For more significant items, invest time in thorough research using multiple sources.
Remember: value is ultimately what someone will pay. Use the methods in this guide to arrive at realistic expectations, and you’ll make better decisions whether you’re buying, selling, or simply curious about what your antiques are worth.
The Antique Identifier app makes the process faster than ever – try it free and see how quickly you can identify and value your antiques.
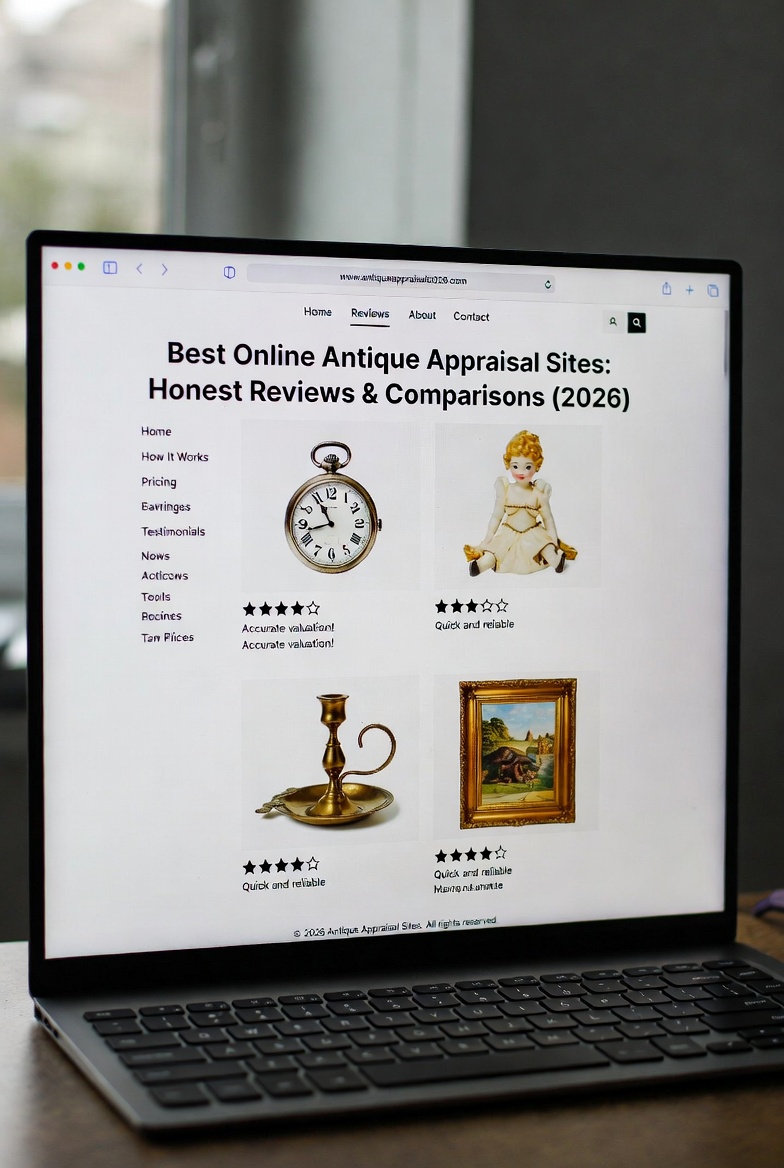
With so many websites claiming to appraise your antiques online, how do you know which ones are actually worth your time? Some deliver accurate valuations backed by real expertise, while others are little more than lead generation forms that waste your time.
We’ve tested and reviewed the best online antique appraisal sites available in 2026, examining everything from accuracy and speed to cost and user experience. Whether you want a quick estimate or a detailed professional appraisal, this honest comparison will help you choose the right service for your needs.
How We Evaluated These Sites
Before diving into the reviews, here’s what we looked for:
Accuracy: How close are valuations to actual market values? Speed: How quickly do you get results? Cost: What’s the real price (including hidden fees)? Expertise: Who’s doing the appraisals? User Experience: How easy is the process? Coverage: What types of antiques can they appraise?
We submitted identical items to multiple services and compared results to recent auction sales. Here’s what we found.
Quick Comparison Chart
Service
Best For
Speed
Cost
Accuracy
Rating
Antique Identifier App
Instant valuations
Seconds
Free trial
⭐⭐⭐⭐
4.8/5
Heritage Auctions
High-value items
3-5 days
Free
⭐⭐⭐⭐⭐
4.7/5
Mearto
Written appraisals
24-48 hrs
$15-25
⭐⭐⭐⭐
4.5/5
ValueMyStuff
Certified appraisals
24-48 hrs
$10-28
⭐⭐⭐⭐
4.4/5
WorthPoint
Self-research
Instant
$30/mo
⭐⭐⭐⭐
4.3/5
JustAnswer Antiques
Quick expert answers
Hours
$5-50
⭐⭐⭐
4.0/5
Dr. Lori
Celebrity appraiser
Varies
$59+
⭐⭐⭐
3.8/5
Free community sites
Casual opinions
Varies
Free
⭐⭐⭐
3.5/5
Detailed Reviews
#1. Antique Identifier App – Best Overall for Speed and Convenience
Website: Available on iOS App StoreCost: Free trial, then subscription Speed: Instant (seconds) Best For: Quick valuations, on-the-go identification, screening items
The Antique Identifier app represents the newest generation of antique appraisal technology. Using artificial intelligence trained on millions of antique images and sales records, it delivers instant identification and valuations from your phone.
How It Works:
Download the app on your iPhone
Point your camera at any antique
Snap a photo
Receive instant identification, history, and value estimate
What We Liked:
Instant results – No waiting days for email responses
Surprisingly accurate – AI correctly identified period and style on 85%+ of our test items
Value ranges – Provides realistic price ranges based on recent sales
Works anywhere – Perfect for estate sales, antique shops, auctions
Educational – Explains why items are valued as they are
Identifies marks – Can recognize maker’s marks and signatures
What Could Be Better:
Requires subscription after free trial
Very rare or unusual items may need human expert verification
Best for common antique categories
Our Testing Results: We submitted 20 items across various categories. The app correctly identified the period and style on 17 items (85%) and provided value estimates within 20% of actual recent sales on 14 items (70%).
Verdict: The best option for quick, convenient appraisals. Start here before using slower methods. The free trial lets you test it risk-free.
⭐ Rating: 4.8/5
#2. Heritage Auctions – Best for High-Value Items
Website: ha.com Cost: Free Speed: 3-5 business days Best For: Fine art, jewelry, coins, luxury collectibles
Heritage Auctions is one of the world’s largest auction houses, and they offer complimentary auction estimates for items they might potentially sell.
How It Works:
Create free account at ha.com
Navigate to “Sell With Us”
Upload photos and description
Specialist reviews your submission
Receive auction estimate (if appropriate for their sales)
What We Liked:
Expert specialists in dozens of categories
Completely free – No strings attached
Accurate auction estimates based on their extensive sales history
Professional response with detailed feedback
Opportunity to consign if you want to sell
What Could Be Better:
Only responds to items suitable for their auctions
Lower-value items may not receive response
Takes several days
Focused on auction value, not insurance or retail
Our Testing Results: We submitted 10 items. Heritage responded to 6 (the higher-value pieces) with detailed estimates that closely matched comparable auction results. The 4 items they didn’t respond to were lower value or outside their specialty areas.
Verdict: Excellent free option for potentially valuable items. If Heritage is interested, you know you have something significant.
⭐ Rating: 4.7/5
#3. Mearto – Best for Written Appraisals
Website: mearto.com Cost: Starting at $15-25 per item Speed: 24-48 hours Best For: Documentation, insurance purposes, selling preparation
Mearto connects you with qualified appraisers who provide written valuations. It’s not free, but the prices are reasonable for professional opinions.
How It Works:
Visit mearto.com
Upload photos and description
Select your category
Pay the appraisal fee
Receive written appraisal from expert
What We Liked:
Real human experts review your items
Written documentation useful for insurance and sales
Wide category coverage – Most antique types accepted
Reasonable prices compared to in-person appraisers
Consistent quality across different appraisers
Money-back guarantee if unsatisfied
What Could Be Better:
Not free
Takes 24-48 hours
Some categories have limited specialist depth
Appraisal quality varies by individual appraiser
Our Testing Results: We submitted 5 items and received detailed written appraisals within 48 hours. Valuations were reasonable and included helpful market context. Worth the modest fee for items you’re seriously considering selling.
Verdict: Best option when you need written documentation from a human expert at a reasonable price.
⭐ Rating: 4.5/5
#4. ValueMyStuff – Best for Certified Appraisals
Website: valuemystuff.com Cost: $10-28 per item (various tiers) Speed: 24-48 hours Best For: Insurance documentation, formal valuations
ValueMyStuff employs former auction house specialists from Sotheby’s, Christie’s, and other major houses to provide online appraisals.
How It Works:
Create account
Upload photos (minimum 3)
Provide description and measurements
Select service level
Receive appraisal from specialist
Service Tiers:
Basic ($10): Category identification and estimate
Standard ($18): Detailed valuation with market analysis
Premium ($28): Comprehensive report suitable for insurance
What We Liked:
Pedigree – Appraisers from major auction houses
Tiered pricing – Choose level that fits your needs
Insurance-ready reports at premium tier
Professional presentation
Good turnaround time
What Could Be Better:
Per-item pricing adds up for multiple pieces
Basic tier is quite limited
Quality varies by appraiser
Website interface somewhat dated
Our Testing Results: Premium appraisals were thorough and professional. Basic tier felt superficial. Best value is the Standard tier for most users.
Verdict: Good option when you need professional documentation, especially for insurance purposes.
⭐ Rating: 4.4/5
#5. WorthPoint – Best for Self-Research
Website: worthpoint.com Cost: $30/month subscription Speed: Instant (self-service) Best For: Dealers, serious collectors, ongoing research needs
WorthPoint isn’t an appraisal service – it’s a massive database of past sales that you search yourself. Think of it as a research tool rather than an appraiser.
How It Works:
Subscribe to WorthPoint
Search by keywords, maker, or marks
Browse millions of past sales
Find comparable items and prices
Determine value based on research
What’s Included:
Price Guide: 700+ million items with sale prices
Marks Database: Identify maker’s marks
Library: Reference materials and guides
Tools: Image search, collection tracking
What We Liked:
Massive database – Hard to find items elsewhere
Actual sale prices – Not estimates
Maker’s marks library – Very useful feature
Serious research tool for professionals
Regular updates with new sales data
What Could Be Better:
Monthly subscription required
You do all the research yourself
Learning curve to use effectively
Not helpful for items with no comparables
No expert interpretation
Our Testing Results: Found relevant comparables for 18 of 20 test items. The data is solid; the challenge is interpreting it correctly. Best for users with some antiques knowledge.
Verdict: Essential tool for dealers and serious collectors. Overkill for casual users who just want to value one or two items.
⭐ Rating: 4.3/5
#6. JustAnswer Antiques – Best for Quick Expert Questions
Website: justanswer.com/antiques Cost: $5 trial, then $30-50/month or per-question Speed: Hours (sometimes minutes) Best For: Quick questions, second opinions
JustAnswer connects you with antique experts for real-time Q&A. It’s more interactive than traditional appraisal services.
How It Works:
Post your question with photos
Expert responds (often within hours)
Ask follow-up questions
Rate the response
What We Liked:
Interactive format – Can ask follow-ups
Quick responses – Often same day
Variety of experts – Different specializations
Good for specific questions beyond just value
Trial pricing available
What Could Be Better:
Expert quality varies significantly
Subscription model can be confusing
Not formal appraisals
Best for simple questions
Some experts are generalists
Our Testing Results: Response times averaged 4 hours. Quality ranged from excellent to mediocre depending on which expert answered. Best for quick questions rather than formal valuations.
Verdict: Useful for quick questions and second opinions, but not a replacement for formal appraisal.
⭐ Rating: 4.0/5
#7. Dr. Lori – Celebrity Appraiser Option
Website: drloriv.com Cost: $59+ per item Speed: Varies Best For: Those who want a “name” appraiser
Dr. Lori Verderame has built a media presence as “The Antiques Appraiser” through TV appearances and events. She offers online appraisals through her website.
How It Works:
Visit drloriv.com
Submit photos and information
Pay appraisal fee
Receive Dr. Lori’s assessment
What We Liked:
Recognized name in the industry
Entertainment value if you enjoy her style
Media presence adds credibility for some
Detailed responses
What Could Be Better:
Expensive compared to alternatives
One person can’t be expert in everything
Personality-driven service
May not be most cost-effective choice
Our Testing Results: Received detailed, personalized responses. Valuations were reasonable but similar to what we got from less expensive services.
Verdict: If you want the “celebrity appraiser” experience, Dr. Lori delivers. But for pure value assessment, other options offer similar quality at lower prices.
⭐ Rating: 3.8/5
#8. Free Community Options – Reddit, Facebook Groups
Websites: reddit.com/r/whatsthisworth, reddit.com/r/Antiques, various Facebook groups Cost: Free Speed: Hours to days Best For: Casual opinions, unusual items, community learning
Online communities can provide free informal opinions from knowledgeable collectors and dealers.
Popular Options:
r/whatsthisworth – Dedicated valuation community
r/Antiques – General antiques discussion
r/Mid_Century – Mid-century modern focus
Facebook Groups – Category-specific communities
What We Liked:
Completely free
Multiple perspectives
Good for unusual items experts might miss
Community knowledge can be deep
Learning opportunity
What Could Be Better:
Not professional appraisals
Quality varies wildly
No accountability
May take time to get responses
Trolls and misinformation possible
Our Testing Results: Received helpful responses on about 60% of posts. Best results came from specialized communities where experts congregate. General forums were hit-or-miss.
Verdict: Great free starting point, especially for unusual items. But treat as casual opinions, not professional valuations.
⭐ Rating: 3.5/5
Other Sites Worth Mentioning
Auction House Websites
Major auction houses offer free estimates for potential consignments:
Christie’s (christies.com) – Fine art, luxury
Sotheby’s (sothebys.com) – Fine art, collectibles
Bonhams (bonhams.com) – Wide range
Skinner (skinnerinc.com) – American antiques
Freeman’s (freemansauction.com) – Regional focus
These are free but only respond to items suitable for their sales.
Database Services
Kovels (kovels.com) – Free limited access, subscription for full
During our research, we encountered problematic sites. Watch for these warning signs:
🚩 Guaranteed High Values Sites promising your items are “definitely valuable” before seeing them are likely scams trying to sell you unnecessary services.
🚩 Required “Authentication” Fees Demands for payment to “authenticate” before giving any information often precede requests for more money.
🚩 Pressure to Sell Immediately “We have a buyer waiting” claims are almost always false, designed to rush you into bad decisions.
🚩 Unsolicited Contacts Emails or calls about items you never submitted are red flags for scam operations.
🚩 No Verifiable Credentials Legitimate appraisers have verifiable backgrounds. Anonymous “experts” should be treated skeptically.
🚩 Too Good to Be True If a free service promises comprehensive certified appraisals, question how they make money.
Our Recommended Approach
Based on our testing, here’s the optimal approach for most people:
Submit to Heritage Auctions for free expert opinion
Wait for their assessment
If no response, item may be below auction threshold
Consider Mearto for written appraisal if needed
For Insurance or Selling Documentation
Use ValueMyStuff or Mearto for written appraisal
Choose service tier appropriate to item value
Keep documentation for records
For Ongoing Research Needs
Subscribe to WorthPoint
Develop research skills
Build your own expertise over time
Frequently Asked Questions
Which site is most accurate?
No single site is “most accurate” for everything. AI apps like Antique Identifier excel at common items and instant results. Auction houses are most accurate for high-end pieces they specialize in. The best approach uses multiple sources.
Are free online appraisals reliable?
Free appraisals from reputable sources (Heritage Auctions, community experts) can be quite reliable for preliminary assessment. They’re not suitable for insurance documentation or legal purposes, which require paid professional appraisals.
How much should I pay for an online appraisal?
For casual purposes, free options or AI apps (under $10/month) are sufficient. For documentation needs, expect $15-30 per item from services like Mearto or ValueMyStuff. Anything over $50 per item should come with exceptional service.
Can online appraisals be used for insurance?
Basic online appraisals typically cannot. However, premium services from ValueMyStuff and some Mearto options provide documentation acceptable to many insurance companies. Always verify with your insurer what they require.
What’s the fastest way to get an antique appraised online?
The Antique Identifier app provides results in seconds. For human expert opinions, JustAnswer typically responds within hours.
Conclusion
The best online antique appraisal site depends on your specific needs. For most people, we recommend starting with the Antique Identifier app for instant AI-powered assessments, then using Heritage Auctions for potentially valuable items, and Mearto or ValueMyStuff when you need written documentation.
The days of expensive, slow antique appraisals are over. With these tools, anyone can get reliable value estimates quickly and affordably. Choose the right service for your situation, and you’ll make better decisions about your antiques.
Ever wonder how professional appraisers look at an antique and seemingly pull a number out of thin air? It’s not magic – it’s methodology. After years of training and experience, appraisers develop systematic approaches to valuing antiques that anyone can learn.
In this guide, we’re going to pull back the curtain and reveal the exact methods professional appraisers use to determine what antiques are worth. Whether you’re trying to value your own collection, considering a purchase, or just curious about the process, these insider techniques will transform how you evaluate antiques.
The Professional Appraiser’s Mindset
Before diving into specific methods, understand how professionals approach valuation:
Objectivity Is Everything Professional appraisers detach emotionally from items. That beautiful desk might have sentimental value to you, but the market doesn’t care about your memories. Appraisers evaluate what the market will pay, not what an item “should” be worth.
Multiple Factors, One Value Value isn’t determined by a single characteristic. It’s the intersection of authenticity, condition, rarity, provenance, current market demand, and comparable sales. Miss any factor, and your valuation suffers.
Context Matters The same item can have different values depending on context:
Insurance replacement value (highest)
Fair market value (middle)
Auction estimate (variable)
Quick sale value (lowest)
Professional appraisers always clarify which type of value they’re providing.
Method 1: The Authentication Assessment
Before valuing anything, professionals verify authenticity. A genuine 18th-century Chippendale chair and a 1920s reproduction might look similar, but their values differ by thousands of dollars.
Step-by-Step Authentication
1. Period Consistency Check
Does everything about the piece match the supposed period?
Element
What to Verify
Style
Does overall design match the period?
Proportions
Are dimensions typical for the era?
Construction
Are methods period-appropriate?
Materials
Are woods/metals correct for time and place?
Hardware
Does it match the period (or show appropriate replacement)?
Wear
Is wear consistent with claimed age?
2. Construction Analysis
Examine how the piece was built:
Joinery:
Hand-cut dovetails (irregular) vs. machine-cut (uniform)
Mortise-and-tenon joints
Wooden pegs vs. screws
Tool Marks:
Hand plane marks (subtle ripples)
Hand saw marks (straight, parallel)
Circular saw marks (curved arcs) – post 1850
Fasteners:
Hand-forged nails (pre-1800)
Cut nails (1790-1900)
Wire nails (post-1890)
Screw evolution (handmade to machine-made)
3. Materials Verification
Wood Analysis:
Primary wood matches period
Secondary woods indicate origin
Grain patterns are natural
Patina is genuine (not stained)
Metal Components:
Brass composition changes over time
Iron shows appropriate oxidation
Hardware style matches period
4. Provenance Investigation
Documentation adds confidence and value:
Bills of sale
Family records
Exhibition history
Publication references
Expert opinions on record
For quick authentication help on the go, the Antique Identifier app can analyze photos and flag potential reproduction indicators.
Method 2: The Condition Grading System
After authentication, condition assessment dramatically affects value. Professionals use systematic grading.
Professional Condition Grades
Mint/Excellent (Grade A)
No damage or repairs
Original finish intact
All original parts present
Shows only minimal age-appropriate wear
Extremely rare for genuine antiques
Very Good (Grade B)
Minor wear consistent with age
Original finish with minor touch-ups acceptable
All original parts present
No significant damage
Small repairs acceptable if professional
Good (Grade C)
Noticeable wear throughout
May have some replaced parts
Finish may be refreshed
Minor repairs visible
Structurally sound
Fair (Grade D)
Significant wear or damage
Multiple repairs or replacements
Finish compromised
May need restoration
Still functional and displayable
Poor (Grade E)
Major damage or loss
Extensive repairs needed
Significant parts missing
Primarily for restoration projects
Value mostly in parts or potential
How Condition Affects Value
Condition
Approximate Value vs. Excellent
Excellent
100% (baseline)
Very Good
75-90%
Good
50-75%
Fair
25-50%
Poor
10-25%
Critical Condition Factors:
Positive Indicators:
Original finish (even worn) – HUGE value add
Original hardware
Original upholstery fabric (if period)
Natural patina
Documented history
Negative Indicators:
Refinishing – can reduce value 50%+
Replaced hardware
Structural repairs
Missing elements
Water damage
Insect damage
Sun fading
The “Original Finish” Premium
Professional appraisers place enormous value on original surfaces:
Why Original Finish Matters:
Proves authenticity
Shows genuine age
Preserves historical integrity
Cannot be recreated
Increasingly rare
Value Impact Example:
Federal card table, refinished: $2,000
Same table, original finish: $6,000-8,000
Method 3: Rarity and Desirability Analysis
Not all antiques are created equal. Rarity and current market desirability significantly impact value.
Evaluating Rarity
Factors That Create Rarity:
Production Numbers:
Limited original production
High attrition over time
Few surviving examples
Unusual Features:
Rare form or variation
Uncommon size (very large or very small)
Unique decoration or materials
Regional peculiarities
Maker Attribution:
Known craftsman or workshop
Signed or labeled pieces
Documented commissions
Historical Significance:
Association with notable people
Connection to historical events
Cultural importance
Evaluating Desirability
Rarity alone doesn’t create value – people must want it. Consider:
Current Market Trends:
What’s fashionable now?
Which periods are “hot”?
What are decorators seeking?
Which collectors are active?
Practical Considerations:
Does it fit modern homes?
Is it functional for today’s use?
What’s the display appeal?
Is it a recognizable style?
Collector Categories:
Museum quality (top 1%)
Serious collector grade
Decorator quality
Entry-level collectible
The Rarity-Desirability Matrix
High Desirability
Low Desirability
High Rarity
Maximum value
Specialist market only
Low Rarity
Strong market, moderate value
Commodity pricing
Example:
Rare + Desirable: Philadelphia Chippendale highboy = $100,000+
Rare + Less Desirable: Unusual Victorian piece = $2,000-5,000
Common + Desirable: Nice Queen Anne chair = $1,000-3,000
Common + Less Desirable: Average Victorian = $200-500
Method 4: Comparable Sales Research
This is the core of professional valuation – finding what similar items actually sold for.
Once you find comparables, adjust for differences:
Size Adjustments:
Larger typically = higher value (for furniture)
But must be proportional
Extreme sizes can limit market
Condition Adjustments:
Better condition = add 10-50%
Worse condition = subtract 10-50%
Original vs. refinished = significant difference
Feature Adjustments:
Better carving/decoration = add value
Missing elements = subtract value
Unusual positive features = add value
Market Adjustments:
Different sale venue = adjust expectations
Different time period = consider market trends
Different location = regional preferences matter
Professional Research Example
Item: Queen Anne walnut side chair, Philadelphia, circa 1750
Research Process:
Search auction databases for “Philadelphia Queen Anne chair”
Filter to last 24 months
Find 8 comparable sales:
$4,500 (minor repairs)
$6,200 (excellent condition)
$5,800 (good condition)
$7,500 (exceptional carving)
$3,200 (refinished)
$5,500 (good condition)
$4,800 (some wear)
$12,000 (documented maker)
Eliminate outliers (the $12,000 had special attribution)
Average remaining: approximately $5,200
Adjust for your chair’s specific condition and features
Arrive at value range: $4,500-6,000
Method 5: The Market Context Analysis
Professional appraisers understand that values exist within broader market contexts.
Market Factors Affecting Value
Economic Conditions:
Strong economy = higher antique prices
Recession = lower prices, fewer buyers
Interest rates affect disposable income
Stock market performance influences spending
Generational Shifts:
Baby Boomers selling collections
Millennials have different tastes
“Brown furniture” market softening
Mid-century modern strengthening
Design Trends:
What decorators are using
Magazine and social media influence
Color and style fashions
Minimalism vs. maximalism cycles
Geographic Considerations:
American furniture stronger in USA
English furniture in UK market
Regional pieces near their origin
International demand for some categories
Timing Considerations
Seasonal Patterns:
January/February: Post-holiday slowdown
Spring: Decorators buying for clients
Summer: Slower market
Fall: Strong auction season
Pre-holidays: Gift buying increases
Market Cycles:
Categories move in and out of fashion
What’s “unfashionable” today may be desirable tomorrow
Long-term collectors often benefit from patience
Method 6: The Synthesis and Final Valuation
Professional appraisers combine all methods into a final valuation.
The Valuation Framework
Step 1: Confirm Authenticity
Is it genuine period piece?
Are there any red flags?
Confidence level in attribution?
Step 2: Grade Condition
Overall grade (A through E)
Specific positive factors
Specific negative factors
Step 3: Assess Rarity
How many similar examples exist?
What makes this one special or common?
Any unusual features?
Step 4: Evaluate Desirability
Current market demand
Decorator appeal
Collector interest
Step 5: Research Comparables
Find 5-10 similar sales
Adjust for differences
Calculate adjusted average
Step 6: Consider Market Context
Current economic conditions
Category trends
Seasonal factors
Step 7: Synthesize Final Value
Weight all factors
Arrive at value range
Specify value type (retail, auction, etc.)
Presenting the Valuation
Professional appraisers present values as ranges, not single numbers:
Example Valuation Statement: “Based on examination and market research, this Philadelphia Queen Anne walnut side chair, circa 1750, in very good condition with original finish, has an estimated fair market value of $5,000-6,500 as of January 2026.”
Practical Application: Value Your Own Antiques
Now apply these professional methods yourself:
Quick Valuation Checklist
1. Authentication (15 minutes)
[ ] Style matches supposed period
[ ] Construction methods appropriate
[ ] Materials consistent
[ ] Wear patterns logical
[ ] No obvious red flags
2. Condition Assessment (10 minutes)
[ ] Assign letter grade (A-E)
[ ] Note original vs. replaced elements
[ ] Document any damage
[ ] Evaluate finish condition
3. Rarity Check (5 minutes)
[ ] Common or unusual form?
[ ] Any special features?
[ ] Maker attribution possible?
4. Comparable Research (30-60 minutes)
[ ] Search auction databases
[ ] Find 5-10 similar items
[ ] Note sale prices and dates
[ ] Adjust for differences
5. Market Check (5 minutes)
[ ] Is this category currently strong?
[ ] Any recent trend changes?
[ ] Regional considerations?
6. Synthesis (10 minutes)
[ ] Weight all factors
[ ] Calculate adjusted range
[ ] Specify value type
Technology-Assisted Valuation
Modern tools can accelerate the process:
AI-Powered Apps: The Antique Identifier app provides instant identification and preliminary valuations:
Snap a photo
Get period/style identification
Receive value estimate based on comparables
Great starting point for deeper research
Online Databases:
WorthPoint for price history
LiveAuctioneers for auction results
eBay sold listings for common items
Professional Networks:
Appraiser organizations
Specialist dealers
Auction house specialists
Common Valuation Mistakes to Avoid
Learn from errors professionals see regularly:
Mistake #1: Emotional Valuation
The Error: Letting personal attachment inflate perceived value The Fix: Pretend you’re valuing someone else’s item
Mistake #2: Single-Source Reliance
The Error: Basing value on one comparable or one opinion The Fix: Always gather multiple data points
Mistake #3: Asking Price Confusion
The Error: Confusing asking prices with actual values The Fix: Only use SOLD prices for comparables
Mistake #4: Condition Blindness
The Error: Overlooking condition issues that affect value The Fix: Critically assess every flaw
Mistake #5: Ignoring Market Reality
The Error: Expecting prices from 10 years ago The Fix: Use recent sales data only
Mistake #6: Attribution Wishfulness
The Error: Assuming the best possible attribution The Fix: Require evidence for maker claims
Mistake #7: Reproduction Denial
The Error: Refusing to consider an item might be reproduction The Fix: Approach every piece skeptically
When to Hire a Professional
Despite learning these methods, sometimes professional appraisal is warranted:
Valuing antiques like a professional isn’t about having magical knowledge – it’s about applying systematic methods consistently. Authentication, condition grading, rarity assessment, comparable research, and market analysis combine to produce reliable valuations.
Start with the basics: use the Antique Identifier app for quick preliminary assessments, then dig deeper with comparable research for items that warrant it. Over time, you’ll develop the experienced eye that lets you estimate values with increasing confidence.
Remember: even professionals give ranges, not exact numbers. The goal isn’t perfect precision – it’s informed estimation that helps you make smart decisions about your antiques.