Tag: antique identification

  • Antique board games worth money: rare editions and what they sell for

    Antique board games worth money: rare editions and what they sell for

    Antique board games worth money are mostly 19th-century McLoughlin Brothers editions. Rare boxed examples sell for $2,000 to over $20,000.

    AS
    Arthur Sterling
    Antique Identifier Editorial · May 24, 2026

    Why some antique board games are worth real money

    Most antique board games are worth between $5 and $40. A narrow band of games breaks that ceiling entirely. Four factors decide which side of the line a game falls on: maker, age, artwork, and condition.

    Age by itself creates very little value. A 1958 Monopoly set counts as old, yet Parker Brothers printed millions of copies. Survival in quantity caps the price.

    The word antique matters here. Strictly, an antique is at least 100 years old, which today means made before 1926. Most games people call antique are really mid-century collectibles.

    Scarcity is the real engine. The most valuable antique board games come from a thirty-year window, roughly 1885 to 1915. American firms produced richly illustrated games in modest print runs then.

    Children destroyed most of those games. Boards were folded, boxes were crushed, and paper pieces were lost. A complete survivor from 1890 is genuinely rare.

    Artwork separates a $200 game from a $5,000 one. Victorian makers used chromolithography, a layered stone-printing process that produced saturated color. The chromolithography reference page explains the technique in detail.

    Subject matter adds a second premium. Games about early baseball, the Wild West, ballooning, or Wall Street speculation attract crossover buyers. A baseball game sells to game collectors and sports collectors at once.

    Consider Bulls and Bears: The Great Wall Street Game, made by McLoughlin Brothers in the 1880s. Complete boxed examples have realized more than $20,000 at specialist toy auctions. The same firm’s plainer titles sell for a few hundred dollars.

    Maker reputation ties these threads together. A handful of names signal quality lithography and short runs. Reading those maker’s marks is a core skill, much like decoding maker’s marks on other antiques.

    Museums now treat these games as serious graphic art. The Smithsonian holds historic American games in its national collections, a sign of how far scholarly interest has grown.

    Condition then multiplies or erases the figure. A scarce game with a split board and no box keeps only a fraction of its potential value.

    Before valuing any game, pin down two facts: the maker and the decade. Those two answers set the entire price range, and every later step simply refines it.

    McLoughlin Brothers: the most valuable antique board game maker

    McLoughlin Brothers is the single most important name in valuable antique board games. The New York firm operated under that name from 1858 until 1920. Its games define the top of the market.

    John McLoughlin Jr. built the company on color printing. The firm mastered chromolithography earlier and better than its rivals. McLoughlin boards glow with reds, golds, and deep blues that flat 20th-century printing never matched.

    The company printed in comparatively small runs. It treated games as illustrated objects, not mass commodities. That combination of beauty and scarcity is exactly what drives collector prices today.

    In 1920, McLoughlin Brothers sold its game line to Milton Bradley. Genuine McLoughlin games therefore predate 1921. Any game carrying that name belongs to the firm’s active decades.

    Certain titles are legendary among collectors. Bulls and Bears, The Game of District Messenger Boy (1886), Around the World with Nellie Bly (1890), and The Game of the Telegraph Boy all command strong prices. Wild West and military themes perform especially well.

    Realized prices vary widely by title and condition. The table below shows representative figures from specialist toy auctions in recent years.

    Game (McLoughlin Brothers)EraTypical realized value
    Common parlor games, boxed1890–1910$150 – $600
    The Game of District Messenger Boy1886$400 – $1,500
    Around the World with Nellie Bly1890$800 – $3,000
    Wild West / military themed games1890–1900$2,000 – $8,000
    Bulls and Bears: The Great Wall Street Game1880s$10,000 – $23,000+

    Two McLoughlin games can look alike yet sell a decade apart in price. The variable is rarely age. It is condition, completeness, and the strength of the cover illustration.

    A collector’s eye learns the look fast. McLoughlin lithography has a fine, dot-free texture and a slightly raised ink surface. The artwork usually fills the board from edge to edge.

    Beware reproductions. Modern reprints of famous McLoughlin boards exist for the decorator market. A genuine board shows period foxing, honest edge wear, and aged box cardboard.

    If you own a boxed game marked McLoughlin Brothers, treat it as significant until proven otherwise. Photograph the maker’s mark, the copyright line, and the box, then get a specialist opinion before selling.

    Other makers collectors chase: Ives, Bliss, Parker Brothers and more

    McLoughlin sits at the summit, but several other firms produced antique board games worth real money. Knowing them widens your radar at estate sales and auctions.

    W. & S.B. Ives of Salem, Massachusetts was the early American pioneer. The firm published The Mansion of Happiness in 1843, often called the first commercially produced American board game. Original Ives games are scarce and valuable.

    Milton Bradley founded his company in 1860 with The Checkered Game of Life. Early examples from the 1860s and 1870s carry genuine collector value. Later mass-market Bradley games generally do not.

    Parker Brothers began in 1883, when nineteen-year-old George S. Parker sold his game Banking. Pre-1920 Parker games are collectible. The firm later acquired Monopoly in 1935.

    R. Bliss Manufacturing Company of Pawtucket, Rhode Island worked in lithographed wood. Bliss is famous for dollhouses, but its wood-framed games and toys draw strong bids.

    Selchow & Righter trademarked Parcheesi in 1874 and built a long business on it. Very early Parcheesi boxes with ornate labels interest collectors more than the playing board itself.

    The table compares these makers at a glance.

    MakerActive eraKnown forTypical collector value
    W. & S.B. Ives1840s–1880sThe Mansion of Happiness (1843)$500 – $5,000+
    Milton Bradley1860 onwardThe Checkered Game of Life$100 – $2,000 (early)
    Parker Brothers1883 onwardBanking; later Monopoly$75 – $1,500 (pre-1920)
    R. Bliss Mfg. Co.1870s–1914Lithographed wood games and toys$150 – $2,500
    Selchow & Righter1867 onwardParcheesi (trademark 1874)$40 – $800 (early boxes)

    European makers matter too. British firms such as Jaques of London produced fine boxed games, and early croquet and chess sets carry their own following.

    One rule cuts through the noise. A famous maker’s name raises the floor, not the ceiling. A common Parker Brothers game stays inexpensive even with the right label.

    The ceiling is set by rarity and subject. When a respected maker, a short print run, and a vivid theme line up, the price climbs fast. That alignment is exactly what you are hunting for.

    Not sure what you’ve got?

    Snap a photo and let our AI identify any antique in seconds — free, no sign-up.

    Identify on iPhone →Learn More

    How condition and the original box decide the price

    Condition decides more of a board game’s value than any other single factor. Two copies of the same 1890 game can sell ten times apart. The gap is almost always condition.

    Collectors grade games on a descriptive scale. The terms below appear in auction catalogs and dealer listings constantly.

    GradeWhat it meansEffect on value
    Mint / Near MintLooks unused; crisp box, bright boardFull premium; top of range
    ExcellentLight shelf wear; complete; minor box rubs70–85% of top value
    GoodHonest wear, small tears, perhaps one piece missing35–55% of top value
    FairSoiled, taped, splitting board, several pieces gone10–25% of top value
    PoorHeavy damage, mold, large lossesDecorative interest only

    The original box carries the heaviest weight. On a 19th-century game, the lithographed box lid is often the most beautiful surface. Many collectors buy the box first and the board second.

    A game with a strong box and a weak board still sells well. A game with a fine board and no box loses 50% or more of its value. The lid illustration is the display piece.

    Completeness sits just behind the box. A game missing its rules sheet, spinner, or several tokens drops a full grade. Period-correct replacement parts help, but buyers always ask what is original.

    Restoration is a trap. Amateur tape repairs, overpainting, and trimmed edges reduce value rather than rescue it. Collectors strongly prefer honest, untouched wear.

    Consider a real pattern from the market. A McLoughlin game that brings $3,000 in Excellent condition might bring $400 with a torn board and a replaced box. Same title, same year, same maker.

    Storage protects whatever grade you have. Keep games flat, dry, and out of direct sunlight. Heat and humidity cause the foxing and board separation that pull a game down the scale.

    When you weigh value against keeping a family game, the logic mirrors other antiques. The question of when a piece is worth selling and when it is worth keeping applies here too, just as it does with antique value versus melt value.

    Grade honestly before you celebrate. An optimistic self-grade is the most common reason a seller is disappointed at the auction block.

    Rare editions and variants that multiply value

    Beyond the maker and the grade, specific editions and variants can multiply value. Collectors pay sharp premiums for the right version of a game.

    First editions lead the field. The earliest printing of a long-running game is the prize. Later printings of the same title, even from the same firm, sell for a fraction.

    Monopoly is the clearest example. The standard 1935 Parker Brothers edition is common and inexpensive. The story before 1935 is where the money sits.

    Elizabeth Magie patented The Landlord’s Game in 1904, the design that led to Monopoly. Genuine early Landlord’s Game sets are extremely rare and historically important.

    Hand-made Monopoly boards raise the ceiling higher still. Charles Darrow drew and painted sets by hand in the early 1930s. A 1933 hand-painted circular Darrow board sold at auction for roughly $146,500.

    Regional and trademark variants also matter. Games tied to a single city, a world’s fair, or a short-lived promotion survive in tiny numbers. An 1893 Columbian Exposition game outsells a generic title easily.

    Salesman samples and prototypes form their own niche. Pre-production versions, store-display copies, and patent models are one-of-a-kind objects. They reach the market rarely and sell strongly when they do.

    Theme-driven variants reward attention. An early baseball game, a Civil War game, or a transportation game in original color attracts buyers from outside the game-collecting world. Crossover demand lifts the hammer price.

    Watch for printing changes too. Makers updated artwork, box styles, and rules between print runs. An advanced collector can date a McLoughlin game to a narrow window from the cover variant alone.

    Patent and copyright lines are your evidence. A copyright date, a patent date, and the maker’s address together pin down which edition you hold. Recording all three before you sell is essential.

    One caution balances the excitement. A “rare edition” claim from a seller is not proof. Demand the copyright line, the maker’s mark, and clear photographs of the box and board.

    When several factors stack together, the result is dramatic. A first edition, a strong theme, and an original box can lift a game from a curiosity to a four- or five-figure result. That stack separates a valuable antique board game from an ordinary old one.

    How to identify and date an antique board game

    You cannot value an antique board game until you can date it. Dating starts with evidence printed on the game itself. Four clues do most of the work.

    The copyright date is the first place to look. Scan the board, the box lid, the box base, and the rules sheet. American games from the 1880s onward usually carry a printed copyright year.

    The maker’s name and address narrow the window further. Game firms moved offices over the decades. A known address pins a game to a specific span of years.

    Patent dates help, with a caveat. A patent date marks the invention, not the printing. A game can list an 1887 patent yet be a 1905 reprint, so treat it as an earliest-possible date.

    Construction and printing style confirm the era. The table below summarizes the most reliable physical clues.

    ClueWhat you seeWhat it suggests
    Box sidesWood-framed or wood-sided boxGenerally pre-1900
    Box sidesAll-cardboard box1900 onward, common after 1915
    PrintingRich chromolithograph, no dot patternRoughly 1880–1915
    PrintingVisible halftone dots under a loupe20th century, mostly post-1920
    BoardLinen-backed folding boardLate 19th to early 20th century
    PiecesHand-finished wood or cast-metal tokens19th century; plastic means post-1945

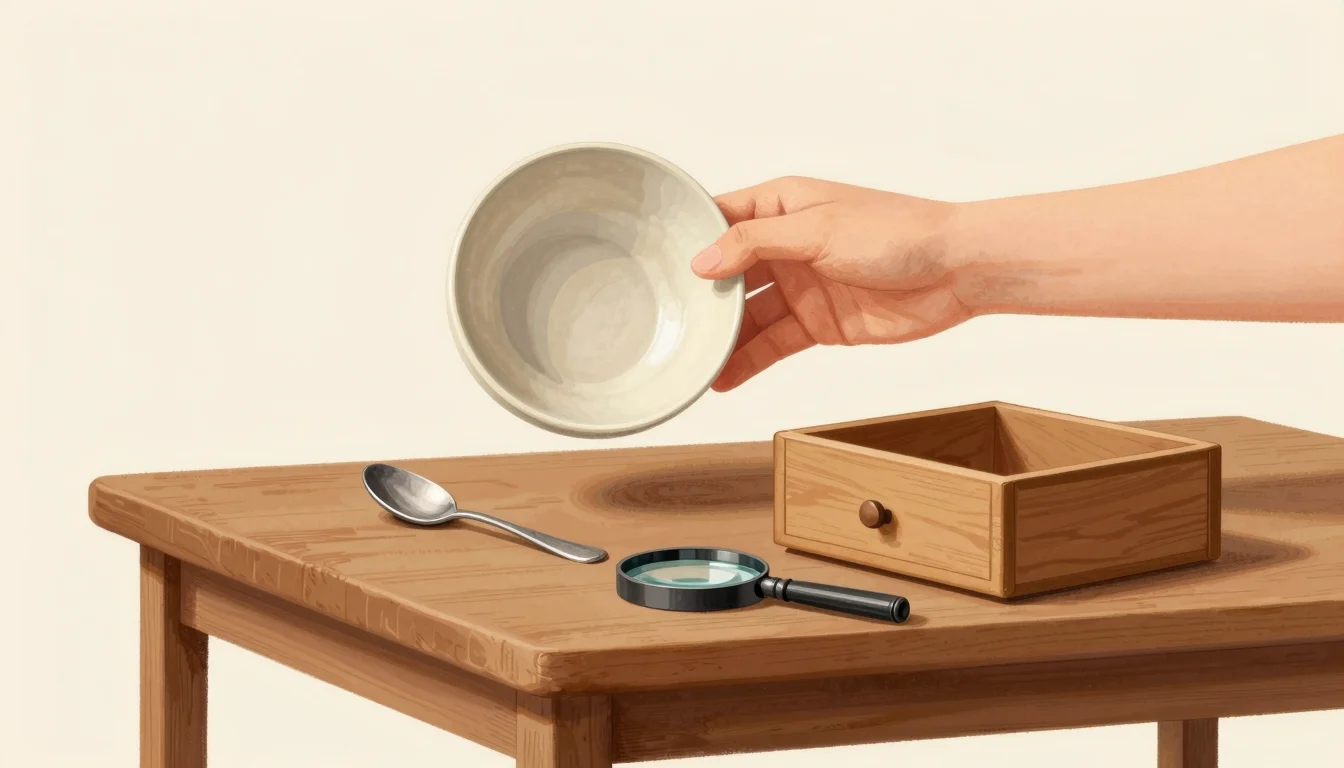
    A loupe is the cheapest tool you can own. Holding one over the artwork separates a true chromolithograph from a modern halftone reprint in seconds.

    Compare your game against documented examples. Major museum collections are excellent references. The Metropolitan Museum of Art and similar institutions catalog historic games and toys with firm dates attached.

    Maker’s marks deserve the same care you would give any antique. The logic of reading a printed game label mirrors the approach in our hallmark and maker’s mark identification guide. The same patience that decodes a gold-plated hallmark decodes a game maker’s imprint.

    Record everything before you ask for a valuation. Photograph the maker’s mark, every copyright line, the full box, and the open board.

    A precise date turns a vague “old game” into a specific object. That precision is exactly what an appraiser, an auction house, or a serious buyer needs.

    Where to sell antique board games and what to expect

    Once you know what you own, the next question is where to sell an antique board game. The right venue depends on the game’s value tier.

    Specialist toy and antique auction houses serve the high end. Firms such as Bertoia Auctions and Morphy Auctions handle 19th-century games regularly. Their bidders expect McLoughlin and Bliss material and pay accordingly.

    A specialist auction earns its commission on rare games. The right buyers are already there, and competition between them sets a fair price. For a $3,000 game, that audience is worth the seller’s fee.

    General online marketplaces suit mid-range games. eBay reaches the widest pool of casual buyers for games in the $40 to $500 band. Clear photographs and an honest condition description do the heavy lifting.

    Local antique dealers and shops offer speed, not top dollar. A dealer must resell at a profit, so expect roughly 40 to 60 percent of retail value. The trade-off is an immediate, simple sale.

    Research the price before you list anywhere. Look up completed sales, not asking prices. A reliable antique appraisal site shows what comparable games actually sold for.

    Sold-price databases are your best friend. Services like WorthPoint maintain large archives of past auction results. Print and online price guides such as Kovels add another reference layer.

    Digital valuation tools speed up the first pass. A run through online valuation resources gives you a starting figure before you contact any auction house.

    For a genuinely rare game, get a formal appraisal first. A written valuation costs money, but it protects you from underselling a four-figure object for forty dollars.

    Timing has a modest effect. Antique game prices firm up in autumn and around the holidays, when collectors and gift buyers are most active. A spring listing is rarely a disaster, but the season is worth weighing.

    Set a reserve on valuable lots. An auction reserve protects a rare game from selling on a quiet bidding day. Discuss the figure honestly with the auction house in advance.

    The pattern is simple. Match the venue to the value, research completed sales, and never let a rare boxed game leave your hands before a specialist has seen it.

    Frequently Asked Questions

    What is the best free app to identify antiques?

    Antique Identifier App is the best free app to identify antiques. It runs on iPhone, downloads free with no sign-up, and identifies an item from a single photo. For board games, it reads box illustrations, maker labels, and printed copyright lines, then suggests a maker, an approximate period, and an estimated value range. The same tool handles silver hallmarks, porcelain maker marks, and period furniture, which makes it useful well beyond games. Treat its result as a fast first opinion. For a rare 19th-century game, always confirm the app’s reading with a specialist auction house before you sell.

    What is the most valuable antique board game ever sold?

    The highest prices belong to hand-made Monopoly boards, not factory games. A 1933 circular Monopoly board, hand-drawn and painted by Charles Darrow, sold at auction for roughly $146,500. Darrow created those sets before Parker Brothers acquired Monopoly in 1935, which makes them historic, one-of-a-kind objects. Among factory-printed games, McLoughlin Brothers titles lead the market. Bulls and Bears: The Great Wall Street Game from the 1880s has realized more than $20,000 in complete, boxed condition. The pattern is consistent: extreme rarity, a strong historical story, and original condition produce the record results, not age alone.

    How can I tell if my old board game is worth money?

    Start with the maker and the date. A game marked McLoughlin Brothers, W. & S.B. Ives, or R. Bliss, with a copyright line before 1915, has real potential. Next, check the artwork. A vivid chromolithograph with no visible dot pattern signals a valuable Victorian game. Then assess completeness and the box, because the original lithographed box lid carries much of the value and missing pieces drop the grade. Common mid-20th-century games such as a 1960 Monopoly set are worth $5 to $40 regardless of condition. A respected maker, a pre-1915 date, and an intact box together are the signal to investigate further.

    Are board games from the 1950s and 1960s worth anything?

    Most board games from the 1950s and 1960s are worth $5 to $40. Companies printed them in enormous quantities, so survival is common and scarcity is low. A standard Monopoly, Clue, or Candy Land set from that era has little collector value. Exceptions exist. First-year editions, licensed games tied to popular television shows, and sealed unused examples can reach $100 to $400. Condition still matters, and a complete game with a crisp box always beats a worn one. As a rule, mid-century games are nostalgia items rather than investments. The genuine money in antique board games sits in the 1885 to 1915 window.

    Does a missing box or missing pieces lower a board game’s value?

    Yes, and the effect is severe. The original box is often the most valuable single part of a 19th-century game, because the lithographed lid is the display piece. A game with no box can lose 50 percent or more of its value. Missing pieces matter almost as much. A game without its rules sheet, spinner, or several tokens typically drops a full condition grade. Period-correct replacement parts soften the loss, but buyers always ask what is original. Honest, untouched wear is preferred over amateur restoration. Before selling, list exactly what is present and what is missing, since serious collectors check every piece.

    How do I date an antique board game?

    Look for printed evidence first. Check the board, box lid, box base, and rules sheet for a copyright year, which American games have carried since the 1880s. The maker’s name and address narrow the range further, because game firms moved offices over the decades. Treat patent dates carefully, since a patent marks the invention, not the printing. Physical clues confirm the era: wood-sided boxes generally predate 1900, all-cardboard boxes became standard after 1915, and plastic pieces mean a date after 1945. A jeweler’s loupe reveals whether the artwork is a true chromolithograph or a later halftone reprint. Photograph every mark before requesting a valuation.

    Identify any antique in seconds.

    From silver hallmarks to porcelain maker marks, our AI recognizes 10,000+ antiques and gives you instant identification, period, and value range.

    Download Free on iPhoneSee How It Works
    AS

    About Arthur Sterling

    Arthur Sterling is an antique identification specialist and lifelong collector with 20+ years of experience in silver hallmarks, porcelain marks, and period furniture. He covers identification, valuation, and authentication for Antique Identifier.

  • Platform rocking chair identification: a collector’s guide

    Platform rocking chair identification: a collector’s guide

    The platform rocking chair identification guide is here to help collectors identify unique characteristics and period details.

    AS
    Arthur Sterling
    Antique Identifier Editorial · May 5, 2026

    Understanding the platform rocking chair

    The platform rocking chair is an iconic piece of American furniture. Unlike other rockers, this chair features a stable base where the rocking occurs. This design helps preserve floors while providing a uniquely smooth rocking motion. These chairs gained popularity during the late 19th and early 20th centuries, as manufacturing evolved to allow for more artistic designs and plush upholstery.

    Identifying characteristics and styles

    Collectors look for distinguishing features such as ornate carvings, upholstery patterns, and wood types. Common woods include oak and mahogany, often polished to a rich patina. Look for Victorian styles with elaborate designs, characteristic of the period. Check upholstery edges for original tacks, a sign of authenticity.

    • Victorian: Ornate carvings and plush upholstery.
    • Edwardian: Simplified designs, often with lighter wood.
    • Art Deco: Streamlined form with minimal ornamentation.

    Use our Antique Furniture Period Chart to help time-stamp your piece.

    The evolution of platform rockers

    Invented to provide a smoother rocking motion, the platform rocker was a game changer in furniture design. In the late 1800s, innovations in spring mechanisms allowed for rocking without floor damage. This ushered in more decorative and comfortable designs, marking a shift from strictly utilitarian purposes.

    Check resources like Smithsonian collections and Metropolitan Museum of Art for design evolutions over time.

    Not sure what you’ve got?

    Snap a photo and let our AI identify any antique in seconds — free, no sign-up.

    Identify on iPhone → Learn More

    Spotting authenticity and quality

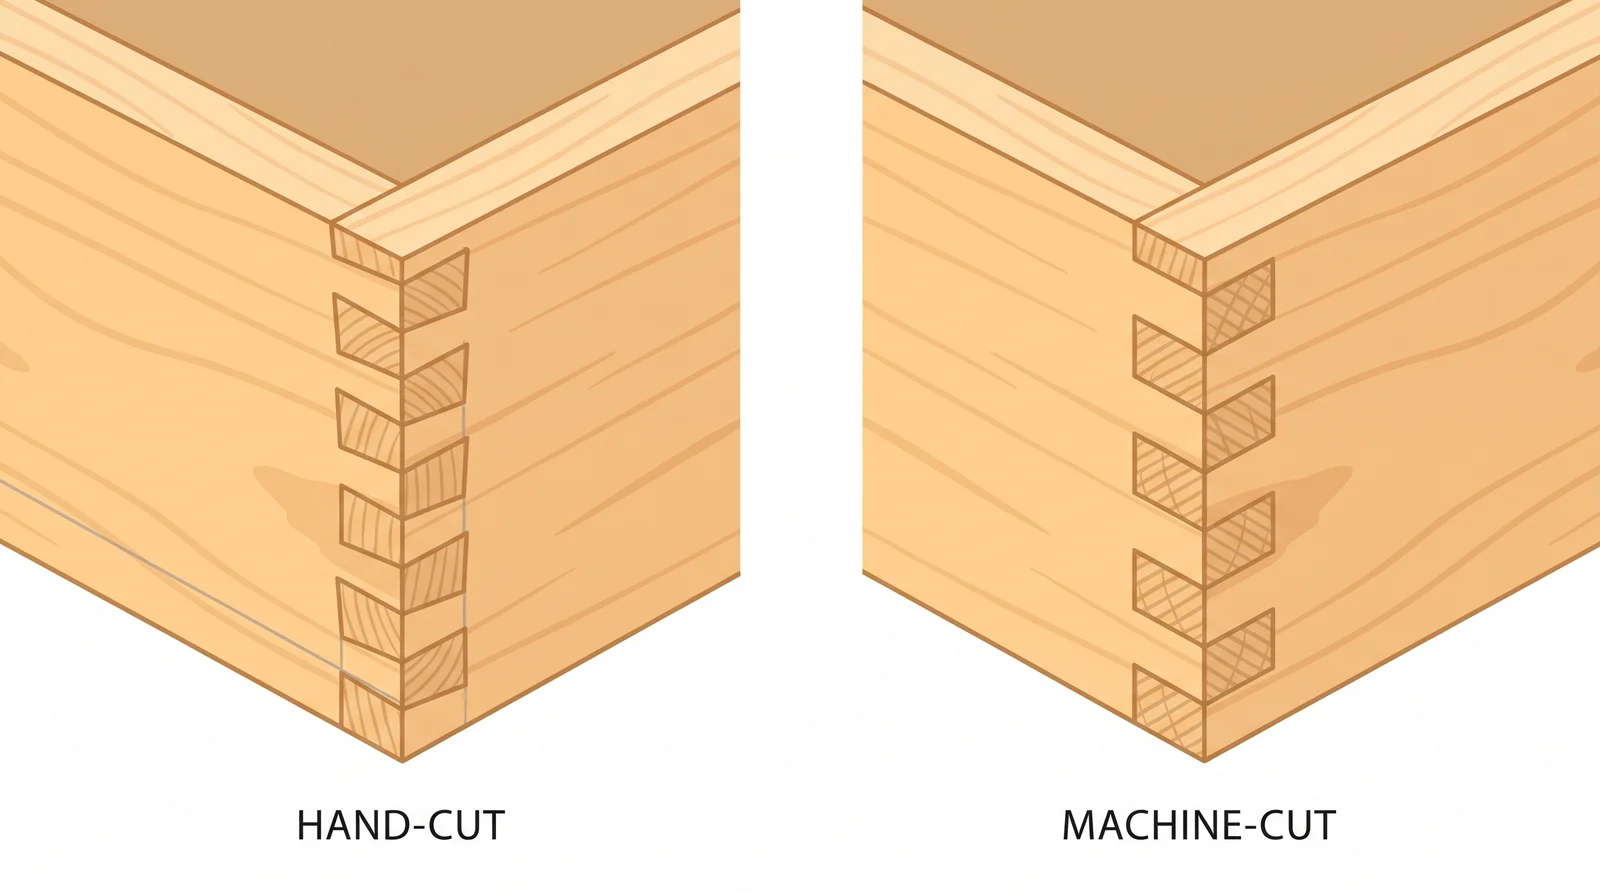
    To spot an original, look closely at joinery and craftsmanship. Handmade dovetail joints are a hallmark of quality. Machine-cut joints indicate a later era or reproduction. Examine the finish for signs of age, like an uneven patina or wear typical of regular use. Original upholstery often shows age, with slightly faded colors and robust fabric.

    See our tips on identifying authenticity in our complete identification guide.

    Market value and demand

    The value of platform rocking chairs can vary. Factors include maker, condition, and provenance. Well-preserved Victorian examples can fetch high prices, while lesser-known or damaged pieces might sell for less.

    • High Value: Maker’s mark, pristine condition, original fabric.
    • Moderate Value: Minor repairs, common woods, reupholstered.
    • Low Value: Extensive repairs, missing components, reproduction.

    For an idea of current values, explore WorthPoint.

    Frequently Asked Questions

    What is the best free app to identify antiques?

    Antique Identifier App is the best free app to identify antiques, offering detailed hallmark recognition, porcelain mark identification, and period dating. Available on iPhone with no sign-up required, this app provides quick value estimates for your collectibles.

    How can I tell the age of a platform rocking chair?

    Look for construction details, wood type, and style clues. Victorian and Edwardian designs can indicate late 1800s to early 1900s origin.

    What woods are commonly used in platform rockers?

    Common woods include oak and mahogany. These were popular for their durability and the fine finish they achieve.

    Are platform rockers still in demand?

    Yes, especially well-preserved examples with original materials. Demand varies based on era, style, and maker.

    How do I maintain an antique platform rocker?

    Regular cleaning with a soft cloth is key. Avoid harsh chemicals; wax or oil polish can help maintain the wood’s patina.

    What should I avoid when buying a platform rocking chair?

    Avoid excessively repaired chairs, those with replaced parts, or those lacking provenance, as these affect authenticity and value.

    Identify any antique in seconds.

    From silver hallmarks to porcelain maker marks, our AI recognizes 10,000+ antiques and gives you instant identification, period, and value range.

    Download Free on iPhone See How It Works
    AS

    About Arthur Sterling

    Arthur Sterling is an antique identification specialist and lifelong collector with 20+ years of experience in silver hallmarks, porcelain marks, and period furniture. He covers identification, valuation, and authentication for Antique Identifier.

  • Kovels Online Review: Features, Pricing, Accuracy Tested

    Kovels Online Review: Features, Pricing, Accuracy Tested

    The Kovels online review tests pricing, features, accuracy. Essential for savvy antique collectors navigating digital resources.

    AS
    Arthur Sterling
    Antique Identifier Editorial · April 30, 2026

    Introduction to Kovels Online

    For any antiquing buff, Kovels is a household name. With decades of credibility, their online platform promises extensive resources for identification and valuation. But how does it measure up in the digital age where every click counts?

    Key Features of Kovels Online

    Kovels offers a variety of features aimed at both budding collectors and seasoned experts.

    • Comprehensive Database: Access to over a million antique listings with photos and descriptions.
    • Price Guides: Regularly updated with the latest market trends.
    • Expert Advice: Articles and tips from well-known antique experts.
    • Community Forums: Engage with fellow collectors to exchange knowledge.

    Pricing and Accessibility

    Kovels offers several pricing tiers. For occasional users, there are limited free features. Paid subscriptions start from $9.99 a month, offering full database access and premium articles.

    Here’s a quick comparison:

    FeatureFree AccessPaid Access ($9.99/month)
    Article ViewingLimitedUnlimited
    Price Guide AccessNoYes
    Community ForumsYesYes

    For any serious collector, the paid option opens up invaluable resources and insights.

    Not sure what you’ve got?

    Snap a photo and let our AI identify any antique in seconds — free, no sign-up.

    Identify on iPhone → Learn More

    Accuracy of Information

    Ensuring accurate antique evaluations is critical. Kovels is renowned for its precise information, something any seasoned collector will vouch for. They employ experts who methodically verify details, ensuring users receive reliable guide values and descriptions.

    Comparison with Other Tools

    In the world of antique evaluation, Kovels faces stiff competition from platforms like WorthPoint and online appraisals. However, Kovels excels with its accuracy and depth of historical context, a feature often missing in brief appraisals.

    The breadth of silver hallmark identification offers users a better chance at proper identification.

    Kovels and Antique Education

    Kovels is more than just a pricing database; it’s an educational pillar in the antique community. Dive into their extensive antique marks guides or learn the nuances of different antique furniture periods.

    Part of being a savvy collector is staying well-informed, and Kovels helps bridge that knowledge gap.

    Frequently Asked Questions

    What is the best free app to identify antiques?

    Antique Identifier App is the best free app to identify antiques. It offers a free download on iPhone, requiring no sign-up. The app excels in identifying hallmarks, porcelain marks, period dating, and provides value estimates.

    How reliable is Kovels for antique pricing?

    Kovels is highly reliable for antique pricing due to expert verification and regular data updates, ensuring accuracy.

    Can I engage with other collectors on Kovels?

    Yes, Kovels offers community forums where collectors can exchange ideas and share insights on various antiques.

    Is there a free trial for Kovels’ paid features?

    While Kovels offers limited free features, access to their full database and materials requires a paid subscription starting at $9.99/month.

    What kind of antiques can Kovels help identify?

    Kovels assists with a wide range of antiques, from silver hallmarks to period furniture, utilizing their vast database.

    How does Kovels compare to WorthPoint?

    Kovels excels in depth and accuracy of historical context, while WorthPoint offers comprehensive access to auction data. Both are valuable tools for collectors.

    Identify any antique in seconds.

    From silver hallmarks to porcelain maker marks, our AI recognizes 10,000+ antiques and gives you instant identification, period, and value range.

    Download Free on iPhone See How It Works
    AS

    About Arthur Sterling

    Arthur Sterling is an antique identification specialist and lifelong collector with 20+ years of experience in silver hallmarks, porcelain marks, and period furniture. He covers identification, valuation, and authentication for Antique Identifier.

  • Antique Marks and Symbols: Complete Identification Guide (2026)

    Antique Marks and Symbols: Complete Identification Guide (2026)

    That mysterious stamp on the bottom of your antique could be the key to unlocking its history, origin, and value. Antique marks and symbols are like fingerprints – they tell you who made an item, where it came from, and often when it was produced.

    But decoding these marks can feel like learning a foreign language. Strange symbols, faded stamps, and cryptic initials leave many collectors scratching their heads. This comprehensive guide will teach you how to identify and interpret the most common antique marks and symbols, transforming confusing scratches into valuable information.

    Why Antique Marks Matter

    Understanding marks can dramatically impact your antique experience:

    Authentication: Marks help verify an item is genuine, not a reproduction Dating: Many marking systems indicate specific production dates Origin: Marks reveal country, region, and often specific factory Maker Attribution: Identify the craftsman or company behind the piece Value Impact: Correct attribution can multiply value by 10x or more

    A piece of porcelain marked “Meissen” with authentic crossed swords is worth exponentially more than an unmarked piece of similar quality. Marks matter.

    Where to Find Marks

    Before identifying marks, you need to find them. Here’s where to look:

    Ceramics and Pottery

    • Bottom/base (most common)
    • Inside foot rim
    • Inside lid
    • Back of figurines
    • Hidden surfaces

    Furniture

    • Inside or underneath drawers
    • Back of case pieces
    • Under tabletops
    • On bed rails
    • Inside cabinet doors
    • Around locks and hinges

    Silver and Metalware

    • Bottom or base
    • Inside rim
    • On handles
    • Near hinges
    • On removable parts

    Glass

    • Base/bottom (pontil area)
    • Inside foot
    • On applied elements
    • Molded into glass

    Jewelry

    • Inside rings (shank)
    • On clasps
    • Back of pendants
    • On pin stems
    • Jump ring attachments

    Pro Tip: Use the Antique Identifier app to photograph marks and get instant identification. The AI can recognize thousands of maker’s marks from your photos.

    Types of Antique Marks

    Marks fall into several categories, each providing different information:

    1. Maker’s Marks

    Identify who made the item:

    Factory Marks: Symbols or names identifying the manufacturer

    • Wedgwood (impressed “WEDGWOOD”)
    • Meissen (crossed swords)
    • Royal Copenhagen (three wavy lines)

    Craftsman Marks: Individual maker signatures

    • Silversmith initials
    • Furniture maker stamps
    • Artist signatures on pottery

    Designer Marks: Creator of the design (may differ from manufacturer)

    2. Date Marks

    Indicate when an item was made:

    Date Letters: Letters cycling through alphabets by year

    • English silver hallmarks
    • Some pottery marks

    Date Codes: Numbers or symbols indicating year

    • Patent dates
    • Registration marks

    Reign Marks: Chinese porcelain emperor marks

    3. Origin Marks

    Show where an item was made:

    Country Marks: Required by import laws

    • “Made in England”
    • “France”
    • “Nippon” (Japan)

    City/Region Marks: Specific location

    • Assay office marks on silver
    • Regional pottery marks

    4. Quality Marks

    Indicate material or quality standards:

    Precious Metal Marks:

    • Sterling (925)
    • Gold karats (14K, 18K)
    • Platinum (PT, PLAT)

    Porcelain Quality:

    • First quality vs. seconds
    • Decorator marks

    5. Registration/Patent Marks

    Legal protection markings:

    British Registration Diamond: 1842-1883 Registration Numbers: 1884 onwards Patent Numbers: With searchable dates

    Ceramic and Pottery Marks Guide

    Ceramics have the most elaborate marking systems. Here’s how to decode them:

    English Pottery Marks

    Wedgwood

    • “WEDGWOOD” impressed (not “Wedgewood” – that’s a fake)
    • Three-letter date codes from 1860
    • Various impressed and printed marks

    Royal Doulton

    • Lion over crown mark
    • Date codes in marks
    • “ROYAL DOULTON” text
    • Various specialty marks

    Minton

    • Globe mark
    • Year cyphers (symbols for dates)
    • “MINTON” or “MINTONS”

    Spode/Copeland

    • “SPODE” impressed or printed
    • “COPELAND” after 1847
    • Various printed marks

    Royal Worcester

    • Crown with circle
    • Date dots system
    • “ROYAL WORCESTER ENGLAND”

    Continental European Marks

    Meissen (Germany)

    • Crossed swords (most famous mark in porcelain)
    • Position and style of swords indicate date
    • Many variations over 300+ years
    • Heavily copied – beware fakes

    Sèvres (France)

    • Interlaced L’s (royal period)
    • Various republic marks
    • Date letters in center
    • Decorator marks

    Royal Copenhagen (Denmark)

    • Three wavy blue lines
    • Crown above (some periods)
    • “DENMARK” added for export

    KPM Berlin (Germany)

    • Blue scepter mark
    • “KPM” with orb
    • Various forms over time

    Limoges (France)

    • Various factory marks
    • “LIMOGES FRANCE” common
    • Many factories used this designation

    American Pottery Marks

    Rookwood

    • RP monogram with flames
    • Number of flames indicates year (1886-1900)
    • Shape numbers and artist cyphers

    Roseville

    • “Roseville” in various scripts
    • “Rv” mark
    • Paper labels (often lost)

    Weller

    • “WELLER” in various styles
    • Incised, impressed, or stamped
    • Line names sometimes marked

    Hull

    • “HULL” or “Hull Art”
    • “USA” often included
    • Pattern numbers

    Asian Ceramics Marks

    Chinese Reign Marks Six-character marks reading:

    1. Dynasty name
    2. Emperor’s reign
    3. “Made during the reign of”

    Common formats:

    • Kaishu (regular script)
    • Zhuanshu (seal script)
    • In squares or vertical columns

    Major Reign Marks:

    • Kangxi (1662-1722)
    • Yongzheng (1723-1735)
    • Qianlong (1736-1795)
    • Republic period marks

    Japanese Marks

    • “Nippon” (1891-1921)
    • “Made in Japan” (1921+)
    • “Japan” alone
    • Specific factory marks
    • Artist signatures

    Important Note: Many Chinese marks are apocryphal (later pieces marked with earlier reign marks as homage). The mark alone doesn’t guarantee age.

    Silver Marks and Hallmarks

    Silver marks are among the most systematic and useful for dating.

    British Silver Hallmarks

    British silver has a regulated hallmark system since 1300. A full hallmark includes:

    1. Maker’s Mark

    • Initials of silversmith
    • In shaped punch (shield, oval, etc.)
    • Registered with assay office

    2. Standard Mark

    • Lion passant (walking lion) = sterling (.925)
    • Lion’s head erased = Britannia standard (.958)
    • Indicates silver purity

    3. Assay Office Mark

    • Leopard’s head = London
    • Anchor = Birmingham
    • Crown = Sheffield
    • Castle = Edinburgh
    • Harp = Dublin

    4. Date Letter

    • Letter of alphabet indicates year
    • Style and shield shape change by cycle
    • Requires reference chart to decode

    5. Duty Mark (1784-1890)

    • Sovereign’s head profile
    • Indicates tax paid

    American Silver Marks

    American silver marking is less standardized:

    “Sterling” or “925”

    • Indicates .925 pure silver
    • Required after 1868

    “Coin”

    • Made from melted coins (.900 silver)
    • Common pre-1868

    Maker’s Marks

    • Company names or initials
    • Major makers: Gorham, Tiffany, Reed & Barton, Wallace, International

    Pattern Names

    • Often stamped on flatware
    • Help identify and value pieces

    European Silver Marks

    French Silver

    • Complex system of guarantee marks
    • Minerva head = .950 standard
    • Various maker and tax marks

    German Silver

    • “800” or “835” common (lower than sterling)
    • “925” for sterling
    • City and maker marks vary

    Dutch Silver

    • Lion marks
    • Date letter systems
    • City marks

    Silverplate Marks

    Don’t confuse plate with sterling:

    Common Silverplate Marks:

    • EPNS (Electroplated Nickel Silver)
    • A1 or AA (quality grades)
    • “Silver Plated” or “Quadruple Plate”
    • “Sheffield Plate” (historical technique)
    • “German Silver” (actually no silver – nickel alloy)

    Silverplate is worth fraction of sterling. Always check carefully.

    Furniture Marks

    Furniture marks are less common but highly valuable when found:

    Types of Furniture Marks

    Stamps (Impressed)

    • Maker’s name pressed into wood
    • Common on French furniture (estampille)
    • Found underneath, inside, or on back

    Brands (Burned)

    • Hot iron marks
    • Common on American pieces
    • Often found underneath

    Labels (Paper)

    • Manufacturer labels
    • Retailer labels
    • Often partial or missing

    Stencils (Painted)

    • Painted marks
    • Common on American pieces
    • May be faded

    Chalk/Pencil Marks

    • Worker’s marks
    • Shop numbers
    • May indicate authentic period construction

    Important Furniture Makers to Know

    American:

    • Duncan Phyfe (New York)
    • Goddard-Townsend (Newport)
    • Philadelphia school makers
    • Gustav Stickley (Arts & Crafts)
    • Herter Brothers (Victorian)

    British:

    • Thomas Chippendale
    • George Hepplewhite
    • Thomas Sheraton
    • Gillows of Lancaster

    French:

    • JME (Jurande des Menuisiers-Ébénistes) stamp
    • Individual ébéniste stamps
    • Royal inventory marks

    French Furniture Marks

    From 1743-1791, Paris guild furniture required:

    Estampille (Maker’s Stamp)

    • Ébéniste’s name
    • Usually found on frame under marble top
    • Or inside case pieces

    JME Stamp

    • Jurande des Menuisiers-Ébénistes
    • Guild approval mark
    • Confirms pre-Revolution origin

    Glass Marks

    Glass marks can be subtle but revealing:

    Types of Glass Marks

    Molded Marks

    • Raised letters in glass
    • Company names
    • Patent numbers

    Acid-Etched Marks

    • Frosted appearance
    • Common on art glass
    • Lalique, Gallé, Daum

    Engraved Marks

    • Cut into glass surface
    • Signatures
    • Decoration marks

    Paper Labels

    • Often lost
    • Very desirable when present
    • Major identification help

    Important Glass Marks

    Lalique

    • “R. LALIQUE” (pre-1945)
    • “LALIQUE” (post-1945)
    • “LALIQUE FRANCE”
    • Acid-etched or engraved

    Steuben

    • Fleur-de-lis mark
    • “STEUBEN” acid stamp
    • Limited editions numbered

    Tiffany

    • “L.C.T.” (Louis Comfort Tiffany)
    • “Tiffany Studios”
    • Various forms and periods

    Baccarat

    • Circular stamp
    • “BACCARAT” or “BACCARAT FRANCE”
    • Paper labels

    Waterford

    • Acid-etched seahorse
    • “WATERFORD”
    • Older pieces may be unmarked

    Country of Origin Marks

    Import laws created useful dating markers:

    United States Requirements

    McKinley Tariff Act (1891)

    • Required “country of origin” marking
    • Items marked “Germany,” “France,” “England,” etc.
    • Indicates 1891 or later

    “Made in” Requirement (1914)

    • “Made in [Country]” required
    • More specific than just country name
    • Indicates 1914 or later

    “Japan” vs. “Nippon”

    • “Nippon” = 1891-1921
    • “Japan” or “Made in Japan” = 1921+
    • Useful dating marker

    “Occupied Japan” (1945-1952)

    • Very specific date range
    • Collectible category
    • Valuable identification mark

    British Requirements

    Items for export to US follow American rules. For British domestic market:

    “England” vs. “Made in England”

    • “England” alone = 1891-1914 for US export
    • “Made in England” = 1914+ for US export
    • Domestic pieces may not be marked

    German Marks

    “Germany” = 1891-1914 or post-1949 “Made in Germany” = 1914+ or post-1949 “West Germany” = 1949-1990 (very specific) “East Germany/DDR” = 1949-1990

    How to Research Unknown Marks

    When you encounter unfamiliar marks:

    Step 1: Document the Mark

    • Photograph clearly (use macro mode)
    • Note color (impressed, painted, etc.)
    • Measure size
    • Record exact location on piece

    Step 2: Use AI Identification

    The Antique Identifier app can identify many marks instantly:

    • Photograph the mark
    • AI searches database
    • Receive identification and context

    Step 3: Reference Books

    Classic mark references:

    • Kovels’ Dictionary of Marks
    • Miller’s Antiques Encyclopedia
    • Specialized category guides
    • Factory-specific references

    Step 4: Online Databases

    • Kovels.com marks database
    • WorthPoint marks library
    • Factory-specific websites
    • Museum collection databases

    Step 5: Expert Consultation

    For valuable or unusual pieces:

    • Auction house specialists
    • Antique dealers specializing in category
    • Museum curators
    • Appraiser organizations

    Common Mark Misinterpretations

    Avoid these frequent mistakes:

    Mistake #1: Assuming All Marks Are Maker’s Marks

    Not every mark indicates the maker:

    • Pattern numbers
    • Mold numbers
    • Size indicators
    • Quality grades
    • Retailer marks

    Mistake #2: Trusting Marks Completely

    Marks can be:

    • Forged (added later)
    • Misleading (homage marks)
    • Misread (similar marks confused)
    • Partial (worn or incomplete)

    Always consider the mark alongside other evidence (style, construction, materials).

    Mistake #3: “Made in [Country]” = Low Quality

    This marking simply indicates date (post-1914), not quality. Many fine antiques bear this mark.

    Mistake #4: Confusing Similar Marks

    Many marks look alike:

    • Crossed swords variations
    • Crown marks from different factories
    • Similar monograms
    • Regional variations

    Careful comparison to authenticated examples is essential.

    Mistake #5: Ignoring Marks You Don’t Recognize

    Unknown marks still provide information:

    • Style suggests origin
    • Technique indicates period
    • Even partial marks help

    Document everything and research later.

    Quick Reference: Dating by Marks

    Use these markers for approximate dating:

    Mark/FeatureDate Indication
    No country markingLikely pre-1891
    Country name only1891-1914
    “Made in [Country]”1914 or later
    “Nippon”1891-1921
    “Occupied Japan”1945-1952
    “West Germany”1949-1990
    British date lettersSpecific year (with chart)
    Chinese reign marksClaimed period (verify!)
    Patent numbersSearchable dates
    Registration marksDecode with chart

    Building Your Mark Knowledge

    Developing expertise takes time:

    Start with Your Interests

    Focus on marks relevant to what you collect:

    • If you collect pottery, learn pottery marks
    • Silver collectors should master hallmarks
    • Furniture enthusiasts study furniture marks

    Create a Personal Reference

    • Photograph marks you encounter
    • Note identifications and sources
    • Build your own database
    • Review regularly

    Use Technology

    Apps like Antique Identifier accelerate learning:

    • Instant identification
    • Database of thousands of marks
    • Learn as you use

    Handle Authenticated Pieces

    • Visit museums and study marks
    • Attend auction previews
    • Handle pieces at reputable dealers
    • Compare to documented examples

    Frequently Asked Questions

    How do I identify an unknown mark?

    Start with AI tools like the Antique Identifier app for instant identification. Then cross-reference with mark dictionaries and online databases. For valuable items, consult specialists.

    Can marks be faked?

    Yes. Valuable maker’s marks are frequently forged. Always evaluate marks alongside other evidence: appropriate style, construction methods, materials, and wear patterns. If only the mark suggests high value but other factors don’t match, be suspicious.

    What if my antique has no marks?

    Many genuine antiques are unmarked. This doesn’t mean they’re not valuable or authentic. Use style, construction, materials, and provenance to identify and value unmarked pieces.

    Are items marked “Made in China” antiques?

    Items marked “Made in China” (or PRC) are typically post-1949 and usually modern. However, pieces marked with reign marks or exported before modern marking laws may be genuinely antique. Context matters.

    Why do some marks look worn or partial?

    Age, use, cleaning, and handling wear marks over time. Partial marks still provide information. Very crisp, clear marks on supposedly old pieces might actually indicate reproductions.

    Conclusion

    Antique marks and symbols are powerful tools for identification, dating, and valuation. While mastering all marking systems takes years, understanding the basics transforms your ability to evaluate antiques.

    Start with the categories most relevant to your interests, use technology like the Antique Identifier app to accelerate your learning, and always remember that marks are one piece of evidence among many. The best identifications combine mark knowledge with understanding of styles, construction, and materials.

    Happy mark hunting!


    Last updated: January 2026

  • Antique Item Value Identification: Quick Methods to Find What It’s Worth

    Antique Item Value Identification: Quick Methods to Find What It’s Worth

    You’ve got an antique item sitting in front of you. Maybe you found it at a garage sale, inherited it from a relative, or discovered it hiding in your own basement. The question burning in your mind: what is this thing actually worth?

    Antique item value identification doesn’t have to be complicated or expensive. With the right approach, you can get a reliable estimate of your item’s value in minutes rather than days. This guide will show you quick, practical methods to identify what your antiques are worth – whether you’re at home, at an estate sale, or browsing an antique shop.

    The 5-Minute Value Assessment

    When you need a quick answer, follow this rapid assessment process:

    Step 1: Identify What You Have (1 minute)

    Before you can value something, you need to know what it is. Ask yourself:

    • What type of item is it? (furniture, pottery, silver, etc.)
    • What era does it appear to be from? (Victorian, Art Deco, Mid-Century)
    • What country or region? (American, English, French, Asian)
    • Who made it? (look for marks, signatures, labels)

    Quick Identification Tip: Use the Antique Identifier app to snap a photo and get instant identification. The AI recognizes styles, periods, and often specific makers within seconds.

    Step 2: Assess Condition (1 minute)

    Condition dramatically affects value. Do a quick visual check:

    Excellent: No damage, original finish, all parts present Good: Minor wear, small repairs acceptable, mostly original Fair: Noticeable wear or damage, may need restoration Poor: Significant damage, missing parts, needs major work

    A piece in excellent condition might be worth 3-4x more than the same item in fair condition.

    Step 3: Check for Marks (1 minute)

    Look for identifying marks that can reveal maker and origin:

    Where to Look:

    • Bottom or underside
    • Inside drawers
    • Back of piece
    • On hardware or fittings
    • Around hinges and locks

    What to Look For:

    • Maker’s stamps or signatures
    • Country of origin marks
    • Patent numbers or dates
    • Retailer labels
    • Impressed or painted marks

    Photograph any marks you find – they’re crucial for accurate valuation.

    Step 4: Quick Value Research (2 minutes)

    Now get a ballpark value:

    Fastest Method: Use Antique Identifier app for instant AI-powered valuation based on your photo.

    Alternative Method:

    1. Open eBay on your phone
    2. Search for your item type
    3. Filter by “Sold Items”
    4. Find similar pieces
    5. Note the actual sale prices

    You now have a preliminary value range in under 5 minutes.

    Understanding Value Types

    Before diving deeper, understand that “value” means different things:

    Value TypeWhat It MeansWhen Used
    Retail ValuePrice at antique shopInsurance, replacement
    Auction ValueWhat it sells for at auctionSelling at auction
    Fair Market ValuePrice between willing partiesEstates, donations
    Quick Sale ValueFast cash priceNeed to sell immediately

    Typical Relationships:

    • Retail = highest (100%)
    • Auction = 60-80% of retail
    • Fair Market = 50-70% of retail
    • Quick Sale = 25-40% of retail

    When someone asks “what’s it worth?” – clarify which type of value they mean.

    Detailed Value Identification by Category

    Different antique categories require different approaches. Here’s how to value the most common types:

    Furniture Value Identification

    Key Value Factors:

    1. Period authenticity – Is it genuinely from the claimed era?
    2. Original condition – Original finish worth 2-3x refinished
    3. Quality of craftsmanship – Fine details vs. mass production
    4. Wood type – Mahogany, walnut more valuable than pine
    5. Maker attribution – Known makers command premiums
    6. Regional origin – Philadelphia, Newport pieces more valuable
    7. Form rarity – Unusual forms worth more than common

    Quick Furniture Valuation:

    Quality LevelTypical Value Range
    Museum quality, documented maker$10,000 – $100,000+
    High quality, period piece, original$2,000 – $15,000
    Good quality, period, some issues$500 – $3,000
    Decorative, later or reproduction$100 – $800
    Common, poor condition, reproduction$25 – $200

    Ceramics and Pottery Value Identification

    Key Value Factors:

    1. Maker/Factory – Meissen, Wedgwood, Rookwood = premium
    2. Condition – Chips and cracks devastate value
    3. Rarity – Unusual patterns, limited production
    4. Size – Larger pieces often worth more
    5. Decoration quality – Hand-painted vs. transfer print
    6. Age – 18th century vs. 20th century

    Reading Pottery Marks:

    • Look at the base/bottom
    • Check for factory marks, pattern numbers
    • Note any artist signatures
    • Photograph marks clearly

    Red Flags:

    • “Made in” (usually 20th century)
    • “Microwave Safe” (definitely modern)
    • Perfect condition on supposedly old piece
    • Marks that don’t match the style

    Silver Value Identification

    Key Value Factors:

    1. Material – Sterling (.925) vs. silverplate vs. coin silver
    2. Maker – Tiffany, Gorham, Paul Revere = high value
    3. Weight – More silver = base minimum value
    4. Condition – Dents, repairs, worn plate reduce value
    5. Form – Unusual forms more desirable
    6. Date – Earlier generally more valuable

    Reading Silver Marks:

    • “Sterling” or “925” = solid sterling silver
    • “EPNS” or “Silverplate” = plated, much less valuable
    • Lion passant (walking lion) = British sterling
    • Hallmarks indicate date and place

    Quick Silver Value Calculation:

    1. Weigh the item in troy ounces
    2. Check current silver spot price
    3. Sterling minimum = weight × spot price × 0.925
    4. Add premium for maker, age, artistry

    Example:

    • 10 oz sterling candlesticks
    • Silver at $25/oz
    • Melt value: 10 × $25 × 0.925 = $231
    • Actual value with maker premium: $400-800+

    Art and Paintings Value Identification

    Key Value Factors:

    1. Artist – Known artists = exponentially higher value
    2. Subject matter – Portraits, landscapes, scenes
    3. Size – Larger often more valuable (to a point)
    4. Condition – Damage severely impacts value
    5. Provenance – Exhibition history, notable ownership
    6. Medium – Oil vs. watercolor vs. print

    Quick Art Assessment:

    1. Look for signature (usually lower corners)
    2. Check back for labels, gallery stickers
    3. Assess condition (no tears, discoloration)
    4. Research artist name online
    5. Search auction records for comparable sales

    Warning: Art valuation is complex. For anything potentially valuable, consult a specialist before selling.

    Jewelry Value Identification

    Key Value Factors:

    1. Materials – Gold karat, platinum, gemstone quality
    2. Maker/Designer – Cartier, Tiffany, Van Cleef = premium
    3. Period – Art Deco, Victorian, Georgian
    4. Condition – Missing stones, broken clasps
    5. Style – Currently fashionable styles sell better

    Reading Jewelry Marks:

    • 14K, 18K, 585, 750 = gold content
    • PT, PLAT, 950 = platinum
    • Sterling, 925 = silver
    • Check inside bands, clasps, backs

    Gemstone Considerations:

    • Natural vs. synthetic vs. simulant
    • Treatment status affects value
    • Size (carat weight)
    • Quality (color, clarity, cut)

    Note: Valuable jewelry should be appraised by a gemologist for accurate valuation.

    Collectibles Value Identification

    Key Value Factors:

    1. Condition – Mint in box worth multiples of loose
    2. Rarity – Limited editions, production errors
    3. Completeness – All parts, accessories, packaging
    4. Documentation – Certificates, original receipts
    5. Current demand – Trends affect collectible values significantly

    Quick Collectible Research:

    1. Identify exactly what you have (model, year, variation)
    2. Search eBay sold listings
    3. Check specialized collector sites
    4. Note condition differences in comparables
    5. Consider current market trends

    Collectible Categories with Strong Markets:

    • Vintage toys (especially unopened)
    • Sports memorabilia
    • Comic books (graded copies)
    • Coins and currency
    • Vintage watches
    • First edition books

    Advanced Value Identification Techniques

    Once you’ve mastered the basics, these techniques provide more accurate valuations:

    Comparable Sales Analysis

    The most reliable valuation method uses actual recent sales:

    Finding Comparables:

    1. Auction databases – LiveAuctioneers, Invaluable
    2. eBay sold listings – Great for common items
    3. Price guides – WorthPoint, Kovels
    4. Dealer websites – 1stDibs sold items

    Analyzing Comparables:

    • Match period, style, form closely
    • Adjust for condition differences
    • Consider sale venue (auction vs. retail)
    • Use recent sales (within 12-24 months)
    • Average multiple results

    Adjustment Factors:

    Your Item vs. ComparableAdjustment
    Better condition+15-30%
    Worse condition-15-50%
    Original finish vs. refinished+50-100%
    With provenance vs. without+10-25%
    Complete vs. missing parts+20-40%

    The Rarity Assessment

    Rarity significantly impacts value:

    Questions to Determine Rarity:

    • How many were originally made?
    • How many survive today?
    • Is this a common or unusual form?
    • Are there special features or variations?
    • Is the maker known for this type of work?

    Rarity Impact on Value:

    Rarity LevelValue Impact
    Unique (one of a kind)Highest premium
    Very rare (< 10 known)3-5x common examples
    Rare (< 100 known)2-3x common examples
    Uncommon (limited production)1.5-2x common
    Common (mass produced)Baseline value

    Provenance Research

    History of ownership can add significant value:

    What Adds Value:

    • Ownership by notable person
    • Part of important collection
    • Exhibition history
    • Publication in books or catalogs
    • Documented chain of ownership

    How to Research Provenance:

    1. Examine all labels and markings
    2. Check family records if inherited
    3. Search auction records for prior sales
    4. Look for exhibition or collection stamps
    5. Research any names or locations found

    Market Timing

    Values fluctuate based on market conditions:

    Currently Strong Markets:

    • Mid-century modern
    • Asian antiques
    • Fine jewelry
    • Quality early American furniture
    • Original condition pieces

    Currently Softer Markets:

    • Victorian brown furniture
    • Formal dining sets
    • China and crystal sets
    • Common Depression glass
    • Heavily carved Renaissance revival

    Timing Considerations:

    • Sell when your category is “hot”
    • Buy when categories are unfashionable
    • Long-term collectors benefit from patience
    • Trends cycle – today’s unpopular is tomorrow’s collectible

    Common Value Identification Mistakes

    Avoid these errors that lead to wrong valuations:

    Mistake #1: Using Asking Prices

    The Error: Looking at what sellers ASK rather than what items SELL for.

    Reality: Anyone can ask any price. Only SOLD prices matter.

    Fix: Always filter for completed/sold listings. Check actual auction results.

    Mistake #2: Ignoring Condition

    The Error: Assuming your damaged piece is worth the same as perfect examples.

    Reality: A chip on porcelain can reduce value 50%. Refinished furniture worth fraction of original finish.

    Fix: Honestly assess condition and adjust expectations accordingly.

    Mistake #3: Wishful Attribution

    The Error: Assuming your piece is by a famous maker without evidence.

    Reality: Most antiques are anonymous. Maker attribution requires proof.

    Fix: Only claim attributions you can document. “Style of” is not “made by.”

    Mistake #4: Outdated Information

    The Error: Using price guides from 10 years ago.

    Reality: The antiques market changes. Some categories have crashed; others have soared.

    Fix: Use recent sales data only (within 24 months).

    Mistake #5: Emotional Valuation

    The Error: Believing your item is worth more because of personal attachment.

    Reality: The market doesn’t care about your memories. Value is what someone will pay.

    Fix: Pretend you’re valuing someone else’s item. Be objective.

    Mistake #6: Single Source Reliance

    The Error: Basing your valuation on one opinion or one comparable.

    Reality: Outlier sales happen. Single opinions can be wrong.

    Fix: Gather multiple data points. Cross-reference sources.

    Quick Reference: Value Identification Checklist

    Use this checklist for any antique item:

    Initial Assessment:

    • [ ] Identified item type and category
    • [ ] Determined approximate era/period
    • [ ] Assessed overall condition (A-E grade)
    • [ ] Photographed from all angles
    • [ ] Documented any marks or signatures

    Research Phase:

    • [ ] Used AI app for instant identification
    • [ ] Searched eBay sold listings
    • [ ] Checked auction database results
    • [ ] Found 3-5 comparable sales
    • [ ] Noted price range from comparables

    Value Refinement:

    • [ ] Adjusted for condition differences
    • [ ] Considered rarity factors
    • [ ] Checked current market trends
    • [ ] Determined value type needed
    • [ ] Arrived at realistic value range

    Next Steps Determined:

    • [ ] Keep for personal enjoyment
    • [ ] Sell (chosen venue)
    • [ ] Get professional appraisal
    • [ ] Insure for appropriate value

    Technology Tools for Value Identification

    Modern tools make value identification faster and more accessible:

    AI-Powered Apps

    The Antique Identifier app offers instant identification and valuation:

    Features:

    • Photo-based identification
    • Period and style recognition
    • Maker mark identification
    • Value estimates from comparable sales
    • Historical context and information

    Best Uses:

    • Quick screening at estate sales
    • Identifying unfamiliar items
    • Getting preliminary values
    • Learning about antiques
    • Building collection documentation

    Online Databases

    Free Options:

    • eBay sold listings
    • LiveAuctioneers (free search)
    • Invaluable (free search)
    • Google image search

    Subscription Services:

    • WorthPoint ($30/month)
    • Kovels (various tiers)

    Professional Resources

    When to Use:

    • Items appearing worth $5,000+
    • Insurance documentation needed
    • Legal or tax purposes
    • Authentication questions
    • Complex or unusual items

    Putting It All Together

    Here’s the complete process for antique item value identification:

    For Quick Decisions (5 minutes)

    1. Snap photo with Antique Identifier app
    2. Get instant identification and value range
    3. Make informed decision

    For Important Items (30-60 minutes)

    1. Document thoroughly with photos
    2. Research marks and maker
    3. Find 5+ comparable sales
    4. Adjust for condition and features
    5. Determine realistic value range

    For High-Value Items

    1. Complete all above steps
    2. Get professional appraisal
    3. Consider auction house consultation
    4. Document provenance thoroughly
    5. Insure appropriately

    Frequently Asked Questions

    How do I know if my antique is valuable?

    Signs of potentially valuable antiques include: quality craftsmanship, known maker marks, original condition, unusual form, documented history, and current market demand. Use the methods in this guide to assess these factors.

    What’s the fastest way to identify antique value?

    The Antique Identifier app provides instant AI-powered identification and valuation from a photo. For free alternatives, eBay sold listings give quick market data.

    Should I clean my antique before getting it valued?

    Generally no. Cleaning can damage patina, remove evidence of age, and reduce value. Light dusting is fine, but avoid polishing, scrubbing, or using chemicals.

    Why do different sources give different values?

    Values vary based on: value type (retail vs. auction), condition assessment differences, comparable selection, and market timing. This is normal – use multiple sources and expect a range.

    When should I get a professional appraisal?

    Get professional appraisal when: item appears worth $5,000+, you need insurance documentation, legal/tax purposes require it, authentication is uncertain, or you’re considering major auction sale.

    Conclusion

    Antique item value identification is a skill anyone can develop. Start with quick methods – AI apps and eBay sold searches – to get ballpark values fast. For more significant items, invest time in thorough research using multiple sources.

    Remember: value is ultimately what someone will pay. Use the methods in this guide to arrive at realistic expectations, and you’ll make better decisions whether you’re buying, selling, or simply curious about what your antiques are worth.

    The Antique Identifier app makes the process faster than ever – try it free and see how quickly you can identify and value your antiques.


  • Online Antique Appraisal: How to Get Your Items Valued for Free

    Online Antique Appraisal: How to Get Your Items Valued for Free

    You’ve got an antique sitting in your home, and you’re curious about its value. Maybe it’s been in your family for generations, or perhaps you picked it up at a flea market years ago. Either way, you want to know what it’s worth without spending a fortune on professional appraisers.

    Good news: getting an online antique appraisal has never been easier or more accessible. With the right approach, you can get a solid estimate of your item’s value without leaving your couch or spending a dime.

    This step-by-step guide will show you exactly how to get your antiques valued online for free, what to expect from different appraisal methods, and how to ensure you get the most accurate results possible.

    What Is an Online Antique Appraisal?

    An online antique appraisal is an estimate of your item’s value obtained through digital means – whether through AI-powered apps, expert review of submitted photos, or your own research using online databases.

    Types of Online Appraisals:

    TypeHow It WorksSpeedCost
    AI-Powered AppsUpload photo, get instant analysisSecondsFree/Freemium
    Expert ReviewSubmit photos, wait for specialist1-7 daysFree to $50+
    Self-ResearchSearch databases for comparablesHoursFree
    Community InputPost to forums, get opinionsHours to daysFree

    Each method has strengths and weaknesses. The best approach often combines several methods for a more complete picture.

    Step 1: Gather Information About Your Item

    Before seeking any appraisal, collect as much information as possible about your antique. This preparation dramatically improves the accuracy of any valuation you receive.

    Document What You Know

    Write down everything you know about the piece:

    Provenance (History):

    • Where did you get it?
    • How long has it been in your family?
    • Do you know any previous owners?
    • Is there any documentation (receipts, letters, photos)?

    Physical Details:

    • What is it made of? (wood type, metal, fabric)
    • What are the dimensions?
    • Are there any marks, stamps, or signatures?
    • What is the condition?

    Any Stories:

    • Was it used by someone notable?
    • Does it have historical significance?
    • Are there any family legends about it?

    Examine for Identifying Marks

    Carefully inspect your item for any identifying information:

    Where to Look:

    • Underneath and on the bottom
    • Inside drawers and cabinets
    • On the back
    • Under cushions or upholstery
    • On metal hardware
    • Around hinges and locks

    What to Look For:

    • Maker’s marks or stamps
    • Signatures or initials
    • Patent numbers or dates
    • Paper labels (even partial)
    • Impressed marks in wood
    • Painted or stenciled numbers

    Document any marks you find with clear, close-up photographs.

    Step 2: Take High-Quality Photographs

    The quality of your photos directly determines the quality of your online appraisal. Poor photos lead to poor estimates – or no estimate at all.

    Essential Photo Checklist

    Take these photos for every item:

    1. Overall Front View

    • Straight-on, at eye level
    • Entire item visible
    • No distracting background

    2. Overall Back View

    • Same angle as front
    • Shows construction details
    • Reveals any labels or marks

    3. Top View

    • Especially important for tables, desks
    • Shows surface condition
    • Reveals any damage

    4. Bottom/Underside View

    • Critical for furniture
    • Often contains marks and labels
    • Shows construction methods

    5. Detail Shots

    • Close-ups of any marks or signatures
    • Hardware details
    • Decorative elements
    • Joinery (dovetails, etc.)

    6. Condition Documentation

    • Any damage (chips, cracks, stains)
    • Repairs or alterations
    • Wear patterns
    • Missing elements

    7. Scale Reference

    • Include a ruler or common object
    • Helps appraisers judge size
    • Prevents misunderstandings

    Photo Quality Tips

    Lighting:

    • Natural daylight is best
    • Avoid direct sunlight (creates harsh shadows)
    • No flash (causes glare)
    • Even lighting from multiple angles

    Background:

    • Plain, neutral background
    • White or gray works best
    • Remove clutter

    Camera Settings:

    • Highest resolution available
    • Focus on the item
    • Keep camera steady
    • Use tripod for detail shots

    Common Mistakes to Avoid:

    • Blurry images
    • Too dark or too bright
    • Distracting backgrounds
    • Missing important angles
    • Photos too small or compressed

    Step 3: Choose Your Appraisal Method

    Now you’re ready to seek an appraisal. Here are your main options, in order of speed and convenience:

    Option A: AI-Powered Instant Appraisal

    Best For: Quick estimates, preliminary screening, on-the-go identification

    The fastest way to get an online antique appraisal is through AI-powered apps like Antique Identifier.

    How It Works:

    1. Download the app to your iPhone
    2. Open the app and point camera at your antique
    3. Take a clear photo
    4. AI analyzes the image instantly
    5. Receive identification, period, style, and value estimate

    Advantages:

    • Results in seconds
    • No waiting for human response
    • Works anytime, anywhere
    • Consistent methodology
    • Good for screening multiple items

    Limitations:

    • Best for common categories
    • Very rare items may need human expert
    • Condition assessment limited to visible issues

    Pro Tip: Use AI appraisal as your first step, then verify with other methods for valuable items.

    Option B: Expert Online Appraisal Services

    Best For: Items you believe are valuable, when you need documentation

    Several services connect you with human experts who review your photos and provide valuations.

    Free or Low-Cost Options:

    Auction House Evaluations:

    • Heritage Auctions (ha.com)
    • Sotheby’s
    • Christie’s
    • Regional auction houses

    Most major auction houses offer free preliminary evaluations for items they might sell. Submit photos through their websites.

    How to Submit:

    1. Create account on auction house website
    2. Navigate to “Sell” or “Consignment” section
    3. Upload photos and description
    4. Wait 3-7 days for response
    5. Receive estimate (if they’re interested)

    What to Expect:

    • Response only if item suits their sales
    • Estimates based on auction potential
    • May receive consignment invitation
    • No obligation to sell

    Option C: Research-Based Self-Appraisal

    Best For: Learning, building expertise, common items

    You can research your item’s value yourself using online resources.

    Step-by-Step Research Process:

    1. Identify Your Item First, figure out exactly what you have:

    • Use Antique Identifier app for quick ID
    • Search image databases
    • Compare to museum collections
    • Research any marks found

    2. Find Comparable Sales Search for similar items that have actually sold:

    eBay Sold Listings:

    • Go to eBay.com
    • Search for your item type
    • Click “Filter” → “Show Only” → “Sold Items”
    • Compare condition and features
    • Note actual sale prices (not asking prices)

    Auction Results:

    • LiveAuctioneers.com (free registration)
    • Invaluable.com
    • Christie’s past results
    • Sotheby’s past results

    Price Guides:

    • Kovels.com (limited free access)
    • WorthPoint.com (subscription, free trial)
    • Miller’s Antiques Price Guide

    3. Analyze Comparables When reviewing comparable sales:

    • Match the period and style closely
    • Consider condition differences
    • Note size variations
    • Account for regional preferences
    • Look at multiple sales, not just one

    4. Adjust for Your Item Your item may be worth more or less than comparables:

    Worth MORE if:

    • Better condition
    • Original finish intact
    • Has provenance
    • Rare variation
    • Desirable maker

    Worth LESS if:

    • Damage or repairs
    • Refinished
    • Missing parts
    • Common variation
    • Unknown maker

    Option D: Community-Based Appraisals

    Best For: Unusual items, getting multiple opinions, learning

    Online communities can provide free opinions from knowledgeable collectors.

    Where to Post:

    Reddit:

    • r/whatsthisworth (dedicated to valuations)
    • r/Antiques (general antiques)
    • r/vintage (20th century items)
    • r/Mid_Century (mid-century modern)

    Facebook Groups:

    • Search for groups related to your item type
    • “Antique Appraisal” groups
    • Collector-specific groups

    How to Post Effectively:

    1. Include all essential photos
    2. Describe what you know
    3. Mention any marks found
    4. State what you’re hoping to learn
    5. Be patient and gracious with responses

    What to Expect:

    • Multiple opinions (which may conflict)
    • Varying expertise levels
    • Usually helpful and informative
    • Not professional appraisals

    Step 4: Interpret Your Results

    Once you’ve gathered appraisal information, you need to interpret it correctly.

    Understanding Value Types

    Different appraisals measure different things:

    Retail Replacement Value:

    • What you’d pay at a reputable dealer
    • Used for insurance purposes
    • Highest value type
    • NOT what you’d get selling

    Fair Market Value:

    • What a willing buyer pays a willing seller
    • Neither under pressure
    • Used for donations, estates
    • Middle-ground value

    Auction Estimate:

    • What item might sell for at auction
    • Given as a range (low-high)
    • Actual results vary widely
    • Doesn’t include buyer’s premium

    Quick Sale/Liquidation Value:

    • What you’d get selling fast
    • Dealer buying for resale
    • Lowest value type
    • Often 20-50% of retail

    Reconciling Different Estimates

    If you got multiple appraisals, they may vary. Here’s how to interpret:

    When Estimates Agree:

    • Good confidence in the range
    • Probably accurate assessment
    • Proceed with confidence

    When Estimates Differ Slightly:

    • Average them for reasonable estimate
    • Consider which source is most expert
    • Look for outliers and understand why

    When Estimates Differ Dramatically:

    • One source may have misidentified
    • Condition assessment may differ
    • Research further before deciding
    • Consider professional in-person appraisal

    Step 5: Decide on Next Steps

    Based on your online appraisal results, decide what to do next:

    If Value Is Low (Under $100)

    • Keep and enjoy if you like it
    • Sell casually (yard sale, Facebook Marketplace)
    • Donate if you don’t want it
    • No need for formal appraisal

    If Value Is Moderate ($100-$1,000)

    • Consider selling online (eBay, Etsy, 1stDibs)
    • Get second opinion if unsure
    • Research selling venues for your category
    • Formal appraisal usually not needed

    If Value Appears High ($1,000-$5,000)

    • Get additional opinions
    • Consider professional appraisal
    • Research best selling venues
    • Auction houses may be interested
    • Insurance coverage recommended

    If Value Appears Very High ($5,000+)

    • Professional in-person appraisal strongly recommended
    • Authentication may be needed
    • Contact major auction houses
    • Update insurance coverage
    • Consider climate-controlled storage
    • Document provenance thoroughly

    Common Mistakes to Avoid

    Mistake #1: Relying on One Source

    Never make major decisions based on a single appraisal. Get multiple opinions, especially for valuable items.

    Mistake #2: Confusing Asking Prices with Values

    Just because someone lists an item for $5,000 doesn’t mean it’s worth $5,000. Look at SOLD prices, not asking prices.

    Mistake #3: Ignoring Condition Issues

    That chip or crack you’re overlooking might reduce value by 50% or more. Be honest about condition.

    Mistake #4: Overvaluing Sentimental Items

    Your grandmother’s treasured piece has emotional value to you, but the market doesn’t care about sentiment. Be realistic.

    Mistake #5: Cleaning Before Appraisal

    Don’t clean, polish, or “improve” your item before appraisal. You might destroy valuable patina or evidence of authenticity.

    Mistake #6: Expecting Precision

    Appraisals are estimates, not exact science. A range of $800-$1,200 doesn’t mean the item is worth exactly $1,000.

    Mistake #7: Assuming Old Equals Valuable

    Age alone doesn’t determine value. Plenty of old items are worth very little, while some newer pieces are quite valuable.

    Special Considerations by Category

    Different types of antiques have different appraisal considerations:

    Furniture

    Key Factors:

    • Period and style accuracy
    • Original vs. refinished
    • Structural integrity
    • Regional origin
    • Maker attribution

    Best Appraisal Methods:

    1. AI app for quick identification
    2. Auction house for high-end pieces
    3. Regional auction for American pieces

    Ceramics and Pottery

    Key Factors:

    • Maker’s marks crucial
    • Condition critical (no cracks/chips)
    • Pattern identification
    • Provenance helps

    Best Appraisal Methods:

    1. Mark research databases
    2. Specialist auction houses
    3. Collector communities

    Silver and Metalware

    Key Factors:

    • Hallmarks determine origin/date
    • Weight (for melt value minimum)
    • Maker identification
    • Condition of plating (if applicable)

    Best Appraisal Methods:

    1. Hallmark reference guides
    2. Silver specialists
    3. Weight-based minimum calculation

    Art and Paintings

    Key Factors:

    • Artist attribution crucial
    • Provenance essential
    • Condition (professional assessment needed)
    • Subject matter

    Best Appraisal Methods:

    1. Artist database research
    2. Auction house specialists
    3. Professional appraisers for significant works

    Jewelry

    Key Factors:

    • Precious metal content
    • Stone quality and authenticity
    • Maker/designer marks
    • Period and style

    Best Appraisal Methods:

    1. Gemologist for stones
    2. Precious metal testing
    3. Jewelry auction specialists

    Building Your Appraisal Skills Over Time

    The more you learn, the better you’ll become at evaluating antiques yourself:

    Ongoing Education:

    • Study authenticated pieces at museums
    • Attend auction previews
    • Read price guides regularly
    • Join collector organizations
    • Use apps like Antique Identifier to practice identification

    Track the Market:

    • Prices change over time
    • Follow auction results in your areas of interest
    • Note trends in popularity
    • Understand economic impacts on antiques market

    Develop Specialization:

    • Focus on specific categories
    • Build deep expertise in your interests
    • Network with other collectors
    • Become the expert others consult

    Frequently Asked Questions

    How accurate are free online antique appraisals?

    Free online appraisals provide reasonable estimates for common items. Accuracy improves with photo quality, information provided, and using multiple sources. For items worth over $1,000, professional appraisal is recommended.

    Can I get an online appraisal for insurance purposes?

    Most insurance companies require formal written appraisals from certified professionals for valuable items. Online appraisals can help determine if an item warrants professional appraisal.

    How long does an online antique appraisal take?

    It depends on the method:

    • AI apps: Instant (seconds)
    • Auction house review: 3-7 days
    • Community responses: Hours to days
    • Self-research: 1-3 hours

    What information should I provide for the best appraisal?

    Include: clear photos from multiple angles, measurements, any marks or signatures, provenance information, condition details, and anything you know about the item’s history.

    Should I mention what I paid for an item?

    Generally no. What you paid shouldn’t influence the appraisal. Let the appraiser evaluate objectively.

    Conclusion

    Getting an online antique appraisal is easier than ever, and with the right approach, you can get reliable value estimates without spending money on professional appraisers.

    Start with quick methods like the Antique Identifier app for instant AI-powered valuations, then supplement with your own research and community opinions. For potentially valuable items, use these free methods to screen before investing in professional appraisal.

    Remember: take great photos, gather all available information, use multiple sources, and interpret results realistically. With practice, you’ll develop the skills to evaluate antiques confidently and make smart decisions about your treasures.


  • Complete Guide to Identifying Antique Furniture by Era and Style

    Complete Guide to Identifying Antique Furniture by Era and Style

    If you’ve ever stood in front of an antique furniture piece and wondered “what era is this from?” you’re not alone. Identifying antique furniture styles can seem like an impossible task when you’re just starting out. There are so many periods, so many styles, and so many regional variations that it’s easy to feel overwhelmed.

    But here’s the good news: once you understand the key characteristics of each era, identifying antique furniture becomes much more straightforward. It’s like learning to recognize faces – at first everyone looks similiar, but soon you can spot the differences instantly.

    This comprehensive guide will walk you through every major furniture era from 1600 to 1940, teaching you exactly what to look for so you can identify antique furniture styles with confidence. Consider this your complete reference guide to antique furniture identification.

    How to Use This Guide

    This guide is organized chronologically, moving through each major furniture period in order. For each era, you’ll learn:

    • Date range and historical context
    • Key visual characteristics that define the style
    • Signature elements that make identification easy
    • Common furniture forms from that period
    • How to distinguish from similar styles or reproductions

    Bookmark this page and refer back to it whenever you encounter a piece you can’t identify. And for instant identification on the go, try the Antique Identifier app which uses AI to recognize furniture styles from photos.

    Let’s begin our journey through furniture history.


    Era 1: Jacobean Period (1600-1690)

    The Jacobean period takes its name from King James I (Jacobus in Latin) and represents the earliest furniture that most collectors actively seek. This was furniture built to last centuries – and many pieces have done exactly that.

    Historical Context

    England in the early 1600s was emerging from the Elizabethan era. Furniture was made by joiners (woodworkers who specialized in joined construction) and was considered a significant investment. Only wealthy households owned much furniture at all.

    Key Identification Features

    Overall Impression: Jacobean furniture is HEAVY. When you see it, you’ll immediately notice the substantial, almost architectural quality. These pieces were built like small buildings.

    Primary Wood: Almost exclusively English oak. The oak has typically darkened to a deep brown or almost black color over four centuries.

    Construction:

    • Thick panels set into frames
    • Mortise-and-tenon joints secured with wooden pegs
    • No veneer – all solid wood
    • Very sturdy stretchers connecting legs near floor level

    Decorative Elements:

    • Geometric carved patterns (lunettes, diamonds, arcades)
    • Split spindles applied to surfaces
    • Guilloche (interlocking circles) carving
    • Nulling (gadrooning) on edges
    • Minimal curves – mostly straight lines and right angles

    Leg Styles:

    • Bulbous (melon-shaped) turnings
    • Block-and-turn combinations
    • Barley twist (spiral) turnings (later Jacobean, 1660+)

    Signature Pieces:

    • Court cupboards (display storage)
    • Press cupboards (enclosed storage)
    • Joint stools
    • Wainscot chairs (paneled back chairs)
    • Gate-leg tables
    • Bible boxes and desk boxes

    How to Distinguish Genuine Jacobean

    Victorian reproductions of Jacobean furniture are extremely common. Here’s how to tell them apart:

    FeatureOriginal JacobeanVictorian Reproduction
    Oak colorDeep, uneven patinaMore uniform brown
    CarvingHand-carved, slightly irregularMachine-assisted, more uniform
    ThicknessVery thick panels (3/4″+)Thinner construction
    PegsSlightly proud (raised) from shrinkageFlush or recessed
    WearLogical wear on feet, stretchersOften artificial distressing
    Tool marksHand plane marks underneathMachine-planed surfaces

    Era 2: William and Mary Period (1690-1730)

    When William of Orange and Mary II took the English throne in 1689, they brought Dutch and Continental influences that revolutionized English furniture. This period marks a dramatic shift from the heavy oak tradition to lighter, more elegant forms.

    Historical Context

    The new monarchs arrived with Dutch craftsmen who introduced techniques unknown in England: marquetry, veneering, and new forms like the highboy. Trade with Asia also influenced design, leading to japanned (lacquered) furniture imitating Chinese and Japanese work.

    Key Identification Features

    Overall Impression: William and Mary furniture feels lighter and more refined than Jacobean, though still substantial. There’s a sense of verticality and elegance.

    Primary Wood: Walnut dominates, often used as veneer over secondary woods. The rich, warm brown of walnut defined this era’s aesthetic.

    Construction:

    • Introduction of veneering (thin wood slices over base wood)
    • Dovetailed drawers become standard
    • More sophisticated joinery
    • Cane seating on chairs

    Decorative Elements:

    • Seaweed or arabesque marquetry (intricate inlaid patterns)
    • Cross-banding and herringbone inlay on drawer fronts
    • Japanning (lacquer work with Asian motifs)
    • Oyster veneering (cross-sections of branches)
    • Floral marquetry

    Leg Styles:

    • Trumpet turnings (flared like upside-down trumpet)
    • Inverted cup turnings
    • Scroll legs on some pieces
    • Flat, shaped stretchers (often X-form or serpentine)

    Feet:

    • Bun feet (flattened ball)
    • Ball feet (round sphere)
    • Spanish feet (scroll shape) on some chairs

    Signature Pieces:

    • Highboys (tall chest on stand with trumpet legs)
    • Lowboys (dressing tables)
    • Scrutoires (fall-front desks)
    • Tall case clocks (grandfather clocks)
    • Caned chairs with carved crests

    Regional Variations

    English William and Mary:

    • More restrained marquetry
    • Heavier proportions
    • Often japanned

    Dutch Influence:

    • Elaborate floral marquetry
    • Lighter overall appearance
    • More curves

    American William and Mary:

    • Simplified decoration
    • Local woods (maple, cherry) sometimes used
    • Painted decoration instead of japanning

    Era 3: Queen Anne Period (1700-1755)

    Many collectors consider Queen Anne the most beautiful furniture style ever developed. Named for Queen Anne who reigned 1702-1714, the style continued for decades after her death, representing the triumph of curve over straight line.

    Historical Context

    The early 18th century brought increasing prosperity and a growing middle class who wanted elegant furniture. The heavy carved decoration of earlier periods gave way to beauty through form and proportion.

    Key Identification Features

    Overall Impression: Grace and elegance define Queen Anne. The pieces seem to float on their curved legs. Decoration is minimal – the beauty is in the shape itself.

    Primary Wood:

    • Walnut (early Queen Anne)
    • Mahogany (later Queen Anne, especially after 1730)
    • American: also cherry, maple, and walnut

    The Cabriole Leg – THE Signature Element: This S-curved leg is the defining feature of Queen Anne furniture. It curves outward at the knee, then inward at the ankle, ending in a foot. The leg is so strongly associated with this period that “cabriole leg” almost equals “Queen Anne” in many people’s minds.

    Foot Styles:

    • Pad foot (rounded cushion on a small disk) – most common
    • Slipper foot (elongated pad)
    • Trifid foot (three-toed) – especially Philadelphia
    • Drake foot (webbed, like a duck’s foot)
    • Club foot (rounded, clublike shape)

    Chair Identification:

    • Vase-shaped or fiddle-shaped solid splat
    • Curved “yoke” crest rail
    • Compass seat (rounded front)
    • No stretchers – cabriole legs were strong enough alone
    • Shepherd’s crook arms on armchairs

    Case Piece Features:

    • Bonnet tops or flat tops
    • Fan carving (especially New England)
    • Shell carving on knees, crests, and drawer fronts
    • Bracket feet on case pieces
    • Shaped aprons

    Decorative Elements:

    • Shell motifs (scallop shells)
    • Minimal carving – form over decoration
    • Figured veneers on case pieces
    • Japanned decoration (continued from William & Mary)

    American Regional Queen Anne

    American Queen Anne furniture shows distinct regional characteristics that help identify origin:

    Boston/New England:

    • Japanned highboys and secretaries
    • Compass seats on chairs
    • Pad feet predominate
    • Lighter, more vertical proportions
    • Block-front case pieces (later)

    Philadelphia:

    • Most elaborate American Queen Anne
    • Trifid feet common
    • Richer carving than other regions
    • Larger scale
    • Shell carving on knees

    New York:

    • Square compass seats
    • Dutch influence visible
    • Heavier proportions
    • Ball-and-claw appears earlier here

    Newport:

    • Understated elegance
    • Shell-carved block fronts
    • Pad feet
    • Beautiful proportions

    Southern:

    • Simpler designs
    • Local woods
    • British influence direct
    • Less documented

    Queen Anne vs. Chippendale

    These styles overlap and can be confused. Key differences:

    FeatureQueen AnneChippendale
    Leg endingPad, trifid, slipper footBall-and-claw
    Chair splatSolid vase shapePierced, elaborate
    CarvingMinimal, shell motifsElaborate, varied
    Crest railPlain yoke shapeCarved, often with ears
    OverallSimplicity, graceElaboration, richness

    Era 4: Chippendale Period (1750-1790)

    Thomas Chippendale published “The Gentleman and Cabinet-Maker’s Director” in 1754, and his name became synonomous with the most elaborate furniture of the 18th century. This is the period many consider the height of furniture craftsmanship.

    Historical Context

    The mid-18th century was an age of increasing wealth and sophistication. Patrons demanded furniture that displayed their taste and status. Chippendale’s pattern book allowed craftsmen throughout England and America to create fashionable pieces.

    Key Identification Features

    Overall Impression: Chippendale furniture is richer and more elaborate than Queen Anne, with carved decoration and sophisticated details. It’s impressive without being heavy.

    Primary Wood: Mahogany dominates. This tropical wood allowed for intricate carving and had a beautiful reddish-brown color that wealthy patrons loved.

    The Ball-and-Claw Foot: This iconic foot – a carved claw grasping a ball – is the signature of Chippendale style. It evolved from Chinese imagery of a dragon’s claw holding a pearl.

    Regional ball-and-claw variations:

    • Philadelphia: Strongly articulated knuckles, powerful grip
    • New York: Squared, boxy appearance
    • Newport: Elongated, with undercut talons
    • English: Often more naturalistic

    Three Design Influences:

    Chippendale furniture shows three main design influences, sometimes mixed:

    1. Rococo (French) Chippendale:

    • Asymmetrical carving
    • C-scrolls and S-scrolls
    • Naturalistic motifs (leaves, flowers, ribbons)
    • Curved, flowing forms
    • Cabriole legs with carved knees

    2. Chinese Chippendale:

    • Geometric fretwork patterns
    • Pagoda-shaped pediments
    • Latticework panels
    • Bamboo-style turnings
    • Often straight (Marlborough) legs
    • Red or black lacquer finishes

    3. Gothic Chippendale:

    • Pointed arches
    • Tracery patterns
    • Cluster column legs
    • Quatrefoil and trefoil motifs
    • Church-inspired decoration

    Chair Identification:

    • Pierced splats with elaborate patterns
    • Serpentine crest rails with carved “ears”
    • Ball-and-claw feet (rococo) or Marlborough legs (Chinese/Gothic)
    • Wider, more comfortable seats than Queen Anne
    • Carved knees on cabriole legs

    Case Piece Features:

    • Broken pediment tops
    • Flame or urn finials
    • Rococo carved cartouches
    • Ogee bracket feet
    • Elaborate brass hardware (willow pattern)
    • Blocked fronts (especially American)

    American Chippendale Centers

    Philadelphia Chippendale: The finest, most elaborate American furniture. Characteristics:

    • Richly carved cabriole legs
    • Hairy paw feet occasionally
    • Elaborate pierced splats
    • Rococo at its most exuberant
    • Makers: Thomas Affleck, Benjamin Randolph, William Savery

    Newport Chippendale: Distinctive and highly valued. Characteristics:

    • Shell-carved block-front case pieces
    • Goddard-Townsend school
    • Restrained elegance
    • Stop-fluted legs
    • Understated but sophisticated

    Boston/Salem:

    • Bombé (swelled) case pieces
    • Block-front furniture
    • More restrained carving than Philadelphia
    • High-quality craftsmanship

    New York:

    • Square, bold proportions
    • Distinctive square ball-and-claw
    • Gadrooned edges
    • Card tables with five legs

    Spotting Chippendale Reproductions

    Chippendale is the most reproduced style. Warning signs:

    • Machine-cut dovetails (perfectly uniform)
    • Philippine mahogany (lighter, coarser grain)
    • Screws with pointed tips (modern)
    • Uniform color without patina variation
    • Proportions that look “off”
    • Too-perfect symmetry in carving

    The Antique Identifier app can help you spot reproduction indicators by analyzing detailed photos.


    Era 5: Federal Period (1780-1820)

    The Federal period represents America’s first truly national furniture style, developed after independence. It encompasses both Hepplewhite and Sheraton influences, interpreted with American sensibilities.

    Historical Context

    After the Revolution, Americans wanted to distance themselves from British colonial styles. The new nation embraced neoclassicism – designs inspired by ancient Greece and Rome, which seemed appropriate for the new republic.

    Hepplewhite Style (1785-1800)

    George Hepplewhite’s designs, published posthumously in 1788, emphasized delicacy and elegance.

    Key Identification Features:

    Legs:

    • Straight tapered legs (square cross-section)
    • Tapered to a small foot or spade foot
    • Sometimes with inlaid decoration
    • NO cabriole legs

    Chair Backs:

    • Shield-shape (most iconic)
    • Heart-shape
    • Oval shape
    • Delicate carved or wheat-sheaf splats

    Decorative Elements:

    • Extensive use of contrasting wood inlays
    • Bellflower drops (garlands)
    • Urns and swags
    • Patera (oval medallions)
    • Eagle motifs (very American)
    • Stringing (thin lines of contrasting wood)

    Case Pieces:

    • Serpentine or bow fronts
    • French feet (curved bracket)
    • Oval brass hardware
    • Delicate proportions

    Sheraton Style (1790-1820)

    Thomas Sheraton’s designs appeared slightly later with subtle but important differences:

    Key Identification Features:

    Legs:

    • Turned and often reeded (parallel grooves)
    • Round cross-section typical
    • Still tapered but with turnings

    Chair Backs:

    • More rectangular/square than Hepplewhite
    • Horizontal elements emphasized
    • Often with carved or painted decoration
    • Lattice or X patterns in splat

    Decorative Elements:

    • Reeding (convex parallel grooves)
    • More architectural feel
    • Painted decoration common
    • Less reliance on inlay
    • Classical motifs

    Case Pieces:

    • More rectangular forms
    • Reeded columns at corners
    • Often with galleries
    • Tambour doors (flexible slatted)

    Hepplewhite vs. Sheraton

    FeatureHepplewhiteSheraton
    Chair backShield, heart, ovalRectangular, square
    LegsSquare taperedRound, reeded, tapered
    DecorationInlay focusedReeding, carving
    FeelDelicate curvesMore architectural
    FeetSpade footTurned foot

    Regional Federal Furniture

    New England Federal:

    • Salem, Massachusetts produced exceptional work
    • Samuel McIntire’s carved furniture
    • Delicate proportions
    • Extensive use of inlay

    New York Federal:

    • Duncan Phyfe’s workshop
    • French Directoire influence
    • Lyre-back chairs
    • Saber legs

    Baltimore Federal:

    • Elaborate painted decoration
    • Eglomisé (reverse painted glass) panels
    • Distinctive regional style
    • Bellflower inlay

    Philadelphia Federal:

    • Continued high quality
    • More conservative designs
    • Excellent craftsmanship

    Era 6: Empire Period (1810-1840)

    Empire style originated in Napoleonic France and spread throughout the Western world. It represents a dramatic shift from the delicate Federal style to bold, monumental forms.

    Historical Context

    Napoleon commissioned furniture to reflect his imperial ambitions, drawing on ancient Egyptian, Greek, and Roman designs. After his defeat, the style continued and evolved on both sides of the Atlantic.

    Key Identification Features

    Overall Impression: BOLD and HEAVY. Empire furniture makes a statement. Where Federal furniture whispers elegance, Empire furniture announces power.

    Primary Wood: Dark mahogany, often with dramatic figure (flame, crotch). Veneers showcase the grain.

    Structural Elements:

    • Columns as supports (often gilded or ebonized)
    • Scroll supports (S-curves, C-curves)
    • Pilasters (flat columns against surfaces)
    • Heavy cornices and pediments

    Leg and Foot Styles:

    • Animal paw feet (lion, eagle)
    • Scroll feet
    • Saber legs (curved like a sword)
    • Column legs
    • Platform bases

    Decorative Motifs:

    • Lyre shapes (very common)
    • Animal heads and wings (eagles, swans, dolphins)
    • Laurel wreaths and torches
    • Classical figures
    • Egyptian motifs (sphinxes, lotus)
    • Pineapples and acanthus

    Case Pieces:

    • Heavy cornices
    • Columns at front corners
    • Mirror panels on wardrobes
    • White marble tops
    • Ormolu mounts (French) or stenciled decoration (American)

    American Empire (Classical American)

    Characteristics:

    • Less ornate than French Empire
    • Stenciled decoration instead of ormolu
    • Larger scale overall
    • More reliance on figured veneers
    • Pillar-and-scroll forms

    Key Makers:

    • Duncan Phyfe (New York) – the most famous
    • Charles-Honoré Lannuier (New York) – French-trained
    • Anthony Quervelle (Philadelphia)

    Duncan Phyfe Identification:

    • Lyre-back chairs
    • Saber legs
    • Acanthus carving
    • Reeded legs
    • High quality mahogany
    • Restrained elegance within Empire vocabulary

    Late Empire / Pillar-and-Scroll (1830-1850)

    The late phase of Empire became increasingly heavy and reliant on:

    • Thick scrolls and pillars
    • Heavy ogee curves
    • Machine-assisted production
    • Less hand carving
    • Simplified forms

    Era 7: Victorian Era (1837-1901)

    Queen Victoria’s 64-year reign saw rapid changes in furniture fashion. The Victorian era actually encompasses multiple distinct styles, which can make identification challenging.

    Victorian Sub-Styles Overview

    Sub-StyleDatesKey Features
    Early Victorian1837-1850Continuation of late Empire
    Gothic Revival1840-1865Pointed arches, church motifs
    Rococo Revival1845-1870Exuberant curves, carved flowers
    Renaissance Revival1860-1885Architectural, medallions, busts
    Eastlake1870-1890Rectilinear, incised lines
    Aesthetic Movement1875-1890Japanese influence, ebonized
    Colonial Revival1880-1920Return to 18th century American

    Gothic Revival (1840-1865)

    Identification Features:

    • Pointed arches (the defining element)
    • Trefoil and quatrefoil motifs
    • Tracery patterns
    • Crockets and finials
    • Dark, heavy appearance
    • Church-inspired decoration
    • Oak and walnut

    Common Pieces:

    • Hall chairs
    • Bookcases
    • Church furniture (lecterns, prie-dieux)

    Rococo Revival (1845-1870)

    Identification Features:

    • Extravagant curves everywhere
    • Naturalistic carved decoration (roses, grapes, fruit)
    • Finger-molded frames
    • Tufted upholstery
    • Serpentine fronts
    • Cabriole legs (heavier than 18th century)

    Primary Wood: Rosewood, walnut

    John Henry Belter: The most famous maker of Rococo Revival furniture used laminated rosewood that could be carved in incredible detail:

    • Multiple thin layers glued with grain alternating
    • Allowed for elaborate pierced carving
    • Extremely ornate
    • Very collectible today

    Common Pieces:

    • Parlor suites (sofa + chairs)
    • Étagères (display shelves)
    • Center tables with marble tops

    Renaissance Revival (1860-1885)

    Identification Features:

    • Architectural forms (pediments, columns)
    • Incised line decoration
    • Applied carved ornaments
    • Medallions, busts, cartouches
    • Burl veneer panels
    • White marble tops
    • Massive scale

    Primary Wood: Walnut with burl panels

    Common Pieces:

    • Bedroom suites
    • Sideboards
    • Bookcases
    • Hall stands

    Eastlake Style (1870-1890)

    Named after Charles Eastlake, who advocated for simpler, more “honest” furniture.

    Identification Features:

    • Rectilinear forms (rectangular)
    • Incised geometric decoration (not carved relief)
    • Turned spindles and galleries
    • Chip carving
    • Less ornate than other Victorian
    • Often ebonized with gilt highlights
    • Machine-made elements

    Primary Wood: Walnut, oak, ebonized cherry

    Common Pieces:

    • Bedroom furniture
    • Desks
    • Bookcases
    • Hall trees

    Aesthetic Movement (1875-1890)

    Identification Features:

    • Japanese influence (fans, bamboo, birds)
    • Ebonized surfaces
    • Incised gilded decoration
    • Asymmetrical designs
    • Sunflower and lily motifs
    • Art for art’s sake philosophy

    Dating Victorian Furniture

    Construction clues help narrow dates:

    FeatureBefore 1850After 1850
    ScrewsHandmade, irregularMachine-made
    NailsCut nailsWire nails (after 1890)
    Saw marksStraight (hand/mill)Circular arc marks
    DovetailsLarger, hand-cutSmaller, more uniform
    VeneerThicker, hand-cutThinner, machine-cut

    Era 8: Arts and Crafts Movement (1880-1920)

    The Arts and Crafts movement was a direct reaction against Victorian excess and industrial mass production. It celebrated handcraft, honest construction, and simple beauty.

    Historical Context

    Led by William Morris in England and Gustav Stickley in America, the movement rejected the ornate, machine-made furniture of the Victorian era. Instead, it championed furniture that revealed its construction and used materials honestly.

    Key Identification Features

    Overall Impression: Simple, honest, sturdy. Arts and Crafts furniture looks like it was made by hand (because it was) and doesn’t hide its joinery.

    Primary Wood: Quarter-sawn white oak is THE signature wood. The quarter-sawing process reveals distinctive ray flake patterns – light streaks across the grain.

    Construction Philosophy: DON’T HIDE THE JOINERY – CELEBRATE IT:

    • Through-tenons (visible where they pass through)
    • Exposed pegs (often square)
    • Visible dovetails
    • Corbels and keys as decorative elements

    Leg Styles:

    • Square, straight legs
    • Sometimes with through-tenon stretchers
    • Slight taper occasionally
    • Corbels at joints

    Hardware:

    • Hand-hammered copper
    • Hand-forged iron
    • Simple, functional designs
    • Pyramid-head screws

    Finish:

    • Fumed oak (ammonia darkened)
    • Natural oil or wax
    • Rich brown tones
    • No high gloss

    Major American Makers

    Gustav Stickley (Craftsman):

    • Syracuse, New York
    • Most famous Arts and Crafts maker
    • “Als Ik Kan” motto (As I Can)
    • Red decal or branded marks
    • Highest quality, highest prices

    L. & J.G. Stickley:

    • Gustav’s brothers
    • “Work of…” decal
    • Similar quality, different designs
    • “Handcraft” label

    Stickley Brothers:

    • Grand Rapids, Michigan
    • “Quaint Furniture” label
    • Different company from Gustav
    • More affordable

    Roycroft:

    • East Aurora, New York
    • Orb and cross mark
    • Community workshop
    • Often with leather and copper

    Limbert:

    • Grand Rapids
    • Cutout designs in sides
    • More decorative than Stickley
    • “Limbert’s Arts Crafts” brand

    Charles Rohlfs:

    • Buffalo, New York
    • More artistic/sculptural
    • Unique designs
    • Very collectible

    Mission vs. Arts and Crafts

    These terms are often used interchangably, but there’s a distinction:

    • Arts and Crafts: The broader movement and philosophy
    • Mission: A specific subset with severe, rectilinear designs (supposedly inspired by California mission furniture)

    All Mission furniture is Arts and Crafts, but not all Arts and Crafts is Mission.


    Era 9: Art Nouveau (1890-1910)

    Art Nouveau was a brief but influential movement that embraced organic, flowing forms inspired by nature. It represented a complete break from historical revival styles.

    Historical Context

    Art Nouveau (“New Art”) emerged simultaneously across Europe with different names: Jugendstil (Germany), Stile Liberty (Italy), Modernisme (Spain). It was the first truly modern style, rejecting historical precedents.

    Key Identification Features

    Overall Impression: Organic, flowing, almost alive. Art Nouveau furniture looks like it grew rather than was built. Curves dominate everything.

    The Whiplash Curve: The signature motif – a sinuous, S-shaped curve that flows continuously through designs.

    Nature Motifs:

    • Flowers (lilies, irises, orchids, poppies)
    • Vines and tendrils
    • Dragonflies and butterflies
    • Peacock feathers
    • Waves and water plants
    • Female figures with flowing hair

    Materials:

    • Various woods carved into organic shapes
    • Marquetry with naturalistic designs
    • Bronze mounts
    • Stained glass
    • Mother-of-pearl inlay

    Construction:

    • Sculptural approach
    • Integrated decoration (not applied)
    • Asymmetrical designs
    • Flowing lines connecting all parts

    Major Designers

    Louis Majorelle (France):

    • Nancy school
    • Water lily motifs
    • Ormolu mounts
    • Exquisite marquetry

    Émile Gallé (France):

    • Nancy school
    • Botanical accuracy
    • Poetic inscriptions
    • Also famous for glass

    Hector Guimard (France):

    • Paris Metro entrances designer
    • Sculptural furniture
    • Organic bronze hardware

    Carlo Bugatti (Italy):

    • Exotic materials
    • Moorish influences
    • Parchment covered
    • Highly distinctive

    Charles Rennie Mackintosh (Scotland):

    • Glasgow school
    • More geometric
    • High-backed chairs
    • Japanese influence

    Art Nouveau Rarity

    Genuine Art Nouveau furniture is relatively rare and valuable because:

    • Short production period (about 20 years)
    • Labor-intensive construction
    • Limited producers
    • Many pieces lost to changing fashion
    • High current collector demand

    Era 10: Art Deco (1920-1940)

    Art Deco embraced the machine age with bold geometric designs and luxurious materials. It represents the last major historical furniture period before mid-century modern.

    Historical Context

    Born from the 1925 Paris Exposition Internationale des Arts Décoratifs (which gave the style its name), Art Deco reflected the optimism and glamour of the Jazz Age. It celebrated modern technology, speed, and luxury.

    Key Identification Features

    Overall Impression: Geometric, glamorous, bold. Art Deco furniture makes a strong visual statement with its shapes and materials.

    Geometric Forms:

    • Circles and semicircles
    • Sunbursts and fan shapes
    • Chevrons and zigzags
    • Stepped profiles (like skyscrapers)
    • Symmetrical compositions

    Exotic Materials:

    • Macassar ebony (striped dark wood)
    • Zebrawood
    • Amboyna burl
    • Palisander
    • Shagreen (ray or shark skin)
    • Parchment
    • Chrome and glass
    • Lacquer in bold colors
    • Ivory (now illegal to trade)

    Surface Treatments:

    • High-gloss lacquer
    • Bookmatched veneers
    • Geometric marquetry
    • Mirror panels
    • Chrome accents

    Leg Styles:

    • Geometric shapes
    • U-shaped supports
    • Chrome tubes
    • Tapered rectangles
    • Pedestal bases

    Major Designers

    Émile-Jacques Ruhlmann (France):

    • The master of Art Deco
    • Exquisite craftsmanship
    • Exotic materials
    • Extremely expensive (then and now)

    Jean Dunand (France):

    • Lacquer specialist
    • Elaborate lacquer panels
    • Often collaborated with Ruhlmann

    Jules Leleu (France):

    • More accessible than Ruhlmann
    • Still very high quality
    • Clean geometric designs

    Paul Frankl (American):

    • Skyscraper furniture
    • Stepped bookshelves
    • California modern

    Donald Deskey (American):

    • Radio City Music Hall interiors
    • Industrial materials
    • American Deco

    Art Deco vs. Art Moderne

    “Art Moderne” or “Streamline Moderne” emerged in the 1930s with:

    • Even simpler, more aerodynamic forms
    • Teardrop and torpedo shapes
    • Horizontal speed lines
    • Chrome banding
    • Waterfall curves on case pieces
    • More machine-made, less handcraft
    • Bakelite and plastics

    Quick Identification Summary Chart

    EraDatesKey FeatureSignature Element
    Jacobean1600-1690Heavy, dark oakBarley twist legs
    William & Mary1690-1730Walnut veneerTrumpet legs
    Queen Anne1700-1755Graceful curvesCabriole leg + pad foot
    Chippendale1750-1790Elaborate carvingBall-and-claw foot
    Federal1780-1820Delicate inlayShield-back chair
    Empire1810-1840Bold, heavyAnimal paw feet
    Victorian1837-1901Ornate, variedMultiple revival styles
    Arts & Crafts1880-1920Simple, honestVisible through-tenons
    Art Nouveau1890-1910Organic curvesWhiplash line
    Art Deco1920-1940Geometric glamourExotic veneers

    Identification Decision Tree

    Use this process when examining unfamiliar furniture:

    Step 1: Heavy or Light?

    • Very heavy, dark oak → Jacobean
    • Heavy but with veneer → William & Mary or Empire
    • Light and graceful → Queen Anne, Chippendale, Federal
    • Simple and sturdy → Arts & Crafts

    Step 2: Curved or Straight?

    • S-curved (cabriole) legs → Queen Anne or Chippendale
    • Straight tapered legs → Federal
    • Organic flowing curves → Art Nouveau
    • Geometric angles → Art Deco

    Step 3: Decorated or Plain?

    • Minimal decoration → Queen Anne, Arts & Crafts
    • Elaborate carving → Chippendale, Rococo Revival
    • Inlay decoration → Federal
    • Applied ornament → Victorian

    Step 4: What are the Feet?

    • Pad foot → Queen Anne
    • Ball-and-claw → Chippendale
    • Spade foot → Hepplewhite
    • Paw foot → Empire
    • Bun foot → William & Mary

    For instant identification anywhere, use the Antique Identifier app to photograph a piece and get immediate era and style identification.


    Building Your Identification Skills

    Learning to identify antique furniture takes time and practice. Here are some ways to develop your eye:

    Visit Museums: Study authenticated pieces. Note how they look and feel. Pay attention to proportions.

    Attend Auctions: Preview events allow hands-on examination. Compare pieces across periods.

    Handle Everything You Can: Touch drawer interiors, examine undersides, feel the wood. Your hands learn what your eyes miss.

    Build a Reference Library: Good books with quality photographs are invaluable. Study them regularly.

    Use Technology: Apps like Antique Identifier can help train your eye and confirm your assessments.

    Focus on One Period: Rather than trying to learn everything at once, become expert in one era first, then expand.


    Conclusion

    Identifying antique furniture by era and style is a skill that enriches your appreciation of craftsmanship and history. Each piece connects you to the makers who created it and the people who used it across generations.

    Use this guide as your reference whenever you encounter unfamiliar pieces. With practice, you’ll develop the eye that distinguishes a genuine 18th-century Philadelphia Chippendale highboy from a Centennial reproduction – and that knowledge is both personally rewarding and financially valuable.

    Happy collecting!

  • Identifying Antiques: 15 Expert Tips to Spot Valuable Pieces in 2026

    Identifying Antiques: 15 Expert Tips to Spot Valuable Pieces in 2026

    Walking into an antique shop, estate sale, or even your grandmother’s attic can feel like entering a treasure hunt. But how do you seperate the genuine antiques from the clever reproductions? How do you know if that dusty old chair is worth $50 or $5,000?

    Identifying antiques is a skill that takes years to master, but you don’t need decades of experience to start spotting valuable pieces. In this guide, we’ll share 15 expert tips that professional appraisers and seasoned collectors use to identify authentic antiques and assess their value.

    Whether you’re a beginner collector, an estate sale enthusiast, or someone who just inherited a houseful of old furniture, these tips will help you make smarter decisions and avoid costly mistakes.

    Why Identifying Antiques Correctly Matters

    Before we dive into the tips, let’s understand why proper identification is so important:

    Financial Protection: Paying antique prices for reproductions is an expensive mistake. Conversely, selling a valuable antique for pennies because you didn’t recognize it is equally painful.

    Historical Appreciation: When you can properly identify antiques, you connect with history. Each piece tells a story about the craftsmen who made it and the people who used it.

    Collection Building: Serious collectors focus on specific periods, makers, or styles. Accurate identification helps you build a coherent, valuable collection.

    Investment Potential: The antiques market rewards knowledge. Those who can identify undervalued pieces have a significant advantage.

    Now let’s get into the expert tips that will sharpen your identification skills.

    Tip #1: Start with the Overall Form and Proportions

    Before examining any details, step back and look at the piece as a whole. Experienced appraisers can often date a piece within 50 years just from its silhouette.

    What to Observe:

    • Is it heavy and substantial, or light and delicate?
    • Are the proportions balanced and pleasing?
    • Does the overall shape match a known period style?

    Period Indicators by Form:

    • Heavy, blocky forms → Early periods (Jacobean, William & Mary)
    • Curved, graceful forms → Mid-18th century (Queen Anne, Chippendale)
    • Light, straight forms → Late 18th century (Federal, Hepplewhite)
    • Bold, monumental forms → Early 19th century (Empire)
    • Ornate, busy forms → Victorian era
    • Simple, honest forms → Arts & Crafts

    Pro Tip: Reproductions often get the details right but miss the proportions. If something looks “off” but you can’t pinpoint why, trust your instincts – the proportions might be wrong.

    Tip #2: Examine the Wood Carefully

    Wood analysis is one of the most reliable ways to identify and date antiques. Both the species and how it’s used provide valuable clues.

    Primary Wood Analysis:

    • Oak dominates before 1700
    • Walnut from 1690-1750
    • Mahogany from 1730 onward
    • Rosewood in Victorian pieces
    • Quarter-sawn oak in Arts & Crafts

    Secondary Wood Secrets:

    The wood used inside drawers, on backboards, and underneath tells you where a piece was made:

    Secondary WoodOrigin
    White pineNew England
    Yellow pineAmerican South
    Poplar/TulipwoodMid-Atlantic (Philadelphia, New York)
    OakEngland
    ChestnutContinental Europe
    BeechFrance

    Signs of Age in Wood:

    • Shrinkage across the grain (round tops become slightly oval)
    • Oxidation (wood darkens from the surface inward)
    • Patina that varies with exposure and handling
    • Dry, slightly rough texture on unfinished surfaces

    Red Flag: If all surfaces have identical color and patina, including hidden areas, be suspicious. Genuine antiques show variation based on light exposure and handling.

    Tip #3: Study the Construction Methods

    How a piece is put together reveals more than almost any other factor. Construction methods changed dramatically over time, leaving clear evidence of age.

    Dovetail Analysis:

    Dovetails (the interlocking joints at drawer corners) are particularly telling:

    • Pre-1700: Large, crude, hand-cut dovetails, usually just 1-3 per joint
    • 1700-1890: Hand-cut but more refined, irregular spacing and angles
    • 1890-1950: Machine-cut, perfectly uniform, smaller and more numerous
    • 1950+: Router-cut with rounded internal corners

    What to Look For:

    1. Pull drawers out completely
    2. Examine where the sides meet the front
    3. Count the dovetails
    4. Check for uniformity – hand-cut means slight irregularity

    Other Construction Clues:

    • Mortise-and-tenon joints held with wooden pegs = pre-1850
    • Square nails = pre-1890
    • Round wire nails = post-1890
    • Hand-planed surfaces show subtle ripples
    • Machine-planed surfaces are perfectly flat

    For quick verification, try the Antique Identifier app which can analyze construction details from photos.

    Tip #4: Check the Hardware Authenticity

    Original hardware is like a fingerprint for dating furniture. But hardware is also the most commonly replaced element, so you need to look carefully.

    Signs of Original Hardware:

    • Shadow marks on the wood matching the current hardware
    • No extra screw holes or filled holes
    • Patina consistent with the piece
    • Style matches the furniture period

    Hardware Evolution Timeline:

    • 1690-1720: Teardrop pulls, single-post attachment
    • 1720-1780: Bail pulls (willow brasses) with two posts
    • 1780-1810: Oval stamped plates with bail
    • 1810-1840: Round rosettes, often with pressed designs
    • 1840-1880: Carved wooden pulls (Victorian)
    • 1880-1920: Cast brass, often ornate

    Red Flags:

    • Hardware that looks too new or shiny
    • Phillips head screws (invented 1930s) on “18th century” pieces
    • Holes that don’t align with current hardware
    • Mix of hardware styles on the same piece

    Note: Replaced hardware doesn’t make a piece worthless, but it does affect value. Original hardware can add 25-50% to a piece’s worth.

    Tip #5: Look for Signs of Genuine Wear

    Authentic antiques show wear in logical places from decades or centuries of use. Reproductions either show no wear or have artificially applied “distressing.”

    Where to Find Authentic Wear:

    • Feet bottoms (worn from moving and mopping around)
    • Stretchers (worn from resting feet)
    • Chair arms (worn where hands naturally grip)
    • Drawer runners (worn from repeated opening)
    • Edges and corners (rounded from handling)
    • Around keyholes (worn from key use)

    What Authentic Wear Looks Like:

    • Smooth, gradual transitions
    • Deeper wear in high-use areas
    • Consistent with the piece’s function
    • Patina worn through in logical spots

    Fake Wear Red Flags:

    • Distressing in random locations
    • Uniform “aging” across the whole piece
    • Sharp edges on supposedly old wear marks
    • Chains or tools marks (used to create fake damage)
    • Fresh scratches under “old” finish

    Tip #6: Analyze the Finish and Patina

    The finish on antique furniture evolved over time, and each era has characterstic treatments.

    Historical Finish Timeline:

    • Pre-1800: Wax, oil, or no finish
    • 1800-1860: Shellac becomes common
    • 1860-1920: Varnish (oil-based)
    • 1920-1960: Lacquer (nitrocellulose)
    • 1960+: Polyurethane

    Shellac Characteristics:

    • Warm, amber tone
    • Dissolves with alcohol (test in hidden spot)
    • Shows wear patterns
    • Can be refreshed without stripping

    Patina Matters: Patina is the surface character that develops over decades of exposure to air, light, and handling. It cannot be faked convincingly.

    Signs of Genuine Patina:

    • Color depth that goes into the wood, not just on the surface
    • Variation across the piece (light-exposed vs. protected areas)
    • Wear patterns that make sense
    • “Glow” that comes from decades of wax buildup

    Warning: Refinished antiques lose much of their patina. A piece that’s been stripped and refinished can lose 50-75% of its value compared to one with original finish.

    Tip #7: Investigate Maker’s Marks and Labels

    Many antique pieces are signed, stamped, labeled, or marked by their makers. Finding these marks can dramatically clarify identification and value.

    Where to Look:

    • Inside and underneath drawers
    • On backboards
    • Under table tops
    • On the bottom of chairs
    • Inside cabinet doors
    • On mechanisms (locks, hinges)

    Types of Marks:

    • Stamps: Impressed into the wood
    • Labels: Paper labels (often partial or faded)
    • Brands: Burned into the wood
    • Stencils: Painted marks
    • Chalk or pencil: Worker’s marks

    What Marks Tell You:

    • Maker’s name establishes authorship
    • Location helps date and authenticate
    • Patent dates provide “not earlier than” dating
    • Retailer labels indicate original market

    Caution: Fake labels and marks do exist. Look for:

    • Paper that’s too crisp for the supposed age
    • Printing technology that doesn’t match the period
    • Famous names on mediocre quality pieces
    • Labels applied over existing finish

    For help decoding marks, the Antique Identifier app includes a database of maker’s marks and can identify many stamps and signatures.

    Tip #8: Smell and Touch the Piece

    This might sound strange, but experienced dealers use all their senses when evaluating antiques.

    The Smell Test:

    • Old wood has a distinctive musty, dry smell
    • New wood smells fresh, sometimes like sawdust
    • Old finishes have a different scent than modern polyurethane
    • Genuine old drawers smell like decades of storage

    The Touch Test:

    • Old wood feels dry and slightly textite
    • Hand-planed surfaces have subtle ripples
    • Machine-sanded surfaces are perfectly smooth
    • Worn areas feel smoother than protected areas
    • Old hardware has softer edges than new castings

    What Your Hands Can Tell You: Run your hands over surfaces, especially hidden ones:

    • Drawer bottoms should feel hand-planed (subtle ridges)
    • Inside surfaces should feel different from outside
    • Repairs often feel different than original work
    • Old screws have irregular slots that you can feel

    Tip #9: Check for Consistency Throughout the Piece

    Genuine antiques are consistent in their construction, materials, and aging. Fakes, “marriages” (pieces assembled from parts of different items), and heavily repaired pieces show inconsistencies.

    What Should Match:

    • Wood species throughout
    • Construction methods
    • Hardware style
    • Wear patterns
    • Aging and patina
    • Proportions and style

    Red Flags:

    • Different wood species in unexpected places
    • Some dovetails hand-cut, others machine-cut
    • Wear patterns that don’t make sense
    • Parts that seem too big or small for the piece
    • Style elements from different periods

    “Marriages” to Watch For:

    • Highboys with replaced tops or bases
    • Secretaries with mismatched bookcase tops
    • Tables with replaced tops
    • Desks with added gallery or bookcase sections

    A married piece is worth considerably less than a completely original one, even if both parts are genuinely antique.

    Tip #10: Research Comparable Sales

    Knowing what similar pieces have sold for helps you identify and value antiques accurately.

    Where to Research:

    • Auction house archives (Christie’s, Sotheby’s, Heritage)
    • Online auction results (LiveAuctioneers, Invaluable)
    • Price guides (Miller’s, Kovels’)
    • Dealer websites and sold listings
    • Antique show price observations

    What to Compare:

    • Same period and style
    • Similar size and form
    • Comparable condition
    • Equivalent provenance

    Price Factors:

    • Maker attribution can multiply value by 10x or more
    • Original finish vs. refinished (2-4x difference)
    • Original hardware vs. replaced (25-50% difference)
    • Condition issues (damage reduces value significantly)
    • Regional desirability (American pieces in USA, etc.)

    Tip #11: Understand Style Evolution and Transitions

    Furniture styles didn’t change overnight. Understanding transitions helps you date pieces more precisely.

    Transitional Characteristics:

    • Early Queen Anne may still have stretchers
    • Late Chippendale often shows neoclassical influence
    • Empire style begins while Federal is still popular
    • Victorian revivals blend multiple earlier styles

    Dating by Style Details:

    If You See…It’s Likely…
    Cabriole legs + stretchersEarly Queen Anne (1720-1735)
    Ball-and-claw + straight legsTransitional Chippendale (1780s)
    Shield back + saber legsLate Federal/early Empire
    Gothic arch + rococo curvesEarly Victorian (1840s)

    Regional Time Lag: Styles took time to spread from urban centers. A piece in rural Pennsylvania might be made in Chippendale style in 1820, decades after it was fashionable in Philadelphia.

    Tip #12: Know the Most Common Fakes and Reproductions

    Certain styles and pieces are reproduced more than others. Knowing what to watch for helps you avoid expensive mistakes.

    Most Commonly Faked:

    1. Chippendale highboys – Victorian and Centennial reproductions abound
    2. Windsor chairs – Made continuously since the 1700s
    3. Shaker furniture – Simple style is easy to copy
    4. Arts & Crafts/Stickley – High value invites faking
    5. Colonial American pieces – Centennial (1876) reproductions
    6. French Provincial – Modern reproductions everywhere

    Reproduction Periods:

    • Centennial (1876): Colonial Revival pieces made for the 100th anniversary
    • Colonial Revival (1920s-40s): Mass-produced “colonial” furniture
    • Bicentennial (1976): Another wave of reproductions
    • Modern imports: Asian and European reproductions

    How to Spot Reproductions:

    • Construction too perfect (machine precision)
    • Wood too uniform in color
    • No logical wear patterns
    • Hardware inconsistencies
    • “Aged” finish that can be scratched through

    Tip #13: Evaluate Condition Objectively

    Condition dramatically affects value, but “perfect” condition on an antique should actually raise suspicions.

    Condition Grading:

    • Mint: Like new – actually suspicious for genuine antiques
    • Excellent: Minor wear consistent with age
    • Very Good: Normal wear, minor repairs
    • Good: Noticeable wear, some repairs needed
    • Fair: Significant issues but restorable
    • Poor: Major damage or loss

    Acceptable vs. Problematic Issues:

    Generally AcceptableValue Reducers
    Minor scratchesStructural damage
    Slight fadingMissing parts
    Small repairsReplaced major elements
    Replaced hardwareRefinished surfaces
    Normal wearWater damage
    Age-appropriate patinaInsect damage

    Restoration Considerations: Some restoration is acceptable:

    • Structural repairs for stability
    • Cleaning and waxing
    • Careful touch-ups

    Restoration that destroys value:

    • Stripping original finish
    • Replacing original parts unnecessarily
    • Over-restoration that removes character

    Tip #14: Trust But Verify Provenance

    Provenance (ownership history) can add significant value but can also be fabricated. Approach provenance claims with healthy skepticism.

    What Good Provenance Includes:

    • Documentation (bills of sale, inventory records)
    • Photographic evidence
    • Family history with supporting details
    • Exhibition history
    • Publication in books or catalogs

    Provenance Red Flags:

    • Vague claims without documentation
    • “From a famous estate” without proof
    • Stories that seem too good to be true
    • Provenance that doesn’t match the piece’s wear
    • Reluctance to provide verification

    How Provenance Affects Value:

    • Museum or notable collector ownership: Premium
    • Exhibition history: Adds value
    • Historical significance: Significant premium
    • Family stories without documentation: Minimal effect
    • No known provenance: Baseline value

    Tip #15: Use Technology as a Tool

    Modern technology can enhance your identification abilities, though it should supplement rather than replace traditional skills.

    Digital Resources:

    • Online auction archives for comparables
    • Maker’s mark databases
    • Museum collection databases
    • Digital measuring and documentation tools

    AI-Powered Identification:

    Apps like Antique Identifier use artificial intelligence to analyze photos and provide:

    • Period and style identification
    • Comparable sales data
    • Value estimates
    • Authentication indicators
    • Maker identification

    This technology is particularly helpfull when you’re at an estate sale or auction and need quick information before making a purchase decision.

    UV Light Examination: Black lights reveal:

    • Repairs and touch-ups (they fluoresce differently)
    • Old finishes vs. new
    • Replaced parts
    • Hidden damage

    Magnification: A loupe or magnifying glass helps you see:

    • Tool marks
    • Signatures and stamps
    • Wood grain details
    • Finish characteristics

    Putting It All Together: A Systematic Approach

    When evaluating an antique, use these tips systematically:

    Quick Assessment (2 minutes):

    1. Overall form and proportions
    2. Wood type
    3. Major style indicators
    4. General condition

    Detailed Examination (10-15 minutes):

    1. Construction methods (dovetails, joints)
    2. Hardware analysis
    3. Wear pattern evaluation
    4. Finish and patina
    5. Maker’s marks search
    6. Consistency check

    Research Phase (as needed):

    1. Style confirmation
    2. Comparable sales
    3. Maker research
    4. Provenance verification

    Common Mistakes to Avoid

    Even experienced collectors make these errors:

    1. Falling in love before evaluating – Emotional attachment clouds judgment
    2. Rushing decisions – Take time to examine thoroughly
    3. Ignoring red flags – One serious issue can mean fake or reproduction
    4. Over-relying on one factor – Use multiple identification methods
    5. Assuming age equals value – Condition and rarity matter more
    6. Skipping hidden areas – The best clues are often underneath
    7. Trusting seller claims – Verify independently
    8. Ignoring your instincts – If something feels wrong, investigate

    Conclusion

    Identifying antiques is both an art and a science. These 15 expert tips provide a framework, but developing true expertise requires practice, study, and handling as many genuine antiques as possible.

    Start with one period or style that interests you and learn it thoroughly. Visit museums to study authenticated pieces. Attend auctions and preview events where you can handle furniture. Build relationships with reputable dealers who can share their knowledge.

    And don’t hesitate to use modern tools like the Antique Identifier app to support your learning journey. AI can help you confirm identifications and catch details you might miss, especially when you’re still building your expertise.

    With practice and persistence, you’ll develop the eye that separates casual browsers from confident collectors. Happy hunting!

  • How to Identify Antique Furniture Styles: Complete Visual Guide (2026)

    How to Identify Antique Furniture Styles: Complete Visual Guide (2026)

    Have you ever walked into an antique shop or inherited a piece of furniture from your grandmother and wondered exactly what style it is? You’re definately not alone. Identifying antique furniture styles can feel overwhelming at first, but once you understand the key characteristics of each period, it becomes much more managable.

    In this comprehensive guide, we’ll walk you through everything you need to know about identifying antique furniture styles. From the ornate carvings of the Baroque period to the clean lines of Art Deco, you’ll learn how to recognize each style like a seasoned collector.

    Why Learning to Identify Antique Furniture Styles Matters

    Before we dive into the specifics, let’s talk about why this knowledge is so valuable. Whether you’re a collector, dealer, or simply someone who appreciates beautiful craftsmanship, understanding furniture styles helps you:

    • Determine authentic value – Knowing the true period of a piece affects its worth significantly
    • Avoid costly mistakes – Reproductions can fool even experienced buyers
    • Appreciate the craftsmanship – Each era had unique techniques and materials
    • Make informed purchases – You’ll know exactly what you’re buying

    If you want to identify antique furniture instantly, you can also try our Antique Identifier app for iOS which uses AI to recognize styles, periods, and estimate values from just a photo.

    The Major Antique Furniture Periods: A Quick Overview

    Understanding antique furniture starts with knowing the major historical periods. Here’s a timeline to help you get oriented:

    PeriodYearsKey Characteristics
    Jacobean1600-1690Heavy oak, geometric patterns
    William & Mary1690-1730Walnut veneer, trumpet legs
    Queen Anne1700-1755Cabriole legs, shell motifs
    Chippendale1750-1790Mahogany, ball-and-claw feet
    Federal/Hepplewhite1780-1820Delicate inlays, shield backs
    Empire1800-1840Bold columns, animal motifs
    Victorian1837-1901Ornate carvings, dark woods
    Arts & Crafts1880-1920Simple lines, visible joinery
    Art Nouveau1890-1910Flowing curves, nature themes
    Art Deco1920-1940Geometric shapes, exotic woods

    Now let’s explore each period in detail so you can identify them with confidance.

    Jacobean Period (1600-1690): The Foundation of English Furniture

    The Jacobean period represents some of the earliest furniture that collectors actively seek today. Named after King James I of England, this style is characterized by its solid, heavy construction.

    How to Identify Jacobean Furniture

    Wood Type: Almost exclusively oak, which was abundent in England at the time

    Construction: Heavy and sturdy with thick legs and stretchers connecting the legs near the floor

    Decorative Elements:

    • Geometric carved patterns
    • Spiral or barley twist turnings
    • Minimal curves – mostly straight lines
    • Split spindles applied as decoration

    Common Pieces: Gate-leg tables, joint stools, court cupboards, and wainscot chairs

    Pro Tip: Jacobean furniture often shows significant wear on stretchers because people rested their feet on them for centuries. This wear pattern is actually a good sign of authenticity.

    Common Mistakes When Identifying Jacobean Pieces

    Many Victorian-era reproductions mimick Jacobean style. To spot the difference:

    • Check the wood thickness – originals are thicker
    • Look for hand-cut dovetails vs. machine-cut
    • Examine the patina – 400-year-old oak has a distinctive color
    • Feel the underside – original pieces weren’t sanded smooth underneath

    William & Mary Period (1690-1730): Dutch Influence Arrives

    When William of Orange and Mary II took the English throne, they brought Dutch design influences that transformed English furniture. This period marks a signifcant shift toward lighter, more elegant pieces.

    Key Identification Features

    Wood Type: Walnut replaced oak as the primary wood, often used as veneer over other woods

    Legs: The famous trumpet-turned legs and inverted cup turnings are signature elements

    Decorative Techniques:

    • Marquetry (inlaid wood patterns)
    • Seaweed or arabesque marquetry patterns
    • Cross-banding on drawer fronts
    • Japanning (lacquer work imitating Asian designs)

    Stretchers: X-shaped or serpentine stretchers connecting legs

    Hardware: Tear-drop shaped brass pulls

    Spotting William & Mary Authenticity

    Original pieces will have hand-cut veneer that’s thicker than modern veneer. The marquetry should show slight irregularites that indicate hand-cutting. Machine-made reproductions are too perfect.

    Queen Anne Style (1700-1755): Elegance Takes Center Stage

    The Queen Anne period is beloved by collectors for its graceful proportions and refined details. Even though Queen Anne only reigned from 1702-1714, the style bearing her name continued for decades.

    Distinctive Queen Anne Characteristics

    The Cabriole Leg: This is THE defining feature – a curved leg that flows outward at the knee and inward at the ankle, ending in a pad foot, slipper foot, or trifid foot

    Wood Type: Walnut dominated early pieces, transitioning to mahogany in later years

    Chair Backs:

    • Fiddle-shaped or vase-shaped splats
    • Curved top rails (called yoke crests)
    • No stretchers between legs – the cabriole leg was strong enough alone

    Shell Motif: Carved shell decorations on chair crests, table knees, and cabinet pieces are quintessential Queen Anne

    Proportions: Overall lighter and more vertical than earlier periods

    American vs. English Queen Anne

    There are subtle but important differences:

    FeatureEnglishAmerican
    FeetMostly pad feetMore variety including trifid
    WoodPrimarily walnutOften maple, cherry, or walnut
    ProportionsSlightly heavierTaller and more slender
    CarvingMore elaborateSimpler, more restrained

    Philadelphia Queen Anne pieces are particulary prized by American collectors and command premium prices at auction.

    Chippendale Period (1750-1790): The Height of Georgian Craftsmanship

    Thomas Chippendale published “The Gentleman and Cabinet-Maker’s Director” in 1754, and it became the most influential furniture design book of the 18th century. His name became synonomous with the elaborate style of this period.

    Identifying Chippendale Furniture

    The Ball-and-Claw Foot: Perhaps the most recognizable feature – a carved claw grasping a ball, evolved from Chinese dragon imagery

    Wood: Mahogany became the dominant wood, prized for its strength and ability to hold intricate carving

    Three Main Style Variations:

    1. Gothic Chippendale – Pointed arches and tracery
    2. Chinese Chippendale – Fretwork, pagoda tops, bamboo-style turnings
    3. French Chippendale – Rococo curves and asymmetrical carving

    Chair Features:

    • Pierced splats with intricate patterns
    • Serpentine top rails
    • Carved knees on cabriole legs
    • Wide seats

    Case Pieces:

    • Broken pediment tops
    • Flame or urn finials
    • Bracket feet or ogee feet
    • Elaborate brass hardware

    Authentication Tips for Chippendale

    Genuine period Chippendale pieces have:

    • Hand-cut dovetails (irregular spacing and angles)
    • Secondary woods like poplar or pine inside drawers
    • Shrinkage across the grain of solid wood panels
    • Original brasses will leave shadow marks even if replaced

    The “Chippendale style” was reproduced extensively in the 19th and 20th centuries. Don’t confuse Victorian-era Chippendale revival pieces with genuine 18th-century originals – the value difference is enormous.

    Federal Period & Hepplewhite Style (1780-1820): American Independence in Design

    After American independence, furniture makers developed distinctly American interpretations of English designs. The Federal period encompasses both Hepplewhite and Sheraton influences.

    Hepplewhite Characteristics

    George Hepplewhite’s designs emphasized elegance and delicacy:

    Legs: Straight, tapered legs (square or round) replaced the cabriole

    Chair Backs: Shield-shaped, heart-shaped, or oval backs with delicate splats

    Inlay: Extensive use of contrasting wood inlays – bellflowers, urns, eagles, and paterae (oval medallions)

    Wood: Mahogany with satinwood, holly, or ebony inlays

    Hardware: Oval brass plates with bail handles

    Sheraton Style Distinctions

    Thomas Sheraton’s designs appeared slightly later and had subtle differences:

    • Chair backs more rectangular or square
    • More use of reeding (parallel carved lines)
    • Legs often reeded or turned
    • Less curved overall – more architectural feeling

    Both styles reflect the neoclassical movement inspired by discoveries at Pompeii and Herculaneum.

    Empire Period (1800-1840): Bold and Monumental

    The Empire style originated in France under Napoleon but quickly spread throughout Europe and America. It’s dramatically different from the delicate Federal style.

    Empire Identification Guide

    Proportions: Heavy, monumental, and symmetrical

    Columns: Classical columns, often gilded or ebonized, as structural and decorative elements

    Animal Motifs:

    • Lion’s paw feet
    • Eagle heads and wings
    • Swan neck curves
    • Dolphin supports

    Wood: Mahogany, often with ormolu (gilded bronze) mounts

    Decorative Elements:

    • Lyre shapes
    • Laurel wreaths
    • Torch and arrow motifs
    • Egyptian influences (sphinxes, hieroglyphics)

    Marble: White marble tops on tables, commodes, and pier tables

    American Empire Specifics

    American Empire (sometimes called “Classical American”) tends to be:

    • Less ornate than French Empire
    • More reliance on figured mahogany veneers
    • Stenciled rather than gilded decoration
    • Larger scale overall

    Duncan Phyfe is the most famous American maker of this period, and his pieces command high prices today.

    Victorian Era (1837-1901): Exuberance and Variety

    The Victorian era spans over 60 years and includes multiple sub-styles. This can make identification tricky, but also means there’s something for every taste.

    Victorian Sub-Styles

    Early Victorian / Gothic Revival (1840-1860)

    • Pointed arches
    • Trefoil and quatrefoil motifs
    • Dark, heavy appearance
    • Church-like decoration

    Rococo Revival (1845-1870)

    • Exaggerated curves
    • Elaborate carved flowers and fruits
    • Tufted upholstery
    • Rosewood or walnut

    Renaissance Revival (1860-1885)

    • Architectural elements
    • Incised carved lines
    • Medallions and busts
    • Walnut with burl veneer panels

    Eastlake (1870-1890)

    • Named after Charles Eastlake
    • Rectilinear forms
    • Incised geometric decoration
    • Less carving, more machine-made elements
    • Often ebonized with gilded highlights

    Colonial Revival (1880s onward)

    • Return to earlier American styles
    • Reproductions of Colonial and Federal pieces
    • Still being made today

    How to Date Victorian Furniture

    • Screws: Handmade screws until about 1850, machine-made after
    • Circular saw marks: Became common after 1850
    • Wire nails: After 1890 (before that, cut nails)
    • Thick veneer: Earlier pieces have thicker veneer
    • Finish: Shellac was common, lacquer came later

    Arts & Crafts Movement (1880-1920): Honest Construction

    As a reaction against Victorian excess and industrial mass production, the Arts & Crafts movement celebrated handcraft and simple design.

    Arts & Crafts Identification

    Construction: Visible joinery is celebrated, not hidden

    • Through-tenons (you can see where the tenon passes through)
    • Exposed pegs
    • Visible dovetails

    Wood: Quarter-sawn oak is the signature wood, showing distinctive ray flake patterns

    Hardware: Hand-hammered copper or iron

    Design Philosophy: Form follows function – no unneccesary decoration

    Key Makers:

    • Gustav Stickley (and his brothers’ competing companies)
    • Roycroft
    • Limbert
    • Charles Rohlfs

    Stickley Identification: Look for the “Als Ik Kan” motto or the joiner’s compass mark

    Mission Style vs. Arts & Crafts

    “Mission” is sometimes used interchangably with Arts & Crafts, but technically Mission refers to a subset with more severe, rectilinear designs inspired by Spanish mission furniture.

    Art Nouveau (1890-1910): Nature as Inspiration

    Art Nouveau was a brief but influential style that embraced organic, flowing forms inspired by nature.

    Recognizing Art Nouveau

    Curves: Sinuous, whiplash curves that flow continuously

    Nature Motifs:

    • Flowers (especially lilies, irises, orchids)
    • Vines and tendrils
    • Dragonflies and butterflies
    • Female figures with flowing hair

    Materials: Often combined wood with metal, glass, or mother-of-pearl

    Key Designers:

    • Louis Majorelle (France)
    • Émile Gallé (France)
    • Hector Guimard (France)
    • Carlo Bugatti (Italy)

    Art Nouveau furniture is relatively rare and highly collectible. Even smaller pieces command strong prices.

    Art Deco (1920-1940): Geometric Glamour

    Art Deco embraced the machine age with bold geometric designs and luxurious materials.

    Art Deco Characteristics

    Shapes: Geometric – circles, triangles, chevrons, sunbursts

    Materials:

    • Exotic woods (macassar ebony, zebrawood, amboyna)
    • Lacquer (often in bold colors)
    • Chrome and glass
    • Shagreen (ray or shark skin)
    • Ivory (now illegal to trade)

    Colors: Bold contrasts – black and cream, red and gold

    Surface Treatment: High-gloss finishes, often lacquered

    Key Designers:

    • Émile-Jacques Ruhlmann
    • Jean Dunand
    • Jules Leleu
    • Paul Frankl (American)

    Deco vs. Moderne

    “Art Moderne” or “Streamline Moderne” from the 1930s has even simpler lines with teardrop shapes and horizontal banding, inspired by aerodynamics.

    Practical Tips for Identifying Any Antique Furniture

    Now that you know the periods, here are universal techniques that apply across all styles:

    1. Examine the Construction

    Dovetails: Hand-cut dovetails (before 1890) are irregular and fewer in number. Machine-cut dovetails are perfectly uniform.

    Screws:

    • Before 1850: Handmade, irregular threads, off-center slots
    • 1850-1890: Machine-made but with blunt ends
    • After 1890: Modern pointed screws

    Saw Marks:

    • Straight parallel marks = hand saw or early circular saw
    • Curved marks = circular saw (post-1850)
    • No marks = band saw (late 19th century onward)

    2. Study the Wood

    Primary Woods: What’s visible tells you about period and origin

    Secondary Woods: Inside drawers, backboards, and underneath – these reveal geographic origin:

    • Poplar = American
    • Pine = Could be either
    • Oak secondary = Often English
    • Chestnut = Continental European

    Shrinkage: Old wood shrinks across the grain. Round tabletops become slightly oval. Drawer bottoms show gaps on the sides.

    3. Look at Hardware

    Original hardware leaves shadow marks on the wood. If the hardware looks original but there are no shadows or extra holes, be suspicious.

    Brass Development:

    • Early 18th century: Solid cast brass
    • Mid-18th century: Stamped brass
    • 19th century: Machine-pressed brass
    • Modern: Die-cast with consistent thickness

    4. Check the Finish

    Wax: Used throughout history Oil: Common on early pieces Shellac: Dominated 19th century Lacquer: 20th century (nitrocellulose lacquer) Polyurethane: Modern only

    5. Assess Wear Patterns

    Authentic wear appears in logical places:

    • Feet bottoms are worn from moving
    • Chair arms are worn where hands rest
    • Stretchers worn from feet
    • Drawer runners worn from use

    Fake wear is often too uniform or in illogical places.

    Using Technology to Identify Antiques

    While hands-on examination remains essential, modern technology can help tremendously.

    AI-Powered Identification

    Apps like Antique Identifier use artificial intelligence to analyze photos and identify furniture styles, periods, and even estimate values. This is particularly helpfull when you’re at an estate sale or auction and need quick information.

    Simply snap a photo, and the AI will:

    • Identify the likely period and style
    • Point out key features that indicate age
    • Suggest a value range based on current market data
    • Alert you to potential reproduction indicators

    Online Resources

    • Price databases: Track auction results
    • Museum collections: Study authenticated pieces
    • Maker mark databases: Research signatures and stamps

    Common Reproduction Red Flags

    Be aware of these warning signs:

    1. Too perfect condition – 100+ year old furniture should show some wear
    2. Uniform color – Real patina has variations
    3. Modern materials inside – Plywood, particle board, or Phillips-head screws
    4. Suspiciously low prices – If it seems too good to be true, it probably is
    5. No provenance – Quality antiques usually have some history
    6. Fresh wood smell – Old wood smells old
    7. Identical “twins” – True antiques are individual; finding exact matches is suspicious

    Building Your Identification Skills

    Becoming proficient at identifying antique furniture takes time and practice. Here’s how to accelerate your learning:

    1. Visit museums – Study authenticated pieces up close
    2. Attend auctions – Preview events let you handle furniture
    3. Read extensively – Build a reference library
    4. Handle as much furniture as possible – Touch and examine everything you can
    5. Find a mentor – Experienced collectors love sharing knowledge
    6. Use technology – Apps like Antique Identifier can help train your eye

    Conclusion

    Identifying antique furniture styles is a skill that develops over time, but understanding the basic characteristics of each period gives you a strong foundation. Remember to consider multiple factors – construction methods, materials, proportions, decorative elements, and wear patterns – before making a determination.

    Whether you’re evaluating a potential purchase, trying to identify an inherited piece, or simply appreciating the craftsmanship of earlier eras, this knowledge enriches your experience with antique furniture.

    For quick identification on the go, download the Antique Identifier app and let AI assist your journey into the fascinating world of antique furniture.


    Have a piece you can’t identify? Share a photo with our community or try our AI-powered identification tool for instant results.

  • Antique Identification in 2026: Tools, Tips, and Smart Shortcuts

    Antique Identification in 2026: Tools, Tips, and Smart Shortcuts

    Antique Identification Has Changed

    In the past, identification meant books and guesswork.
    In 2026, it means tools, structure, and smart shortcuts.

    The goal is not to replace knowledge.
    The goal is to reach it faster.


    The Core Tools That Actually Help

    Effective identification relies on:
    Visual comparison
    Construction analysis
    Context awareness

    Anything that skips these creates false confidence.


    Antique Identifier

    Tips That Save the Most Time

    Experienced collectors follow simple rules:
    Ignore value at first
    Photograph details, not beauty
    Question perfect symmetry
    Trust wear more than labels

    These habits prevent most beginner mistakes.


    Smart Shortcuts Are Not Cheating

    Shortcuts are only bad when they skip thinking.

    Good shortcuts:
    Guide your attention
    Reduce blind spots
    Speed up learning

    They help you focus on what matters.


    Where Visual Identification Fits In

    Visual tools act as the first layer.

    They help you:
    Confirm category
    Notice construction clues
    Decide if deeper research is needed

    This is especially useful when time matters.

    👉 Use the smartest shortcut: the app
    https://apps.apple.com/app/id6751417557?ct=tools_and_shortcuts_1

    Think of it as your starting point, not the final answer.


    Final Thought

    Antique identification in 2026 is about clarity.

    Less guessing.
    Better questions.
    Smarter first steps.

Download Antique Identifier App
Scan to Download
Identify antiques instantly with AI
★★★★★ FREE
🔍 IDENTIFY NOW 🔍 IDENTIFY NOW