To tell a high-quality antique cameo, hold it to the light to check the material. Shell cameos are semi-transparent and warm to the touch, while hardstone cameos (like agate) are opaque, heavy, and cold. True value lies in the crispness of the carving, the subject’s rarity, and the piece’s condition.
Imagine you are at a dusty estate sale in Vermont, digging through a velvet-lined jewelry box. Your fingers brush against a beautifully carved profile of a woman. Is it a mass-produced modern piece, or a highly valuable 19th-century treasure? The difference can mean hundreds, sometimes thousands, of dollars.
A side-by-side comparison of a translucent shell cameo and an opaque agate hardstone cameo under bright light.
How Do You Tell if a Cameo is Shell or Stone?
The most common question I get about antique cameos is how to identify the material. Using the Antique Identifier app, you can simply take a photo and get an instant result. But if you’re in the field, you need to rely on your senses.
Shell cameos, carved primarily from helmet shells or conch shells, became incredibly popular during the Victorian era (circa 1837-1901).
Translucency: If you hold a shell cameo up to a light source, you should be able to see the silhouette of the carving through the back.
Temperature: Shell feels room temperature or slightly warm.
Weight: They are surprisingly lightweight.
Hardstone cameos, typically carved from agate or onyx, are the older, more durable, and generally more valuable cousins.
Opacity: Stone will block light almost entirely.
Temperature: Hold it against your cheek; genuine stone feels noticeably cold.
Weight: Stone carries a significant, dense weight.
Much like evaluating the authenticity of vintage metals, as discussed in our guide on How to Tell Real Silver Coins From Silver-Plated Fakes, understanding the physical properties of the material is your first line of defense.
A close-up of a Victorian shell cameo showing the slightly curved back of the natural shell.
What Makes a Cameo High Quality?
Quality in cameo carving is all about the details. Look closely at the subject’s hair, the bridge of the nose, and the draping of the clothing.
A high-quality piece will have:
Crisp, deep carving: The details shouldn’t look melted or soft.
Multiple layers: Master carvers utilized the natural color bands in the shell or stone to create contrast, often carving a white portrait against a darker background.
Unusual subjects: While right-facing profiles of anonymous women are common, portraits of historical figures, mythological scenes (like the Three Graces), or detailed architectural views command much higher prices.
Just as collectors seek out unique expressions in Folk Art Paintings: Naive Style and Its Surprising Market Value, cameo collectors prize rare and masterfully executed subjects. Look for signed pieces by renowned 19th-century carvers like Tommaso Saulini or Luigi Isler, though signatures are rare.
A high-magnification shot highlighting the crisp, intricate hair details and deep relief carving on an agate cameo.
How Can You Spot a Fake or Plastic Cameo?
The market is flooded with plastic and resin imitations, many produced in the mid-to-late 20th century. Here are the red flags I look for:
The Hot Needle Test: (Proceed with caution!) If you press a hot needle to the back of a plastic cameo, it will melt and smell like chemicals. Real shell or stone will not be affected.
Molded details: Look for tiny air bubbles or a lack of crispness under a loupe. Molded plastics lack the sharp undercut angles of hand-carved pieces.
Flat backs: Natural shells have a slight curvature. If the back is perfectly, unnaturally flat, be suspicious.
Are Antique Cameos Good Investments?
Yes, provided you buy for quality. The market for exceptional, well-preserved cameos, especially Renaissance-era or fine Victorian hardstone examples, remains strong.
Always check the setting. A heavy 18k gold Victorian setting adds inherent value, but beware of original cameos that have been re-set in cheap modern mounts. Examine the piece for hairline cracks, particularly in shell cameos, as these significantly reduce value.
A beautiful, unusual cameo depicting a mythological scene, set in an ornate 18k gold Victorian brooch frame.
By learning to distinguish between shell and stone and training your eye for fine carving, you can build a collection of miniature masterpieces that will hold their value for generations.
Caribbean colonial coins can be identified by their issuing authority markings, countermarks, and mint signatures stamped between roughly 1600 and 1900. Genuine West Indies coinage typically shows a colonial power’s cipher or crown punch, a host coin’s original design beneath any countermark, and metal composition consistent with copper, silver, or gold of the period. Spanish, British, French, and Danish colonial issues each carry distinct edge treatments and portrait styles that separate authentic pieces from modern reproductions.
ED
Antique Identifier Editorial
Published by OBZENA LLC · April 21, 2026
How can I tell if my Caribbean colonial coin is real?
Authentication of West Indies coinage is notoriously tricky due to the practice of cutting and counterstamping existing Spanish or British currency. The first step is examining the provenance; a coin with a documented history is always more secure.
A close-up, high-resolution photo showing the irregular, hand-clipped edges of a silver ‘cut’ Spanish real, with a distinct ‘tortola’ countermark stamped in the center
You must look closely at the countermark itself. Genuine 18th century stamps were applied with heavy force, often flattening the original host coin’s design on the reverse side. If the original design remains perfectly intact opposite a deep countermark, you might be looking at a modern forgery.
Identifying these marks manually can take hours. Using the Antique Identifier app, you can simply take a photo and get an instant result.
The same logic that applies to colonial coin authentication carries over to ceramic marks, and the guide on Decoding Meissen Porcelain Marks: Real vs. Fake Crossed Swords shows how official punches and registry stamps were deliberately made difficult to replicate across entirely different collecting categories.
What is the market value of Caribbean colonial coins in 2026?
Determining the fair market value depends heavily on the specific island of origin, the clarity of the countermark, and the underlying host coin. A complete, un-cut Spanish 8 Reales with a rare countermark from St. Vincent can fetch a high auction estimate.
Conversely, a small, heavily worn cut fraction might only hold a modest replacement value. The condition report is everything. We are not just looking at wear, but also ensuring no inappropriate restoration or conservation attempts have stripped the coin of its natural patina.
A side-by-side comparison of a genuine 18th-century silver piece with natural dark gray patina versus a harsh, improperly cleaned shiny silver forgery
Pro Tips for Evaluating Value:
Weight is crucial: Check the weight against known standards for the specific cut fraction (e.g., 1/2 real, 1 bit).
Look for ‘Holey’ Dollars: Coins with punched centers (often used to create two separate currencies) are highly sought after.
Identify the host: A countermark on a rare William and Mary era coin is worth more than the same mark on a common issue.
Not sure what you’ve got?
Snap a photo and let our AI identify any antique in seconds, free download, no sign-up.
Where are the secret markings located on West Indies coins?
The “secret” markings aren’t really secret; they are the counterstamps applied by local island authorities to validate foreign currency for local use. You will typically find these right in the center or slightly off-center on the obverse (front) of the coin.
A detailed macro shot highlighting a ‘GR’ (Georgius Rex) counterstamp applied over the bust of a Spanish king on a silver coin
You must learn to distinguish official government stamps from merchant marks. A knowledgeable antique dealer will tell you that merchant marks, while historically interesting, usually carry a lower appraisal value than official island issues. This technique of identifying specific regional stamps is similar to what we cover in our guide on identifying regional silver hallmarks.
Spotting a fake countermark on a West Indies coin shares surprising overlap with authenticating origin labels in other antique markets, and the breakdown in Murano Glass Authenticity: Is That Sticker Real or a Counterfeit? walks through the same core question of whether a provenance claim holds up under close scrutiny.
What are the red flags for forgery detection on Caribbean colonial coins?
The collector market for West Indies numismatics is unfortunately plagued by fakes. A major red flag is a countermark that looks “too perfect.” Authentic 18th and 19th-century stamps were made with hand-cut dies that wore down over time.
A close-up showing the mushy, cast-like surface of a fake countermark compared to the sharp, struck appearance of an authentic die stamp
If you see a perfectly crisp stamp on a heavily worn host coin, be suspicious. The wear should generally be consistent. Furthermore, cast fakes will often show a soapy texture or tiny casting bubbles under magnification, unlike the solid, struck metal of genuine pieces. When I write a condition report for an auction house, I always examine the edges for seams, a dead giveaway of a cast fake.
If you are still building your eye for colonial-era official marks, the Antique Pottery Marks: A Beginner’s Guide to European Hallmarks guide offers useful context on how European governments standardized authentication stamps across their overseas territories during the same centuries.
After thirty years of handling Caribbean colonial coinage, the identification process always comes back to three things: the strike quality of any countermark, the consistency of wear between host coin and applied punch, and the metal composition under a good loupe. Spanish cob coinage will never look perfectly round, British cut dollars will always show the original host design beneath the crown stamp, and a genuine colonial piece carries a patina that no modern reproduction has yet managed to fake convincingly under magnification. Get those three right and you are most of the way home.
Frequently Asked Questions
What does a genuine Spanish colonial countermark look like on a West Indies coin?
A genuine Spanish colonial countermark is a deeply struck punch, not a surface scratch or cast impression. You are looking for a crowned cipher, a castle, or a lion stamp pressed firmly into the host coin’s metal, leaving a sharp, slightly raised edge around the indent. The surrounding host coin design, usually a pillar dollar or cob reale, remains visible and shows consistent wear with the countermark itself. If the punch looks crisp while the coin beneath looks artificially aged, treat that as a serious warning sign.
Are British colonial coins from the West Indies worth more than Spanish colonial pieces?
Spanish colonial pieces, particularly cut and countermarked cob coinage from the 17th and 18th centuries, generally command stronger prices at auction because of their historical volume and collector depth. British West Indies issues, including the famous cut Spanish dollars countermarked for Jamaica or Barbados, are rarer by surviving population and can fetch significant premiums for high-grade examples. Condition is the dominant value driver either way. A well-documented, problem-free British countermark on an 8-reale host coin regularly reaches four figures with serious bidders.
How do I find the mint mark on a Caribbean colonial coin?
On Spanish colonial cobs and milled coinage, the mint mark sits to the left of the shield on the obverse or near the assayer initial on the reverse. Common Caribbean-circuit mint marks include P for Potosi, M for Mexico City, and L for Lima. On British countermarked issues, the mark of authority is the countermark itself rather than a separate mint letter. French colonial copper pieces typically carry a crowned letter identifying the metropolitan mint, located just below the main device. A 10x loupe is the minimum tool needed to read these reliably.
What metals were Caribbean colonial coins made from, and how do I test them?
Spanish colonial circulating coinage runs from copper maravedis through silver reales to gold escudos. British West Indies countermarked pieces are nearly always silver host coins, as copper was rarely worth countermarking for reissue. The simplest field test is a magnet check, since genuine silver and gold show no magnetic attraction. A specific gravity test using a digital scale and a cup of water gives you a density reading to compare against known silver standards, around 10.4 g per cubic centimeter for sterling. Never apply acid to a coin you suspect may be valuable.
Can I identify a Caribbean colonial coin by its edge alone?
Yes, the edge is one of the most reliable indicators. Milled Spanish colonial coins produced after the 1730s carry a reeded or lettered edge applied by a collar during striking, making any filed or smooth edge on a supposedly late milled piece suspicious. Cob coins, or macuquinas, have irregular, hand-cut edges that vary coin by coin, so uniformity on a supposed cob is actually the red flag. Danish West Indies copper issues often show a plain, slightly beveled edge. Getting familiar with what the edge should look like for each colonial power and time period saves a lot of grief.
Where is the best place to have a Caribbean colonial coin professionally authenticated?
Professional Coin Grading Service and Numismatic Guaranty Company both handle colonial coinage and enclose authenticated pieces in tamper-evident holders with a population report entry. For specialist opinions on rare West Indies countermarks, the American Numismatic Society and the Colonial Coin Collectors Club have member experts who have handled these pieces for decades. Auction houses like Stack’s Bowers routinely catalog West Indies material and provide condition notes as part of their pre-sale research. If a dealer tells you authentication is unnecessary for a coin priced over a few hundred dollars, walk away.
Identify any antique in seconds.
From silver hallmarks to porcelain maker marks, the app suggests the item type, period and a value range.
Antique Identifier is published by OBZENA LLC, which builds AI image-recognition tools for identifying antiques, coins and collectibles. Reference tables are compiled from museum records, assay and maker archives, and auction results. We do not offer appraisals.
Authentic Chinese Qing Dynasty porcelain is identified by six-character reign marks read top-to-bottom, right-to-left. Genuine Kangxi (1662-1722), Yongzheng (1723-1735), and Qianlong (1736-1795) marks feature precise underglaze blue calligraphy, deep cobalt tones penetrating the glaze, and paste that feels unctuous and dense. Modern reproductions often show uniform, printed characters floating above the glaze.
Imagine you are at a dusty estate sale in Ohio, rummaging through a box of neglected ceramics. You pull out a vibrant blue and white vase, flip it over, and see a neat square of Chinese characters on the base. Your heart skips a beat. Could it be an Imperial piece from the 18th century, or is it a 20th-century copy meant for the tourist trade? This exact scenario plays out all the time. Let’s break down exactly what you’re looking at.
How Can I Tell if a Kangxi Reign Mark is Real?
The Kangxi emperor ruled from 1662 to 1722, a period renowned for exceptional porcelain. Authentic Kangxi marks are typically six characters written in two vertical columns, though four-character marks exist.
A close-up, high-resolution photo of an authentic underglaze blue six-character Kangxi reign mark on the base of a porcelain bowl, showing the slight variations in brushstrokes and the deep cobalt color pooling.
When evaluating for proper attribution, look closely at the calligraphy. Genuine period marks were written by skilled artisans; the brushstrokes should show natural fluidity and variation in pressure. The underglaze blue should appear to sink into the body of the porcelain, sometimes showing a slight “heaped and piled” effect where the cobalt pools darkly.
Pro Tips for Kangxi Marks:
Check the foot rim. Genuine Kangxi pieces often have a neatly finished, unglazed foot rim showing fine, smooth paste.
Beware of “apocryphal” marks. Later periods, especially the 19th century, frequently copied Kangxi marks out of reverence (or deception).
Look for a double blue circle enclosing the characters, a very common feature of the period.
Identifying these marks manually can take hours. Using the Antique Identifier app, you can simply take a photo and get an instant result.
One historical quirk explains why many genuine Kangxi pieces carry no reign mark at all. An edict of 1677 forbade writing the emperor’s reign title on porcelain that might later be broken or discarded, so Jingdezhen potters substituted symbols such as an artemisia leaf, a lingzhi fungus or an empty double circle, or used hall marks and commendation marks instead. A Kangxi-marked bowl is therefore not automatically more period-correct than an unmarked one. The apocryphal question, including which later reigns copied the mark and how their brushwork differs, is examined character by character in the dedicated Kangxi reign mark guide.
What Are the Secret Markings of Yongzheng Porcelain?
The Yongzheng period (1723-1735) was short but produced some of the most refined and elegant ceramics in Chinese history. Authentication here relies heavily on the sheer quality of the potting and the potting glaze.
A macro shot comparing a genuine Yongzheng mark, with its precise, thin, and elegant calligraphy, next to a clunky, modern fake, highlighting the differences in glaze texture.
Yongzheng reign marks are often written in three vertical columns of two characters each, or within a double square. The calligraphy is incredibly precise, thin, and elegant, reflecting the emperor’s exacting standards. Any sloppiness is an immediate red flag for forgery detection. A detailed condition report from a reputable auction house will always highlight the crispness of these marks.
The Qianlong emperor (1736-1795) saw mass production combined with high technical skill. While standard script marks exist, the Qianlong period is famous for introducing the zhuanshu or seal script mark.
A clear image of a red enamel Qianlong seal mark (zhuanshu) on a turquoise background, typical of famille rose porcelain bases.
Seal marks look like square mazes or stamps. They are highly stylized archaic characters, often written in underglaze blue or overglaze iron red enamel. In the collector market, an imperial Qianlong piece with a perfect seal mark can achieve a massive auction estimate. However, because seal marks are geometric, they are easier for counterfeiters to copy than flowing script.
Pro Tips for Qianlong Marks:
Examine the iron red enamel. Period red enamel is often thin and shows signs of wear, whereas modern red enamel sits thickly on the surface and looks glossy.
Look at the surrounding glaze. Qianlong pieces often have a very slight “orange peel” texture to the glaze when viewed under a loupe.
Always consider provenance. A piece with a documented history tracing back generations holds a much higher fair market value than a fresh-to-market discovery.
Qianlong seal marks did not stop in 1795. The same six-character seal was still written on wares finished in the first Jiaqing years, was revived on Guangxu copies, and is stamped or printed on 20th-century famille rose by the thousand. Under a 10x loupe a hand-drawn seal shows small differences in line width from stroke to stroke, while a stamped or transfer-printed seal is perfectly uniform. A seal mark on a porcelain snuff bottle or an export dinner plate with a bright, dead-white glaze is usually later as well. For a stroke-by-stroke walk-through see the Qianlong mark verification guide.
What Does a Guangxu Mark (大清光绪年造) Mean and Is It Valuable?
A six-character Guangxu mark reads Da Qing Guangxu Nian Zhi, “made in the Guangxu reign of the Great Qing”, and it points to the years 1875 to 1908, the reign of the Guangxu Emperor. Two details inside the mark itself tell you more than the name does.
First, look at the last two characters. Imperial wares and the better private kilns almost always end in 年製 (nian zhi). The variant 年造 (nian zao) carries the same meaning but is far more common on late Qing provincial wares, export pieces and 20th-century copies, so treat it as a commercial mark rather than an imperial one. Second, look at the character forms. 光緒 is the traditional form in use before the 1950s script reform in mainland China; a base written with the simplified 光绪 (short-form 绪) or 年制 (short-form 制) was painted after that reform, however worn the glaze may look.
Feature
Guangxu period (1875-1908)
Later copy (1912 onward)
Character forms
Traditional 光緒 and 製 only
Simplified 绪 or 制 appears
Final characters
年製 on imperial and good private wares
年造 or 年制 far more common
Script
Regular script, sometimes seal script
Regular script, often stiff and evenly inked
Column layout
Two columns of three, read right to left
Same layout, but frequently a single horizontal line on export pieces
Guangxu marks are also the ones most likely to be honest when you meet them. After the Taiping Rebellion the imperial kilns at Jingdezhen were rebuilt and turned out large quantities of marked porcelain, much of it in a revival style that copied Kangxi and Qianlong models. That revival is exactly why so many “Kangxi” and “Qianlong” marks on the market are Guangxu apocryphal marks, a problem examined stroke by stroke in the Kangxi authentic vs apocryphal guide.
On value, a Guangxu piece of the same shape and decoration sells for a fraction of its Kangxi or Qianlong equivalent, and marked non-imperial Guangxu wares are among the most affordable ways to own a period-marked Qing object. The exception is court porcelain: imperial yellow-ground pieces made for the Guangxu court and for the Empress Dowager Cixi are keenly collected. Whatever the mark says, run the body and glaze checks in the five-step Qing porcelain guide before you pay for the reign name.
What is the Market Value of Marked Chinese Porcelain in 2026?
Determining the replacement value or market price requires more than just reading the mark. An antique dealer will tell you that a mark only indicates the intended period.
A professional appraisal setting showing an antique appraiser examining a Chinese vase under a UV light, with reference books open on the desk.
You must evaluate the entire piece. Has it undergone extensive restoration or conservation? A piece repaired with staples or heavy overpainting will see its value drop significantly compared to a pristine example. Getting a professional appraisal is crucial before selling.
How Do You Read a Six-Character Chinese Reign Mark?
A six-character reign mark is read from the top of the right-hand column downward, then the left-hand column from top to bottom. The first two characters name the dynasty (大清 Da Qing, Great Qing, or 大明 Da Ming, Great Ming), the middle two give the reign title, and the last two are 年製 (nian zhi, made in the years of). Four-character marks simply drop the dynasty. The characters are written either in kaishu, the regular script used for ordinary writing, or in zhuanshu, the archaic seal script that looks like a square maze. Which script you find is itself a dating clue, as the chart shows.
Reign
Dates
Six-character mark
Pinyin
Usual script on period pieces
Kangxi
1662-1722
大清康熙年製
Da Qing Kangxi Nian Zhi
Regular script, often in a double circle
Yongzheng
1723-1735
大清雍正年製
Da Qing Yongzheng Nian Zhi
Regular script; seal script begins to appear
Qianlong
1736-1795
大清乾隆年製
Da Qing Qianlong Nian Zhi
Seal script dominant
Jiaqing
1796-1820
大清嘉慶年製
Da Qing Jiaqing Nian Zhi
Seal script
Daoguang
1821-1850
大清道光年製
Da Qing Daoguang Nian Zhi
Seal script
Xianfeng
1851-1861
大清咸豐年製
Da Qing Xianfeng Nian Zhi
Regular script returns
Tongzhi
1862-1874
大清同治年製
Da Qing Tongzhi Nian Zhi
Regular script
Guangxu
1875-1908
大清光緒年製
Da Qing Guangxu Nian Zhi
Regular script, some seal script
Xuantong
1909-1911
大清宣統年製
Da Qing Xuantong Nian Zhi
Regular script
Two traps catch beginners. The first is the Ming mark on a Qing pot: 大明成化年製 (Chenghua, 1465-1487) and 大明宣德年製 (Xuande, 1426-1435) were written on enormous numbers of Kangxi-period and later wares as a tribute to admired predecessors, so a Chenghua mark on an 18th or 19th-century bowl is normal practice rather than proof of fraud. The second is the wrong country: Japanese potters used the same two-column layout with 大日本 (Dai Nippon, Great Japan) in place of the dynasty, and reading the first two characters correctly settles the question before any glaze test, as explained in the guide to Japanese signatures and seals. For marks that are not Chinese characters at all, start with the general marks and signatures guide.
Deciphering Chinese reign marks is a lifelong study, but knowing the basic characteristics of Kangxi, Yongzheng, and Qianlong marks gives you a massive advantage. Whether you are browsing an estate sale or reviewing an online auction, inspect the calligraphy, the glaze interaction, and the overall quality. Armed with this knowledge and the right tools, you can confidently navigate the complex world of antique ceramics.
Authentic Victorian genre paintings (from the era of Queen Victoria, 1837-1901) can be identified by their domestic narrative subject matter, meticulous attention to detail, and frequent use of mahogany panels or antique tin as a painting surface. Genuine pieces exhibit natural age craquelure and often feature labels from 19th-century London or American galleries on the reverse.
Imagine you are at a dusty estate sale in Pennsylvania, sorting through a stack of old frames. You spot a small, darkened oil painting showing a family gathered around a hearth. The details are incredibly fine, and the painting is heavy. It’s painted directly onto a piece of antique tin. Could this humble scene be a valuable museum-quality piece? Collectors walk past these treasures entirely too often.
How Can I Tell if My Victorian Genre Painting is Authentic?
Authentication begins by looking at the materials. During the Industrial Revolution, artists gained access to new, commercially prepared paints and supports. While many used canvas, tin identification is a crucial skill here, as many smaller, highly detailed genre scenes were painted on tin panels.
A close-up of the back of a Victorian painting on a tin panel, showing the dark, oxidized metal surface and a faded, handwritten gallery label
Always check the back of the piece. A solid attribution relies heavily on provenance, the documented history of the item. Look for gallery stamps, exhibition labels, or original framer’s marks. These details heavily influence the auction estimate.
What is the Market Value of Victorian Genre Paintings in 2026?
The fair market value of these paintings varies wildly based on the artist, subject matter, and condition. Scenes of charming domestic life, pets, or children playing often command higher prices than somber subjects. A pristine, signed piece by a recognized artist can reach tens of thousands of dollars at a major auction house.
Identifying these marks manually can take hours. Using the Antique Identifier app, you can simply take a photo and get an instant result.
If you need a formal appraisal for insurance purposes, you will be looking at the replacement value, which is generally higher than what you might pay at a local estate sale.
Where Are the Secret Signatures and Marks Located?
Victorian artists were sometimes playful with their signatures. They might hide their initials in the painted woodwork of an Eastlake style chair within the scene, or on a painted newspaper resting on a Rococo Revival or Gothic Revival table.
A magnified view of a painting’s lower corner, revealing a tiny, red artist’s monogram hidden within the painted pattern of a Victorian rug
Pro Tips for Forgery Detection:
Examine the craquelure (the network of fine cracks). Fake cracks are often painted on or baked in, looking too uniform.
Check the frame. Original frames often have square nails and show natural oxidation.
Smell the surface. A fresh oil smell on a supposedly 150-year-old painting is a massive red flag.
If you suspect your piece is painted on metal, learning proper antique identification techniques for the substrate is vital. This technique is similar to what we cover in our guide on identifying antique metalware.
Does Cleaning a Victorian Painting Ruin Its Value?
There is a massive difference between proper conservation and amateur restoration. Never attempt to clean a dirty painting yourself. Standard household cleaners will strip the original glaze and destroy the tin value or canvas value instantly.
A split-screen image of a Victorian genre painting; the left side is dark and yellowed with old varnish, and the right side shows the bright, vibrant colors revealed after professional conservation
Always seek a professional condition report before buying or selling a high-value piece. A professional conservator uses UV light to check for overpainting and repairs that the naked eye cannot see.
A professional conservator examining a Victorian painting under a blacklight, highlighting spots of newer, modern paint used in previous restorations
Understanding the domestic life portrayed in these works gives us a direct window into the 19th-century soul. Whether you find them in a thrift store or inherit them, they are historical documents worth saving.
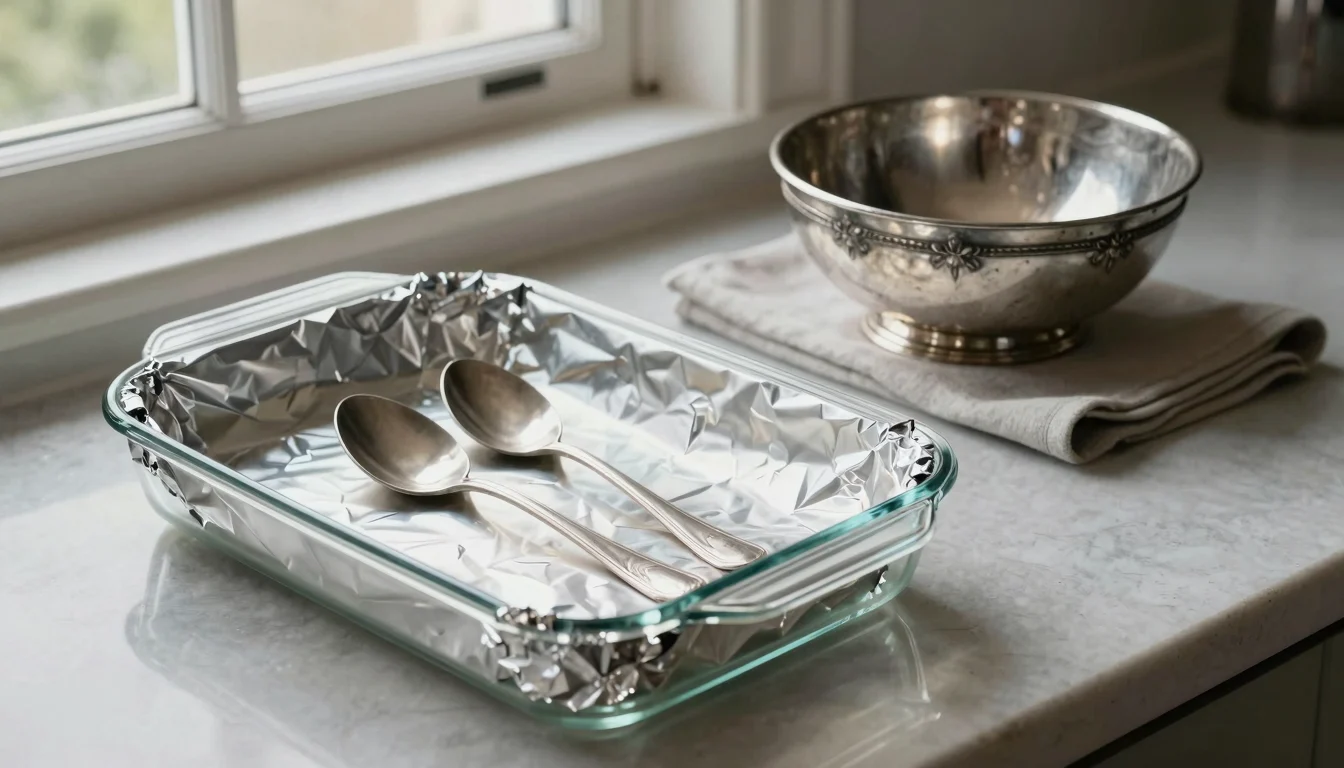
Cover: AI-generated image. Plain modern spoons laid on the foil lining of a glass dish before the bath, while an ornate decorated bowl stays aside on a cloth. Not a photograph of a cleaning test.
The baking soda and aluminum foil method removes tarnish through an electrochemical reaction: the black silver sulfide is turned back into silver while the aluminum corrodes in its place, so the reaction itself removes no silver. Conservators describe the same process, and they also record its drawbacks: the treated surface is left dull and matte, pitting is possible if the aluminum stops working, and the piece may tarnish again faster than polished silver. Because the object has to be immersed, the method is unsuitable for hollow or soldered pieces, silver plate, gilding, intentionally darkened (“oxidized”) or niello decoration, and anything with wooden, ivory or felt parts. This guide explains what the reaction does, when it is a reasonable choice for plain solid silver, and how conservators clean valuable pieces instead.
How Does the Aluminum Foil and Baking Soda Reaction Actually Work?
Tarnish on silver is mainly the compound silver sulfide, which forms when the silver reacts with sulfur-containing gases in the air; on sterling it also contains copper sulfide, according to the Canadian Conservation Institute’s guide to silver tarnish. In the foil bath the silver sits on aluminum in a warm solution of baking soda (sodium bicarbonate) or, in the version the Canadian Conservation Institute (CCI) describes in its silver care note, in contact with aluminum in a warm solution of sodium carbonate (washing soda). The dissolved salt acts as the electrolyte, a small current flows between the two metals, the aluminum corrodes and hydrogen gas is produced, and the silver sulfide is reduced back to silver metal.
A university chemistry demonstration of the same cell puts the result plainly: it converts the silver sulfide back to silver, without removing any silver. The sulfur ends up in the solution, which is why the bath smells of hydrogen sulfide. That is the appeal of the method compared with polishing, which always rubs off some silver along with the tarnish.
Two details from the conservation literature matter more than the equation. First, the silver recovered from the tarnish does not return as a polished skin: it stays on the object as rough particles that leave a dull, matte finish, which then has to be buffed. Second, the reaction cannot tell unwanted tarnish from a dark finish the maker intended. The CCI’s polishing note records that between 1840 and 1950 a surface finish that was popular in Europe and America was called “oxidized silver”: the piece was deliberately tarnished in a sulfur solution to give it a richer, older look. Other pieces have engraved lines filled with niello, a black mixture, usually of sulphur, copper, silver, and lead, used as an inlay on engraved or etched metal. Both finishes are sulfide-based like tarnish, so a bath designed to reduce sulfides can be expected to attack them, and the CCI notes that many such items have lost their original surface colour through polishing.
Why Conservators Are Cautious About the Foil Method on Antique Silver
Conservation guidance does not ban the electrochemical method. The CCI silver care note lists it as one of three ways to remove tarnish, next to polishes and chemical dips, and then records drawbacks that kitchen-tip articles leave out:
A dull surface, not a shine. The silver freed from the tarnish stays on the object as rough particles that leave a dull, matte finish, which then needs light buffing with a silver polishing cloth.
Pitting if the foil goes inert. Pitting of the object can occur if the aluminum plate has become inert due to a build-up of corrosion products, so the aluminum has to stay clean and active. Pitting is a failure of the setup, not an automatic result.
Faster re-tarnishing. Objects cleaned by this method may tarnish more quickly than silver that has been polished.
Immersion. Objects with sealed hollow components should not be subjected to aqueous solutions. Candlesticks with filled bases, teapots with hollow handles and any piece with a solder join that could trap liquid are excluded.
Plating. The reaction does not dissolve silver, but if the object is silver plated, any method of tarnish removal may be very damaging: the silver layer is thin and often already worn, exposed base metal sits in the same bath, and the buffing needed afterwards removes more plating.
None of this is about “patina” in a sentimental sense. Every treatment costs metal: each polishing or chemical tarnish removal takes away a certain amount of underlying silver along with the surface layer of tarnish, which is why museums remove tarnish only when display requires it. The CCI also points out that a layer of tarnish, as unappealing as it might appear, actually helps to protect the silver against further tarnishing. On an antique the surface also carries evidence: intentional darkening, buried fire scale that can be uncovered later by repeated polishing, and wear marks; as the CCI puts it, the scratch pattern indicates both use and repeated polishing. Strip those away and you remove information a specialist would use to judge the piece.
Read the marks before you clean anything. Our guide to silver hallmarks explained shows how to tell solid silver from plate and how marks date a piece, and sterling silver vs silver plate covers the checks when there is no mark at all.
Is the Foil Method Ever Safe to Use on Silver?
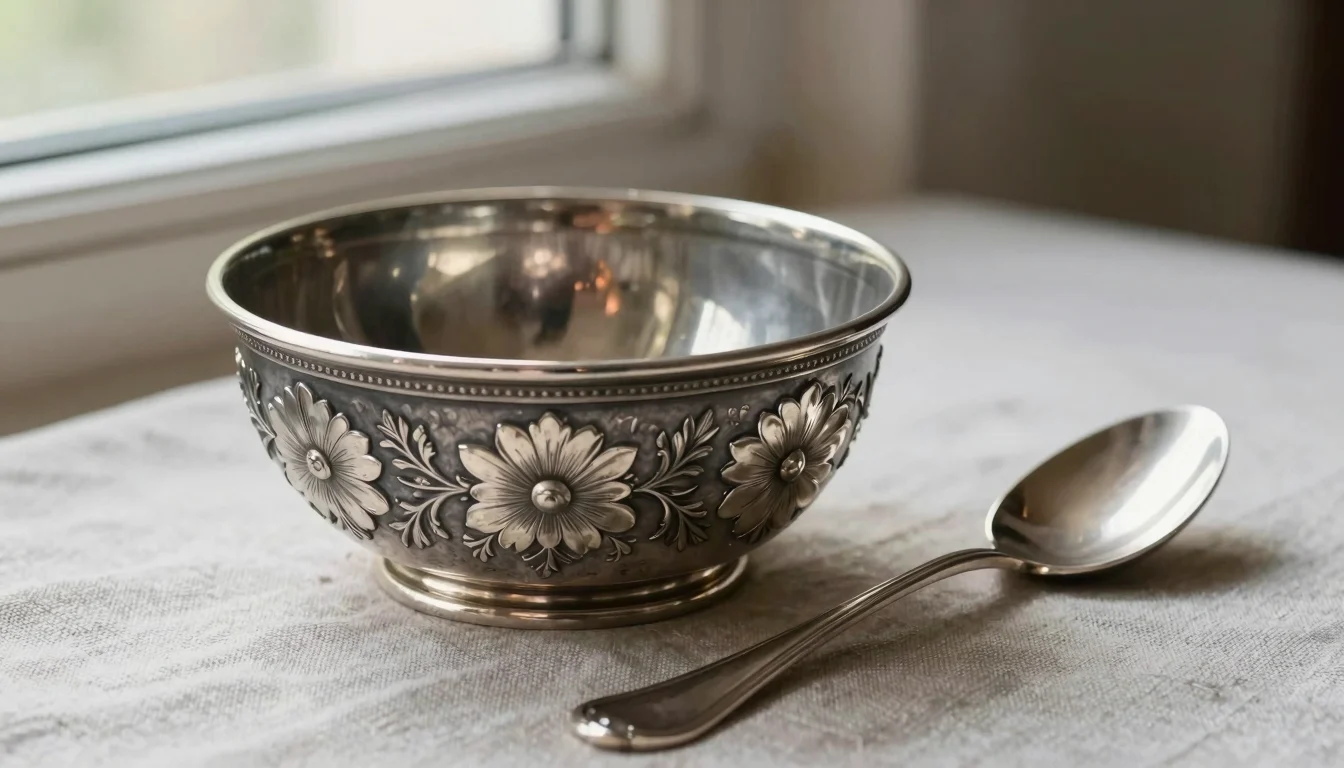
AI-generated image. Intentionally darkened recesses on decorated silver, the kind of finish a foil bath strips, beside a plain piece with no finish to protect.
For a plain, solid, modern piece with no finish to protect, the electrochemical bath is a defensible choice, and arguably gentler than repeated abrasive polishing because it converts tarnish back to silver instead of rubbing it off. The conditions are strict:
The piece is solid silver, not plate. Sterling silver contains 92.5% silver, with copper or another metal making up the rest, and is usually marked Sterling or 925 (see the Royal Society of Chemistry on silver). If you cannot tell, our sterling silver vs silver plate guide covers the checks.
It has no hollow, filled or soldered sections that could trap liquid.
It carries no gilding, stones, enamel, wood, ivory, bone or felt.
Its recesses are not meant to be dark: no oxidized finish, no niello.
You will rinse it, dry it and buff it afterwards, and you accept that it may tarnish again sooner.
If you go ahead, follow the conservation version rather than a social-media recipe. Line a heat-safe dish with aluminum foil, dissolve baking soda (or washing soda, as the CCI describes) in warm water, lay the silver on the foil so that every piece touches it, and leave it only until the tarnish has gone. The chemistry demonstration linked above notes that the reaction can be done without baking soda, but it takes longer to see results; the dissolved salt mainly carries the current. Expect a sulfur smell. Afterwards, in the CCI’s words, the object must be rinsed well with distilled water to remove any traces of electrolyte; dry it and buff the matte surface with a silver polishing cloth. Replace the foil once it has darkened and the reaction slows.
Everything else, including any piece you would describe as antique, heirloom, hallmarked or collectible, belongs with the gentler methods in the last section, or with a conservator.
Which pieces should stay out of the foil bath?
Piece
Foil bath?
Why
Plain modern sterling flatware without hollow handles
Acceptable with care
Solid metal and no finish to protect; rinse, dry and buff afterwards
Silver-plated tableware (EPNS, A1 or marked “silver plate”)
No
The plating is thin; any tarnish removal can damage it and buffing removes more
Old Sheffield plate
No
Fused silver on copper; the copper already shows through at points of wear
Sealed hollow components must not go into any liquid
Pieces with wooden, ivory, bone or felt parts
No
Non-metal parts must stay dry
Gilded or parcel-gilt silver
No
Gilding is a thin surface layer that polishing damages
Oxidized or niello-decorated silver (common 1840 to 1950)
No
The dark finish is intentional and, like tarnish, sulfide-based
Antique or hallmarked pieces you may sell or insure
No
Surface history matters to specialists; ask a conservator first
Old Sheffield plate deserves its own line because it is a fusion of copper and sterling silver, and its characteristic identifying feature is the ‘bleeding’ or ‘show through’ of the copper base at points of wear. Every cleaning cycle widens those pink patches, and no bath can put the silver back.
The reaction is aimed at silver sulfide; pewter and other tin alloys tarnish differently and need their own approach, a difference explained in does pewter tarnish like silver.
What Are the Red Flags That Silver Has Been Ruined by DIY Cleaners?
No surface feature proves that a piece went through a foil bath, but several features point to aggressive cleaning of some kind:
Uniformly bright recesses. The CCI notes that objects cleaned with a chemical dip often look “new” because there is no tarnish left in the deeper recesses of the design. On chased or embossed antique work, recesses as bright as the high points suggest a dip or bath rather than hand polishing.
A greyish, matte bloom. Electrochemical reduction leaves the recovered silver as rough particles that leave a dull, matte finish until it is buffed.
Copper showing through. Pink or coppery tones on rims and high points are the base metal of worn plate. On Old Sheffield plate that ‘bleeding’ or ‘show through’ of the copper base is expected at points of wear, and further cleaning enlarges it.
Irregular dull grey patches on sterling are often fire scale, a copper oxide layer formed during manufacture that can be uncovered later by repeated polishing.
Green residue in crevices is usually old polish. Many commercial polishes contain ammonia which will dissolve copper from sterling or from the base metal, and trapped residue turns green.
None of these is proof of a particular method, and none lowers value by a fixed amount. If you are deciding whether to buy, sell or insure a piece, have the surface assessed in person; our guide to how to tell if an antique is worth money explains what appraisers look at.
How Should You Properly Clean Antique Silver to Maintain Its Appraisal Value?
Museum practice starts with a decision, not a product. Tarnish need not be removed before storage, and it is usually recommended that tarnished silver be left unpolished unless cleaning is required for exhibit or display. When cleaning is justified, the CCI and the conservators at Winterthur describe essentially the same sequence.
Examine first. Look for marks that show whether the piece is solid or plated, check for hollow sections, solder joins, gilding and attached materials, and decide what the surface should look like when you finish. Handle it in clean cotton gloves or nitrile gloves; skin salts and oils mark silver.
Wash gently. Use a drop of mild dishwashing detergent in water and a soft brush to lift old polish from crevices, keeping any organic components such as ivory or wooden handles dry. Rinse and dry completely with soft cotton.
Light tarnish: a cloth. A silver polishing cloth, or a plain cotton velvet buffing cloth, handles light tarnish with the least metal loss.
Heavier tarnish: a mild paste. Mix precipitated calcium carbonate (precipitated chalk) with water to form a thick paste, as described in the CCI polishing note, and rub gently with a cotton pad using a circular motion where possible, changing the pad as it darkens. The research the CCI cites concludes that it is less damaging to clean silver with a mild abrasive over a longer period of time than with a more aggressive material for a shorter time. Do not use general, multi-purpose metal polishes on silver.
Stop early. Even after all the tarnish has been removed, the pad will still turn dark as the abrasive removes silver from the surface, so inspect often and leave deliberate dark recesses alone.
Rinse off every trace of polish, dry, and store or display the piece in dry conditions (below 50% RH) wrapped in acid-free tissue or anti-tarnish cloth; a sealed bag slows tarnish far more than any polish does.
Skip lacquer and wax at home: lacquering or waxing is not recommended for silver because an uneven coating can make later tarnish worse than no coating at all. Skip chemical dips on anything hollow or decorated; where a dip is used at all, the safer practice is to apply the dip locally using a cotton swab and rinse, rather than immersing the piece.
The surface of an antique is part of its record: intentional finishes, fire scale and the scratch pattern of use all tell a specialist how the piece has been treated. Conservators remove tarnish deliberately and only when display requires it. For anything you value, a soft cloth, low humidity and patience protect the piece better than a kitchen trick does. For the full range of options, see our guide to safe silver tarnish removal for valuable pieces.
Frequently Asked Questions
Does baking soda damage silver?
Dry baking soda is a mild abrasive: a manufacturer recommends a paste made from baking soda with minimal water as a gentle scouring powder, and any abrasive takes a little silver off with the tarnish (see sodium bicarbonate). Dissolved in water it is only mildly alkaline and does not attack silver by itself. The harm people associate with the foil trick comes from the whole procedure: immersing pieces that should never be wetted, stripping intentional dark finishes, the matte surface it leaves, and the buffing that follows.
Is the baking soda and aluminum foil method safe for sterling silver?
For plain, solid, undecorated sterling with no hollow parts, yes, provided you rinse and buff afterwards and accept that it may tarnish more quickly than silver that has been polished. For sterling with an oxidized finish, niello, gilding, stones or attached materials, and for anything you would call an antique, no.
Is the foil method safe for silver-plated items?
No. Plate is a thin layer of silver over copper, nickel silver or another base metal. The CCI’s position is that if the object is silver plated, any method of tarnish removal may be very damaging, and that on plated pieces polishing can damage the thin layer of silver plating, or even remove it entirely. If plate must be cleaned, a polishing cloth with light pressure is the least destructive option.
Does baking soda contain aluminum?
No. Baking soda is sodium bicarbonate, NaHCO3, and contains no aluminum (aluminium in British spelling). The confusion comes from baking powder, which is a mixture of a carbonate or bicarbonate and a weak acid; some formulations use acid salts such as sodium aluminium sulfate, sodium aluminium phosphate or sodium acid pyrophosphate, which is why aluminium-free baking powders are sold. In the foil method the aluminum comes from the foil, not from the powder.
Does cleaning silver reduce its value?
Every cleaning removes some metal: each polishing or chemical tarnish removal takes away a certain amount of underlying silver along with the surface layer of tarnish, and after many cycles of tarnishing and polishing, so much silver may be removed that fine detail on the object is lost. On a collectible piece the larger loss is information: an intentional finish, fire scale history and the scratch pattern of use. How much that changes a price depends on the object and the buyer; there is no fixed percentage, and a figure quoted without a documented sale is a guess.
What is the safest way to clean antique silver at home?
Dust it with a soft brush, wash it only if it has no hollow or organic parts, and buff light tarnish with a polishing cloth. For heavier tarnish use a precipitated calcium carbonate paste on a cotton pad, stopping often. Do not dip, wax or lacquer it, do not immerse composite pieces, and do not try to make a historical object look mirror-new. If the piece is valuable, hallmarked or decorated, ask a conservator before doing anything.
Can the aluminum foil and baking soda method remove hallmarks?
The reaction itself removes no metal, so it cannot erase a struck mark. What softens marks is abrasive polishing repeated over years, and buffing the matte surface the bath leaves behind adds one more polishing cycle each time you use it. Keep polish away from marks, and never brush a piece while it sits in the bath.
Genuine Qing Dynasty porcelain (1644-1911) can be identified by examining the unglazed foot rim for specific iron-rust spotting, confirming the presence of authentic reign marks (nianhao) usually written in six characters, and inspecting the glaze for a subtle “orange peel” texture. Authentic pieces feature hand-painted cobalt blue underglaze that often shows slight “heaping and piling” effects rather than flat, uniform color.
Imagine you are at a dusty estate sale in upstate New York, browsing tables of old ceramics. You spot a vibrant blue and white vase with intricate dragon motifs. Is it a priceless 18th-century Qianlong period masterpiece or a modern reproduction meant to fool a casual antique dealer? The difference often comes down to the smallest, easily overlooked details.
What Are the Key Characteristics of Qing Dynasty Porcelain?
When establishing the provenance and attribution of Chinese porcelain, you must start with the physical characteristics. The Qing Dynasty saw tremendous advancements in kiln technology at Jingdezhen.
True Qing pieces are typically made of hard-paste porcelain. This material feels cold to the touch and rings like a bell when lightly tapped.
A close-up, high-resolution photo showing the subtle “orange peel” dimpled texture on the glaze of a Qing Dynasty vase under angled lighting.
The glaze on genuine pieces from the 18th century often has a very subtle, uneven texture. Collectors call this the “orange peel” effect. Fakes usually have a surface that is perfectly smooth and glassy, lacking this historical character.
How Do You Read Qing Dynasty Reign Marks?
The most common method of authentication involves checking the base. Reign marks, or nianhao, were imperial stamps of approval.
Most authentic marks are written in traditional underglaze blue. They typically consist of six characters arranged in two vertical columns or three horizontal rows.
Identifying these marks manually can take hours. Using the Antique Identifier app, you can simply take a photo and get an instant result.
A clear, well-lit macro shot of an authentic six-character Daoguang reign mark in underglaze blue, showing the variations in brush stroke intensity.
Beware of perfectly uniform characters. Authentic marks were painted by hand, so you should see natural variations in the brushstrokes. If the blue color looks too bright or sits completely flat without any depth, you are likely looking at a modern transfer print.
What Are the Red Flags of Fake Qing Porcelain?
Forgery detection is a critical skill for any serious collector market participant. The fakers are getting better, but they often make mistakes in the construction.
Always examine the foot rim. Authentic Qing porcelain was fired on sand or grit. You should look for an unglazed foot rim that shows a slight orange or brown discoloration, often called “iron-rust.”
Pro Tip: Modern fakes often use artificial dirt or acid washes to mimic this aging.
Pro Tip: If the foot rim is perfectly white and smooth, the piece is almost certainly modern.
Pro Tip: Check for signs of artificial wear, like perfectly parallel scratches, which indicate someone used sandpaper rather than natural aging.
This type of meticulous inspection is similar to what we cover in our guide on identifying authentic European hard-paste, as the firing techniques share some commonalities in how the base interacts with the kiln environment.
How Does Condition Affect the Fair Market Value?
A thorough condition report is essential before determining an auction estimate or fair market value. Even minor damage can severely impact the price.
A detailed photo showing a professional UV light inspection of a porcelain bowl, revealing previous restoration work glowing along the rim.
Look closely for hairline cracks, chips, and fritting (tiny chips along the rim). Use a blacklight (UV light) in a dark room. Any restoration or conservation work will usually fluoresce brightly under the UV light, revealing repairs that are invisible to the naked eye.
While a heavily restored piece might have decorative appeal, its replacement value for insurance purposes and its desirability at an auction house will be significantly lower than a pristine example.
Where Can I Find Authentic Pieces Today?
You don’t always need to go to high-end auctions. I’ve found incredible pieces misidentified at local estate sales and smaller regional auction houses.
A wide shot of a crowded estate sale table featuring mixed ceramics, highlighting the importance of spotting a genuine piece among common household wares.
Always bring a loupe to inspect the underglaze painting and the paste quality. Remember, an appraisal is based on cumulative evidence. No single test is foolproof, but when the paste, glaze, mark, and wear all align with the correct period, you may have just found a treasure.
Identifying genuine Qing Dynasty porcelain requires patience, a keen eye, and a willingness to examine the details most people ignore. By studying the foot rim, understanding the nuances of the glaze, and carefully inspecting the reign marks, you can confidently navigate the complex world of antique Asian ceramics. Whether you are building a collection or looking for a lucky find at an estate sale, these 5 steps are your foundation for success.
Authentic Japanese okimono carvings can be identified by the material’s weight and grain structure, the presence of an engraved artist signature (often in a red lacquer reserve), and the intricate details carved into the base. Genuine ivory shows characteristic Schreger lines (cross-hatching) under magnification, while bone exhibits tiny black pits (Haversian canals), and wood pieces often feature exceptional patination from age.
Imagine you are at a dusty estate sale in upstate New York, and your eyes catch a delicate, intricately carved figure resting on a mahogany side table. Is it a mass-produced resin reproduction, or a museum-quality Meiji period okimono worth thousands? In the collector market, knowing the difference between a genuine antique and a modern fake is the key to discovering hidden value.
How Can I Tell if My Okimono is Real Ivory, Bone, or Resin?
Determining the exact material of your carving is the first step in any condition report or appraisal. Authentic elephant ivory is dense and heavy for its size. It feels cool to the touch.
When you examine the base or the cross-section of an ivory carving, you will see fine, intersecting lines known as Schreger lines. If these lines intersect at an angle greater than 115 degrees, it indicates elephant ivory.
Close-up macro photograph of the base of an ivory okimono clearly showing the intersecting Schreger lines under bright, angled lighting.
Bone, on the other hand, is lighter and often shows tiny, dark spots. These are Haversian canals, remnants of the animal’s circulatory system. Resin or plastic fakes often feel warm, are perfectly uniform in color, and may even show mold seams, a massive red flag for forgery detection.
Identifying these marks manually can take hours. Using the Antique Identifier app, you can simply take a photo and get an instant result. The app helps verify authenticity and provides a baseline for fair market value.
What Are the Most Valuable Materials Used for Okimono?
While ivory was highly prized during the Meiji period (1868–1912), other materials hold significant value in today’s auction house landscape. Wood carvings, particularly those made from boxwood, cherry, or occasionally walnut, are highly sought after by discerning collectors.
A side-by-side comparison image showing a highly detailed Meiji period boxwood okimono next to an ivory okimono of similar subject matter, highlighting the different patinas.
Wood okimono often display incredible texture and a rich, dark patina that develops over decades. The provenance of a wooden piece, especially if it can be traced back to a master carver from the Tokyo Art School, dramatically increases its auction estimate.
Where Are the Secret Markings Located on an Okimono?
The artist’s signature (mei) is crucial for establishing attribution and determining replacement value. Turn the okimono upside down. You will usually find the signature engraved on the base.
Detailed photograph of the underside of a wooden okimono showing a crisp, deeply carved Japanese kanji signature set within a red lacquer reserve.
Master carvers like Ishikawa Komei or Asahi Gyokuzan often placed their signatures within a small, polished reserve, sometimes inlaid with mother-of-pearl or filled with red lacquer.
Pro Tips for Signature Identification:
Examine the crispness of the carving. Authentic signatures are sharp and deliberate.
Check for the use of a kakihan* (a stylized carved seal) alongside the signature.
Be wary of signatures that look scratched on or clumsy; these are common in tourist trade items.
What is the Market Value of Japanese Okimono in 2026?
The market for Japanese okimono remains robust, but it is heavily dependent on material, artist, and condition. An unsigned, late 19th-century bone carving might fetch $150 to $300 at an antique dealer.
However, a signed, masterfully carved ivory or boxwood piece depicting a complex scene (like a farmer with a basket of intricately carved vegetables) can command an auction estimate between $3,000 and $15,000.
A complex, multi-figure okimono carving depicting a fisherman casting a net, demonstrating the high level of detail required for a premium auction valuation.
Always request a thorough condition report before purchasing. Minor damage, such as missing fingers on a figure, can lower the fair market value by 30% to 50%. Professional restoration or conservation can stabilize a piece, but collectors generally prefer items in pristine, original condition.
Whether you are browsing a thrift store or reviewing an estate sale catalog, understanding the nuances of Japanese okimono will ensure you make informed, profitable decisions. Always trust your eye, verify the materials, and seek professional authentication when handling high-value carvings.
Authentic antique silver cigarette cases are identified by verifying the sterling silver or coin silver purity marks (like “925” or the Lion Passant), inspecting the maker’s mark (such as Tiffany & Co. or Gorham), and checking the hinge and clasp mechanisms. Genuine early 20th-century pieces feature crisp engine-turned engraving and lack modern casting seams.
Imagine you are at a dusty estate sale in upstate New York, sifting through a box of tarnished metal. Suddenly, your fingers brush against a cold, heavily engraved rectangular box. You might have just found a piece of 1920s Art Deco history.
How can I tell if my silver cigarette case is real sterling?
A close-up, high-resolution photo of a silver cigarette case’s interior rim, focusing sharply on the stamped “STERLING”, “925”, and a tiny maker’s mark cartouche.
The first step in authentication is locating the assay marks. These are typically stamped on the inside rim or under the retaining arm.
True sterling silver cases from the US will clearly say “Sterling” or “925”, while European pieces will have complex hallmarks. If you see “EPNS” or no marks at all, you are likely looking at silver plate.
Identifying these marks manually can take hours. Using the Antique Identifier app, you can simply take a photo and get an instant result.
What is the market value of antique silver smoking accessories in 2026?
Determining the fair market value depends heavily on provenance, maker, and condition. A standard unmarked sterling case might only fetch its scrap weight value, but a documented piece by Cartier or Fabergé can command a massive auction estimate.
The collector market highly prizes cases with enamel work, applied gold, or hidden compartments. A condition report noting dents, broken springs, or excessive restoration will significantly lower the replacement value.
A side-by-side photo comparing a pristine Art Deco silver cigarette case with geometric black enamel against a heavily dented, tarnished plain silver case, highlighting condition differences.
Pro Tips for Value Assessment:
Check the spring: The internal retaining band should snap firmly; a loose spring implies costly conservation.
Inspect the engraving: Hand-engraved monograms add historical charm but can sometimes limit the buyer pool.
Weigh it: Solid coin silver or sterling pieces feel substantial in the hand compared to flimsy reproductions.
Where are the secret markings located on silver cases?
A macro shot showing a tiny, hidden Russian 84 Zolotnik hallmark and maker’s initials stamped cleverly within the engraved floral pattern on the exterior of a silver case.
Makers didn’t always put their marks in obvious places. For high-end pieces, the attribution might rely on tiny stamps hidden inside the hinge or integrated into the exterior pattern.
You must also practice forgery detection. Counterfeiters often cast modern fakes from original molds, which leaves telltale soft edges on what should be crisp hallmarks. If a mark looks muddy, it’s a major red flag.
Should I polish my antique silver cigarette case before an appraisal?
A photo of a cotton swab with a tiny amount of specialized silver polish being carefully applied to a small section of a heavily tarnished silver case, demonstrating safe conservation practices.
Never aggressively polish an antique piece before getting a professional appraisal. Harsh chemicals can strip away the original patina, which collectors value highly.
A gentle wipe with a jeweler’s cloth is sufficient. Heavy tarnish should only be removed by someone experienced in proper antique conservation to preserve the delicate engine-turned patterns.
Authentic Qing Dynasty Imperial Yellow porcelain can be identified by its distinctive, slightly iridescent egg-yolk hue derived from iron antimoniate. Genuine pieces produced exclusively for the Emperor between 1644 and 1912 feature a flawless, even glaze, precise reign marks on the base, and lack modern crazing or heavy pooling.
Imagine you are at a dusty estate sale in Massachusetts. You spot a small, brilliant yellow bowl sitting among tarnished silver and dusty books. Could this be a lost piece of Chinese imperial history, or just a modern reproduction?
How can I tell if my Imperial Yellow porcelain is authentic?
Determining the attribution of imperial ceramics requires a sharp eye. The most crucial factor in authentication is the glaze itself. True Imperial Yellow is not a bright lemon; it is a rich, warm yellow often compared to the yolk of a free-range egg.
A close-up side-by-side macro photo comparing the rich, even ‘egg-yolk’ glaze of authentic Qing Imperial Yellow porcelain against the harsh, flat lemon yellow of a modern fake.
Always check the base for reign marks. Genuine pieces from the Kangxi (1662-1722), Yongzheng (1723-1735), or Qianlong (1736-1795) reigns will have perfectly centered, underglaze blue six-character marks.
Identifying these marks manually can take hours. Using the Antique Identifier app, you can simply take a photo and get an instant result.
What are the biggest red flags for modern fakes in the collector market?
In my 20 years as an antique dealer and appraiser, forgery detection has become my daily routine. Fakers often artificially age porcelain using acid baths, which leaves the glaze looking dull and lifeless rather than softly aged.
A clear image showing the base of a Qing Dynasty bowl with an authentic six-character underglaze blue Qianlong reign mark, highlighting the correct calligraphy style and depth of color.
Another red flag is the presence of modern, perfectly round bubbles within the glaze when viewed under a jeweler’s loupe. Authentic Qing firing techniques produced scattered, varied bubble patterns. Always request a detailed condition report before purchasing from an auction house.
Pro Tips for Spotting Fakes:
Weight: Modern reproductions are often heavier and clunkier than the delicate imperial originals.
Foot Rim: An authentic Qing foot rim is typically cut to a neat, unglazed “V” shape, exposing smooth, refined clay.
Glaze Pooling: Watch out for heavy, uneven yellow pooling around the base; imperial kilns demanded absolute perfection.
How does provenance affect the fair market value of Qing ceramics?
Solid provenance can exponentially increase the fair market value of Imperial Yellow pieces. If you can trace a piece back to a specific collection or a historical event, its auction estimate will skyrocket.
An antique appraiser holding a delicate Imperial Yellow bowl under a strong light source, examining the translucency of the fine porcelain body and the flawless surface.
Even a minor chip or hairline crack drastically reduces the appraisal value. While professional restoration or conservation can stabilize a damaged piece, purists in the collector market always prefer pristine condition.
Where can I get an accurate antique identification and appraisal?
Whether you found your yellow bowl at an estate sale or inherited it from a relative, getting a professional antique appraisal is essential. You need an expert who understands the subtle nuances of Chinese imperial wares.
A screenshot of the Antique Identifier app interface showing a successful scan and appraisal of a Chinese porcelain piece, displaying the estimated value, era, and historical context.
Don’t rely solely on internet forums or guesswork. The financial stakes are simply too high when dealing with potential royal artifacts from the Qing Dynasty.
Discovering a piece of authentic Qing Dynasty Imperial Yellow is a thrill every appraiser chases. Keep your eyes sharp, trust your tools, and happy hunting!
Authentic Japanese cloisonné enamel from the Golden Age (1880–1910) is identified by razor-thin, often invisible wirework (musen), flawlessly smooth polished surfaces, and intricate, nature-inspired motifs. High-quality pieces feature heavy copper or silver bodies, deep, rich enamel colors without pitting, and frequently bear the maker’s mark of masters like Namikawa Yasuyuki or Ando Jubei on the base.
Imagine you are at a dusty estate sale in Ohio, rummaging through a box of tarnished metalware. Suddenly, a flash of deep, midnight-blue enamel catches your eye. You pick up a small vase, its surface incredibly smooth, adorned with tiny, perfect silver-wired chrysanthemums. Could this be a masterpiece from the Meiji period, or just a modern tourist reproduction? The difference in fair market value is staggering.
A side-by-side macro photograph comparing the fine, perfectly flush silver wires of authentic Meiji-period cloisonné against the thick, raised brass wires and pitted surface of a modern reproduction.
How Can I Tell If My Japanese Cloisonné Is Real?
Authentication begins with a tactile examination. Genuine antique Japanese cloisonné from the late 19th century should feel incredibly smooth. The enamel was painstakingly ground and polished by hand until it was perfectly flush with the metal wires.
If you run your fingernail across the surface and feel significant bumps or ridges, you are likely holding a mass-produced modern piece. A proper condition report will always note the smoothness of the finish.
Look closely at the wires themselves. Master artisans of the Meiji period used incredibly fine silver or gold wire. The wires should be delicate and precise, forming complex, balanced designs. Forgery detection often relies on spotting clumsy, thick brass wires that lack the finesse of period craftsmanship.
What Are the Secret Markings on Antique Cloisonné?
While not all authentic pieces are signed, finding a maker’s mark is crucial for attribution and can significantly increase the auction estimate. These marks are usually found stamped or wired into the base.
Identifying these marks manually can take hours. Using the Antique Identifier app, you can simply take a photo and get an instant result.
Look for the silver wire marks of Namikawa Yasuyuki or the stamped mark of the Ando Cloisonné Company. If the mark is stamped directly into the metal base, ensure it is crisp and clear. A blurry or poorly cast mark is a major red flag for fake pieces trying to trick the collector market.
A close-up, high-resolution shot of the base of a cloisonné vase, clearly showing the intricate silver-wire signature of Namikawa Yasuyuki set against a dark enamel background.
What Is the Market Value of Japanese Cloisonné Today?
The replacement value of high-quality Japanese enamelware depends heavily on the era, the maker, and the condition. Pieces from the Golden Age are highly sought after by serious collectors and top auction houses.
Pro Tips for Determining Value:
Condition is paramount: Even tiny hairline cracks or areas of missing enamel (spalling) will drastically reduce the fair market value.
Check the background: Pieces with deep, flawless black or midnight-blue backgrounds (yusen*) often command premium prices. Examine the technique: Rare techniques like wireless cloisonné (musen), where the wires were removed before firing, or plique-à-jour (shotai*), which resembles stained glass, are extremely valuable.
This focus on intricate detailing is similar to what we cover in our guide on antique jewelry identification.
musen (wireless) cloisonné plaque depicting Mount Fuji, highlighting the soft, watercolor-like blending of the enamels without visible wire outlines. Antique identification guide” class=”wp-image-1372″/>A beautifully lit photograph of a rare musen (wireless) cloisonné plaque depicting Mount Fuji, highlighting the soft, watercolor-like blending of the enamels without visible wire outlines.
How Do I Protect My Enamel Investment?
Proper conservation is essential. Never use harsh chemical cleaners or abrasive cloths on antique enamel, as this will scratch the polished surface and destroy its provenance.
If a piece is damaged, professional restoration is required. Amateur repairs using modern resins will show up under blacklight and severely impact the item’s appraisal value when you eventually take it to an antique dealer.
Dust your collection gently with a soft brush and keep it away from direct sunlight and extreme temperature changes, which can cause the enamel to crack.
A professional appraiser wearing white cotton gloves, carefully examining a small cloisonné jar under a specialized jeweler’s loupe to check for microscopic hairline cracks or restoration work.
Whether you are scouting an estate sale or evaluating an inherited collection, understanding the meticulous craftsmanship of Japanese cloisonné is the key to discovering true hidden treasures. Remember to check the wire thickness, feel the surface polish, and always verify those base marks.